
Zendesk Help Center
Import content items from articles in your Zendesk knowledge base.
You can add the Zendesk Help Center data source from the OpenAI integration page in the Meya Console. Check the OpenAI setup guide if you've not configured the integration yet.
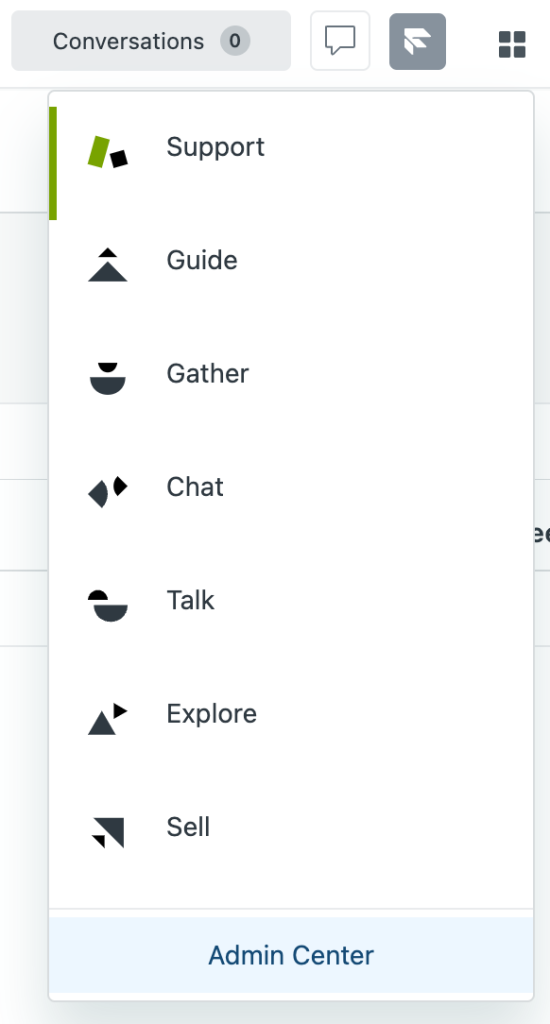
- Open the Meya Console
- Select your app from the app list.
- Go to the Integrations page.
- Select the OpenAI integration.
- Hover over the + Add data source button and select the Zendesk Help Center option.
- This will add the Zendesk Help Center data source form.
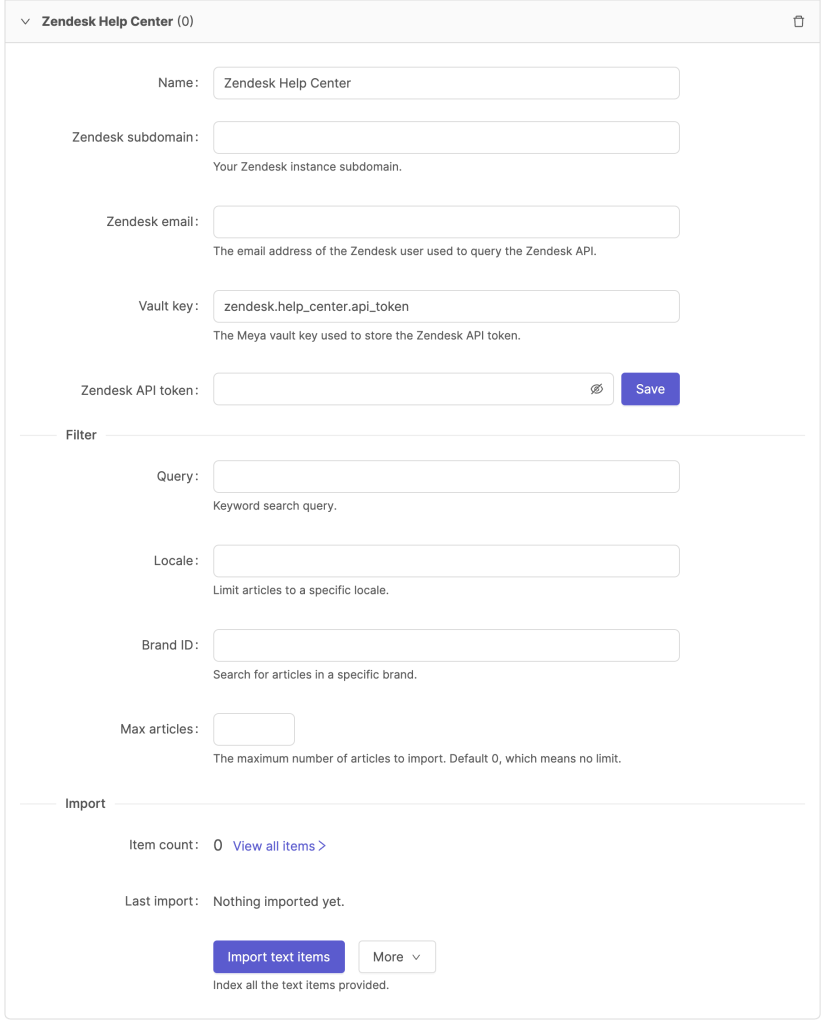
- Give the data source a descriptive name.
The sections below will describe each field and how to configure it in more detail.
Zendesk subdomain
The quickest way to get your Zendesk subdomain is to copy it from your Zendesk instance URL.
- Go to your Zendesk instance using your browser.
- Copy the subdomain from the URL in your browser, here is an example:

- In this example the Zendesk subdomain is d3v-meya.
- Paste the subdomain into the Zendesk subdomain field.

Zendesk email
- Sign in to your Zendesk instance as an admin user.
- From the Zendesk Products menu, select the Admin Center
- From the People menu select the Team members page.
- Copy the email address of the user that will be used to authenticate against the Zendesk API.
- Paste the email into the Zendesk email field.

Vault key
All integration and app secrets are securely stored in your app's vault and are referenced by a specific vault key. The default vault key for the Zendesk Help Center data source is zendesk.help_center.api_token , but you can give it any descriptive value that makes sense to you.
Using the default vault key is fine for most cases, however, if would like to setup more than one Zendesk Help Center data source, then you'll need to define a specific vault key for each Zendesk Help Center data source.

Zendesk API token
Sign in to your Zendesk instance as an admin user.
- From the Zendesk Products menu, select the Admin Center
- From the Apps and integrations menu, select the Zendesk API page.
- Click the Add API token button to create a new token.
- Give the API token a descriptive name so you know what it's used for.
- Click the Copy button to copy the API token.
- Click the Save button to save the new API token.
- Warning, make sure you've copied the API token before you click Save, because the API token will only be visible this once.
- Paste the API token into the Zendesk API token field, and click Save
- Clicking Save will first verify that the token is valid and will do a test API call to make sure it works.

Filter
The Filter section of the data source allows you optionally query for specific sets of articles, by default the data source will import all your articles.
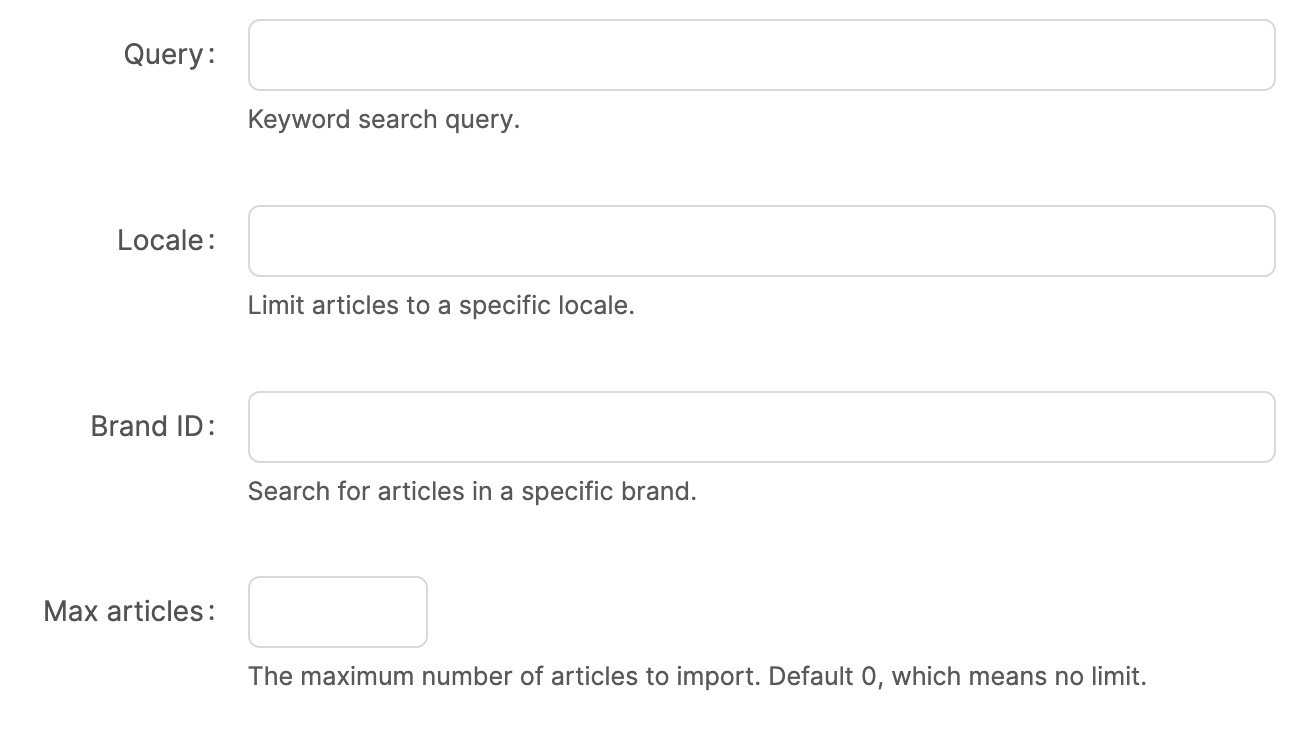
- Query: This field allows you to add a keyword search query to match specific articles.
- Locale: This field allows you to only import articles for a certain language.
- You can get the locale from the Zendesk Help Center URL after you've selected a specific language.

- You can get the locale from the Zendesk Help Center URL after you've selected a specific language.
- Brand ID: If you have multiple brands in your Zendesk Help Center then you can optionally filter articles for a specific brand.
- Max articles: This field allows you to optionally limit the number of articles to import. Usually you would like to import all your articles, but this field is often useful to use when testing different filtering queries where limiting to 10 articles, for example, will make the import job quicker.
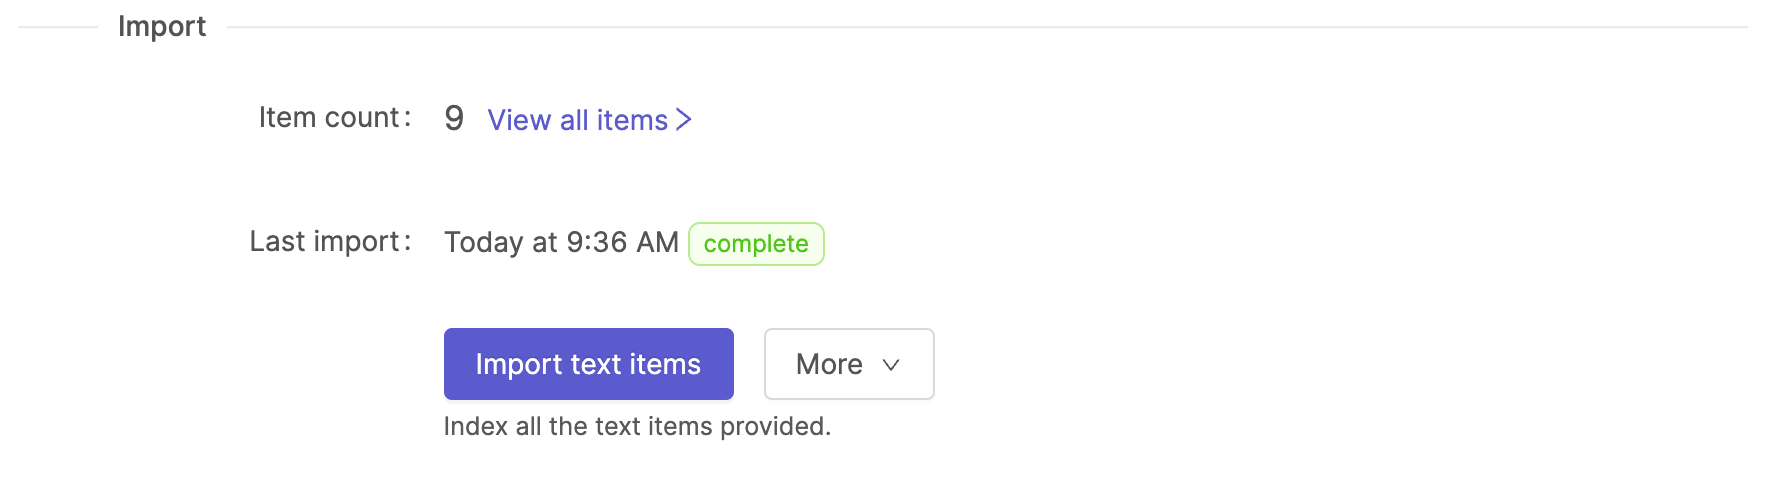
Import
Once you've set your Zendesk credentials and Filter options you import and index your Zendesk articles.
- Click the Import text items button to start the import and indexing jobs.
- This might take a few minutes to complete if you have a large number of articles.
- Once complete, click the View all items > button to view all the imported content.
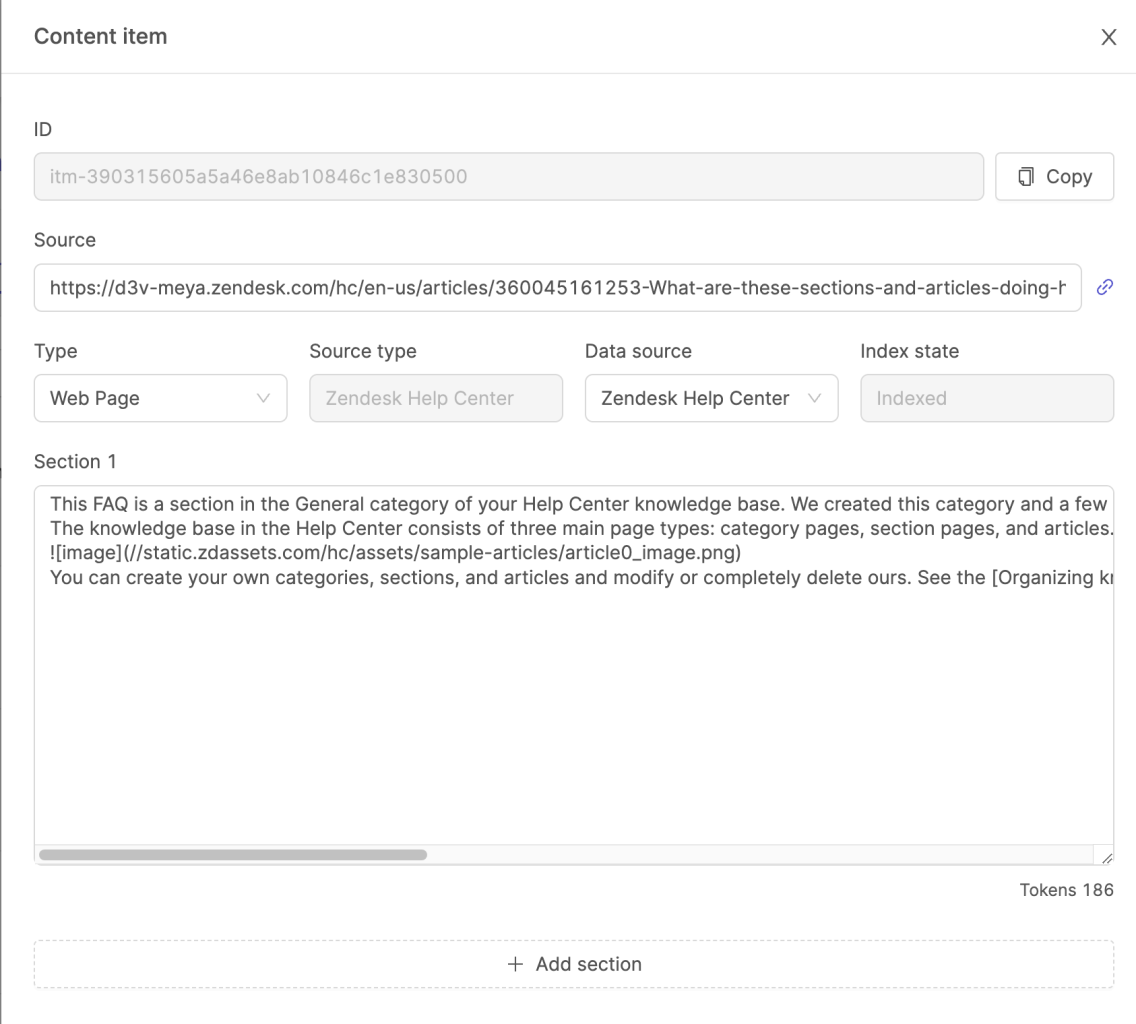
- The Zendesk Help Center data source will import and convert each article to the markdown syntax.
Updated about 2 months ago