Calendly
How to set up a Calendly integration
Calendly is a popular tool for scheduling meetings. You can integrate it with your Meya app to automate the booking process and to update existing bookings.

Create a Calendly access token
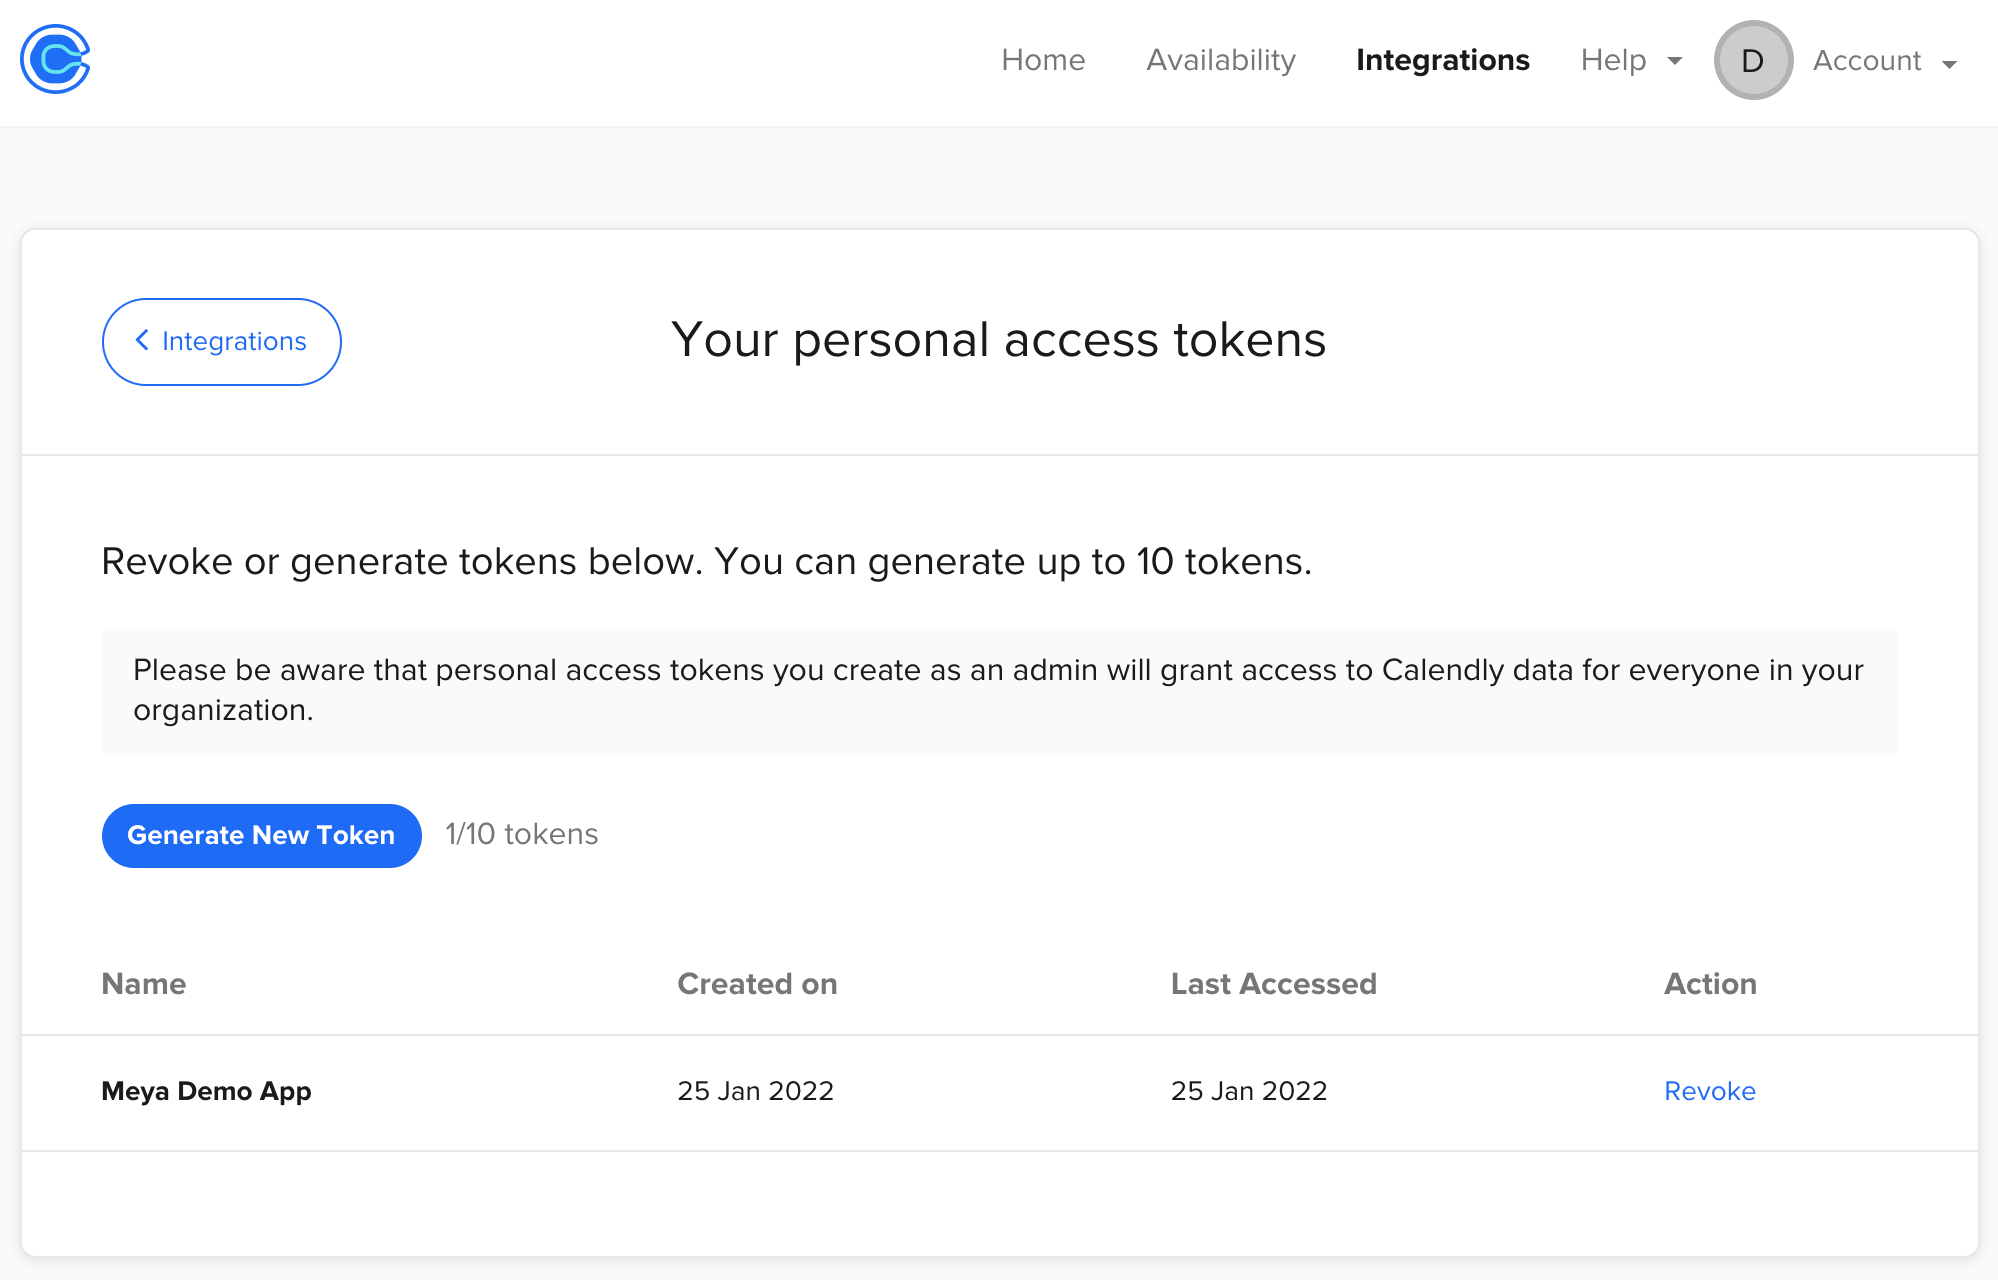
Sign in to your Calendly account. Click the Integrations tab. Navigate to API & Webhooks. Click the Generate new token button.

Find the event link
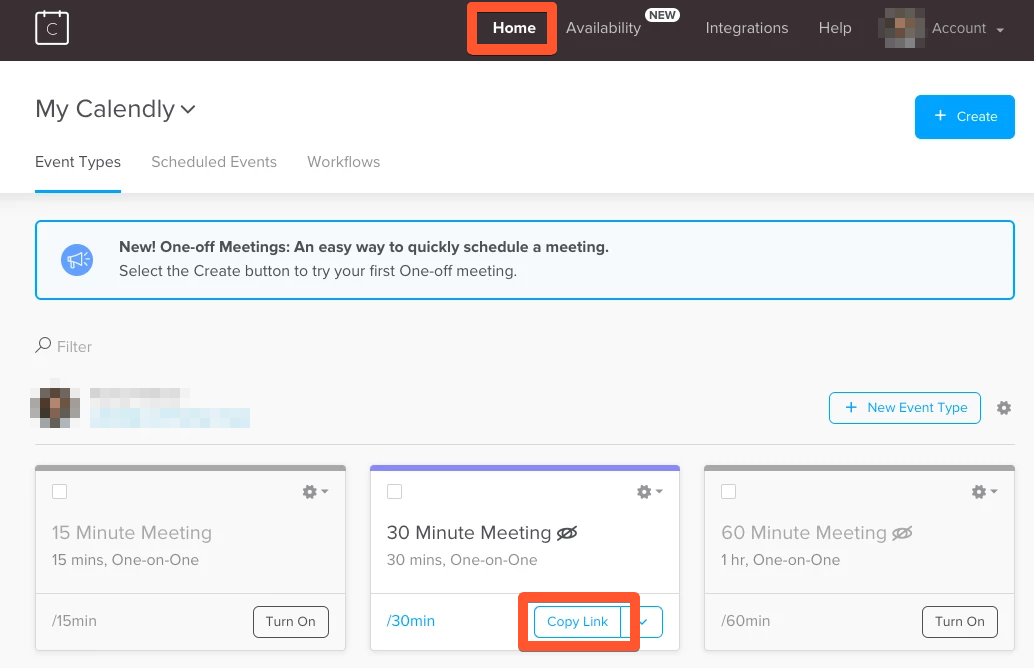
Navigate to the Home tab of your Calendly account. Click Copy Link on the event you want to add to your Meya app.

Update the vault
The vault is where secret information like API keys is stored. You can read more about the vault here.
Let’s add your Calendly access token and event link to the vault. In your flow code, you’ll reference the vault key, instead of the actual values. In addition to being more secure, this makes it easy to update the values from a single location, such as if you have to reset your access token.
- In your app’s root folder, open
vault.yaml. Add this code to it on a new line:
calendly.access_token: xxx
calendly.event_link: xxx
Recall thatvault.yamlshould not contain any secret data like API keys. This file informs developers what secrets are stored in the actual vault.
- Open
vault.secret.yamland add this code to it on a new line:
calendly.access_token: ACCESS_TOKEN
calendly.event_link: EVENT_LINK
Replace ACCESS_TOKEN with your actual Calendly access token.
Replace EVENT_LINK with the Calendly event link.
When replacingEVENT_LINK, you must use just the path segment, not the full URL. For example,your-name/30min.
You can add more event links. Just make sure each one has a unique name in the vault (e.g.calendly.15_min,calendly.30_min, etc).
- Save the files and upload the changes to your vault using these commands in your terminal:
meya format
meya vault upload --file vault.secret.yaml
Create the integration
In your app’s root folder, create a folder called integration. Inside the integration folder, create a file called calendly.yaml. Copy this code into the file:
type: meya.calendly.integration
access_token: (@ vault.calendly.access_token )
Save the file and upload it to the Grid using these commands in your terminal:
meya format
meya push
Add flow
Let's add a flow that lets the user book a meeting using the event link you copied earlier.
In your app’s flow folder, create a folder called calendly. Inside the new folder, create a file called calendly.yaml. Copy this code into it:
triggers:
  - regex: ^calend.*

steps:
  - (book)
  - calendly: (@ vault.calendly.event_link )
    integration: integration.calendly
    title: Book a demo date
    description: Click "Schedule time" below to setup a face-to-face meeting.
    button_style: text
    prefill:
      name: (@ user.name )
      email: (@ user.email )
    rows:
      -   - cell: Customer specialist
            value: Victor
      -   - cell: Email
            value: [email protected]
  - if: (@ flow.result )
    then: next
    else:
      jump: fail

  - (success)
  - say: >
      Meeting booked with Victor
      @ (@ flow.result.start_time )
  - end

  - (fail)
  - say: Nothing booked. Try again?
    quick_replies:
      - text: Try again
        action:
          jump: book
Save the file and push to the Grid:
meya format
meya push
Add Calendly HTML snippets
To render the Calendly interface, you’ll need to import some CSS and Javascript from Calendly. To do this, add the following to your website’s HTML:
<link href="https://assets.calendly.com/assets/external/widget.css" rel="stylesheet" media="print"/>
<script type="text/javascript" src="https://assets.calendly.com/assets/external/widget.js" async=""></script>
Test it out
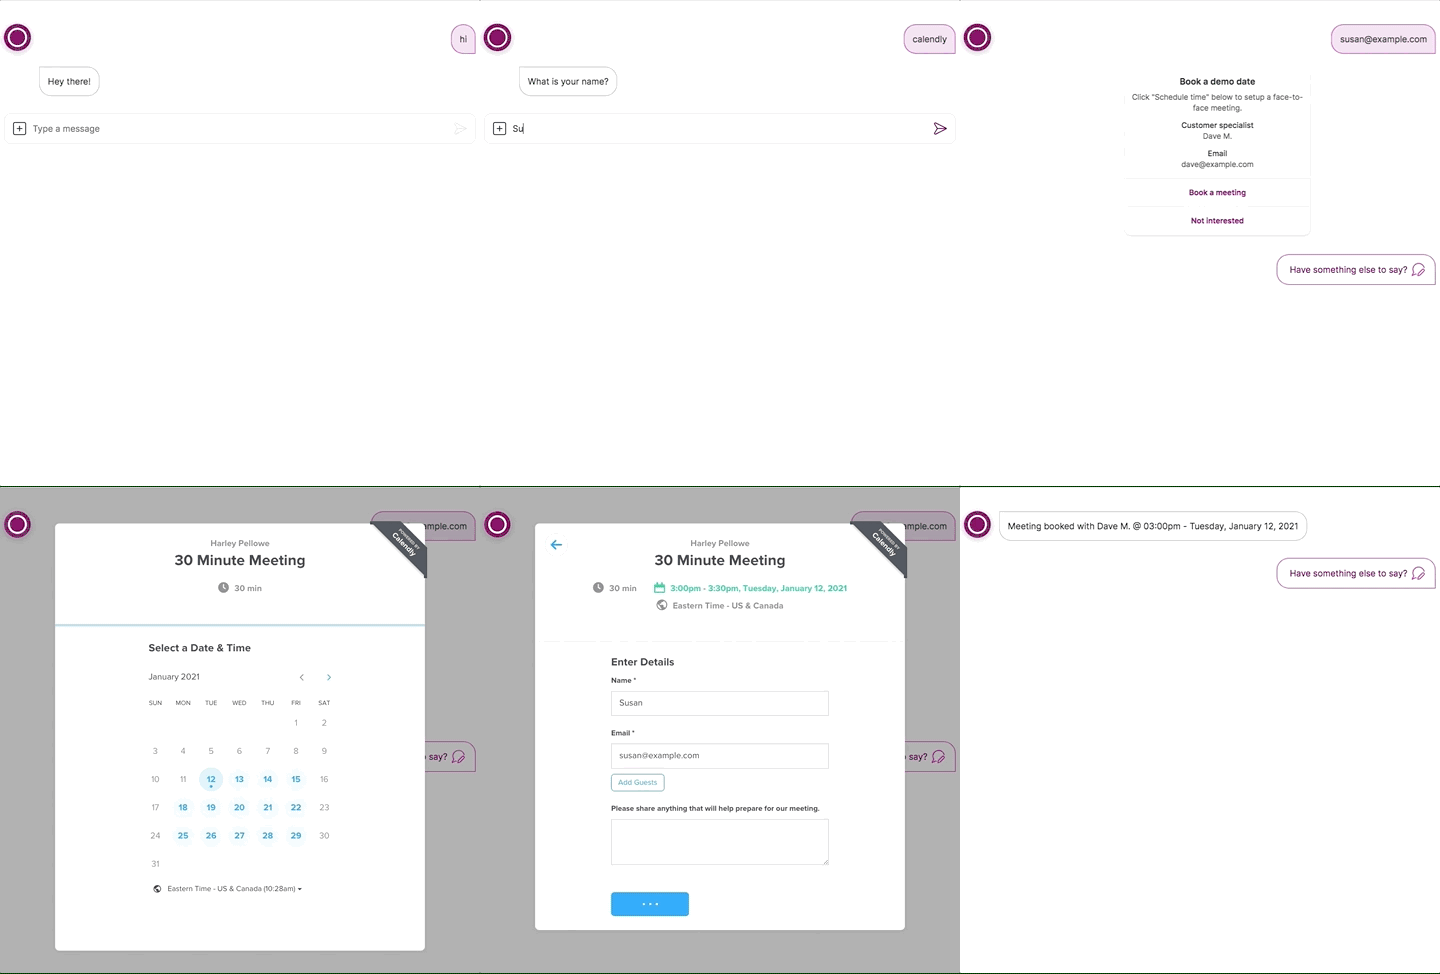
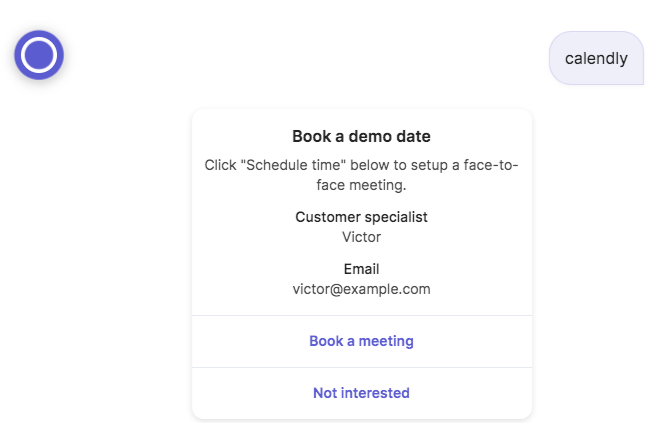
In the simulator, type calendly. You should see a card inviting you to book a meeting. Click Book a meeting to schedule the meeting. Check your calendar to confirm the meeting was booked.

You have successfully added the Calendly integration to your app.
Customization
While the Calendly component has sensible default values for the card’s appearance, these values can be customized using the component’s many optional properties. Check out the full list here.
Updated 9 months ago
