Twilio Flex
Setup a virtual assistant connected to Twilio Flex in minutes
Twilio Flex is a cloud-based, fully customizable, contact centre. It is quick to set up, and has integrations with a wide breadth of channels, including voice, SMS, WhatsApp, Facebook Messenger, WebChat, and more.
With Meya's Twilio Flex integration, you can:
- Transfer the chat between a bot and an agent
- Use agent commands to make your agents more efficient
- Assign attributes to Twilio Tasks which can be used with Twilio TaskRouter to support complex workflows and Task assignments
- Display chat transcripts to the agent so they have context for the conversation
- Customize the user's display name in Flex to include additional information
Keep reading to learn how to set up the Twilio Flex integration.
Update the vault
First, let's update the vault with the keys we'll need in order to create the integration.
In your app's root folder, open vault.yaml and copy this code into it:
twilio.account_sid: xxx
twilio.api_key_secret: xxx
twilio.api_key_sid: xxx
twilio_flex.flex_flow_sid: xxx
twilio_flex.flex_chat_service_sid: xxx
If you've already set up the Twilio integration,twilio.account_sid,twilio.api_key_sid, andtwilio.api_key_secretwill already be in yourvault.yamlandvault.secret.yamlfiles.
Copy the same code into your vault.secret.yaml file.
twilio.account_sid: xxx
twilio.api_key_secret: xxx
twilio.api_key_sid: xxx
twilio_flex.flex_flow_sid: xxx
twilio_flex.flex_chat_service_sid: xxx
Normally, you would update this file to have the actual secret values, but in this case we need placeholders here so we can create the integration webhook URL which we'll be adding to Twilio Flex in a later step. We'll come back and update this file to have the correct values later.
Save the files and upload them to the vault using this command in your terminal:
meya vault upload --file vault.secret.yamlAdd the integration
With our Twilio Flex keys added to the vault, we can now create the integration.
In your app's integration folder, create a subfolder called twilio. Inside the twilio folder, create a file called flex.yaml and copy this code into it:
type: meya.twilio.flex.integration
api_key_sid: (@ vault.twilio.api_key_sid )
api_key_secret: (@ vault.twilio.api_key_secret )
account_sid: (@ vault.twilio.account_sid )
flex_flow_sid: (@ vault.twilio_flex.flex_flow_sid )
flex_chat_service_sid: (@ vault.twilio_flex.flex_chat_service_sid )
Save the file and push your changes to the Grid using these commands in your terminal:
meya format
meya push
Configure Twilio
We'll need to configure some settings in Twilio and retrieve credentials that allow the app to communicate with Twilio, and vice versa. Let's do that now.
Retrieve Twilio account SID
Head over to your Twilio dashboard. Under Account Info, look for the Account SID. Update the Twilio credentials in your vault.secret.yaml file with this value.
Update the `vault.secret.yaml:
- Paste to the
twilio.account_sidvalue.
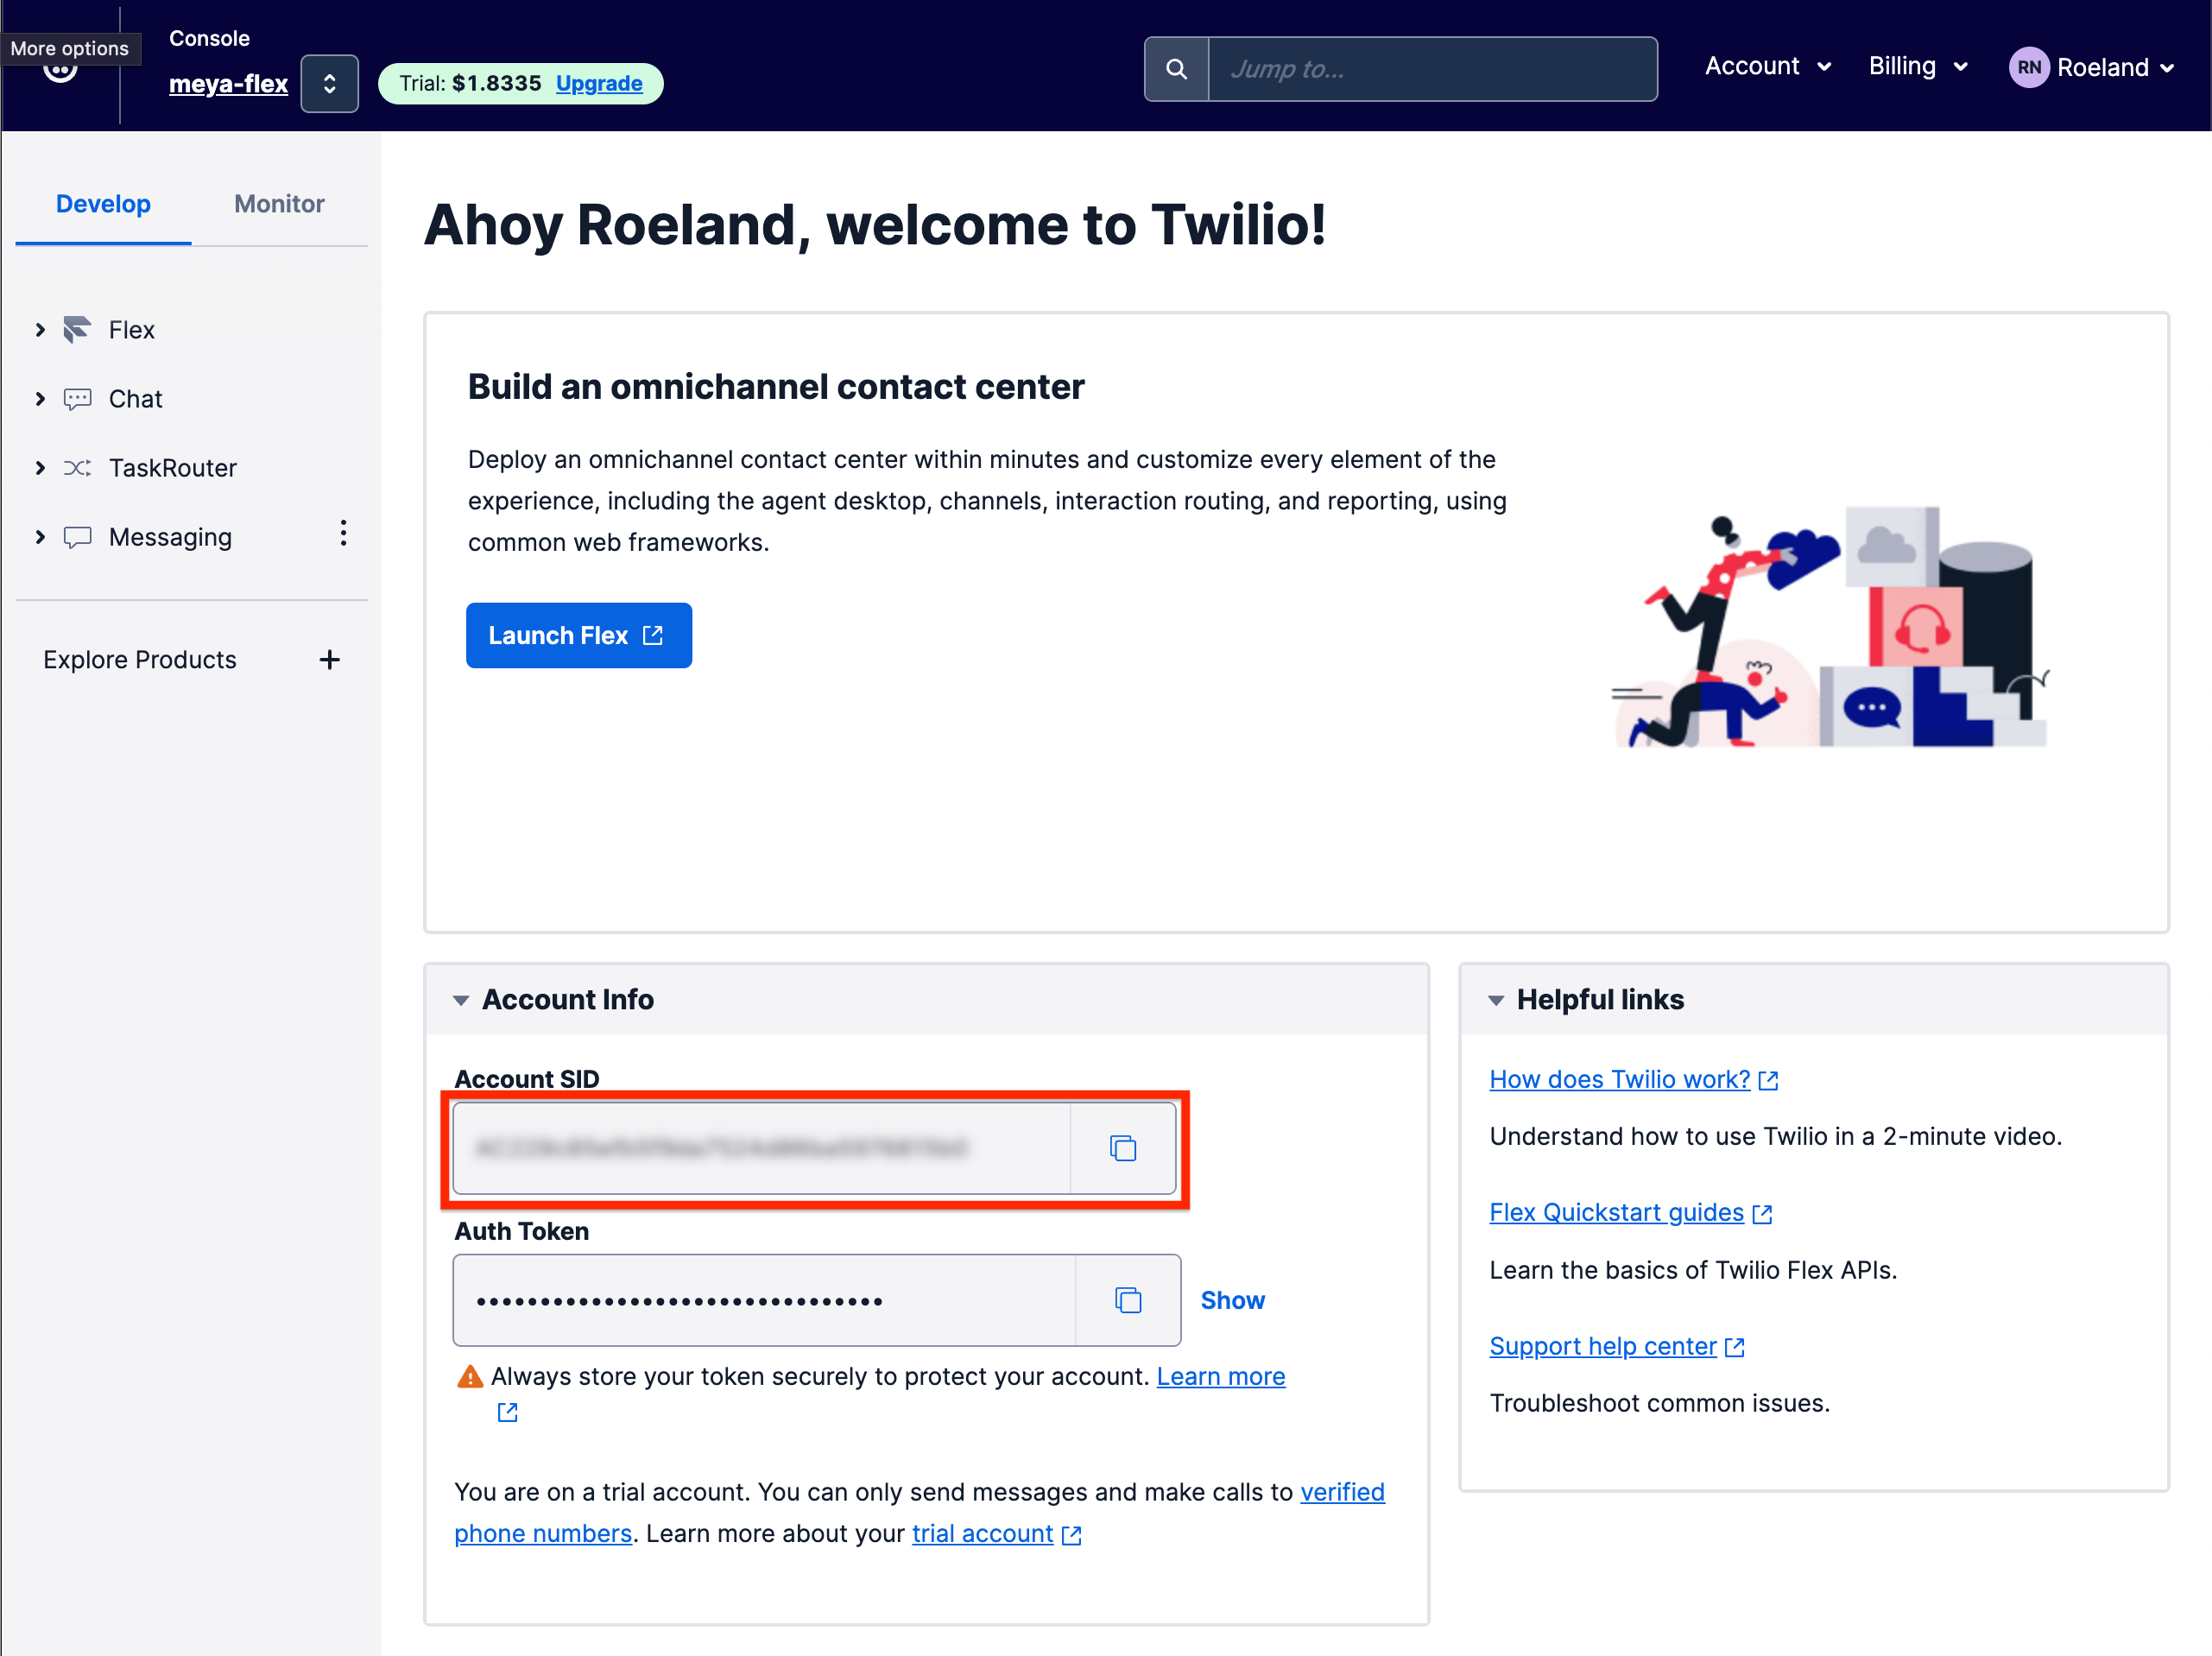
The account SID and auth token
Create the API key
Navigate to Account > General settings > API keys & tokens. Click the Create API key button to create a new key. Make sure the type is set to Standard.
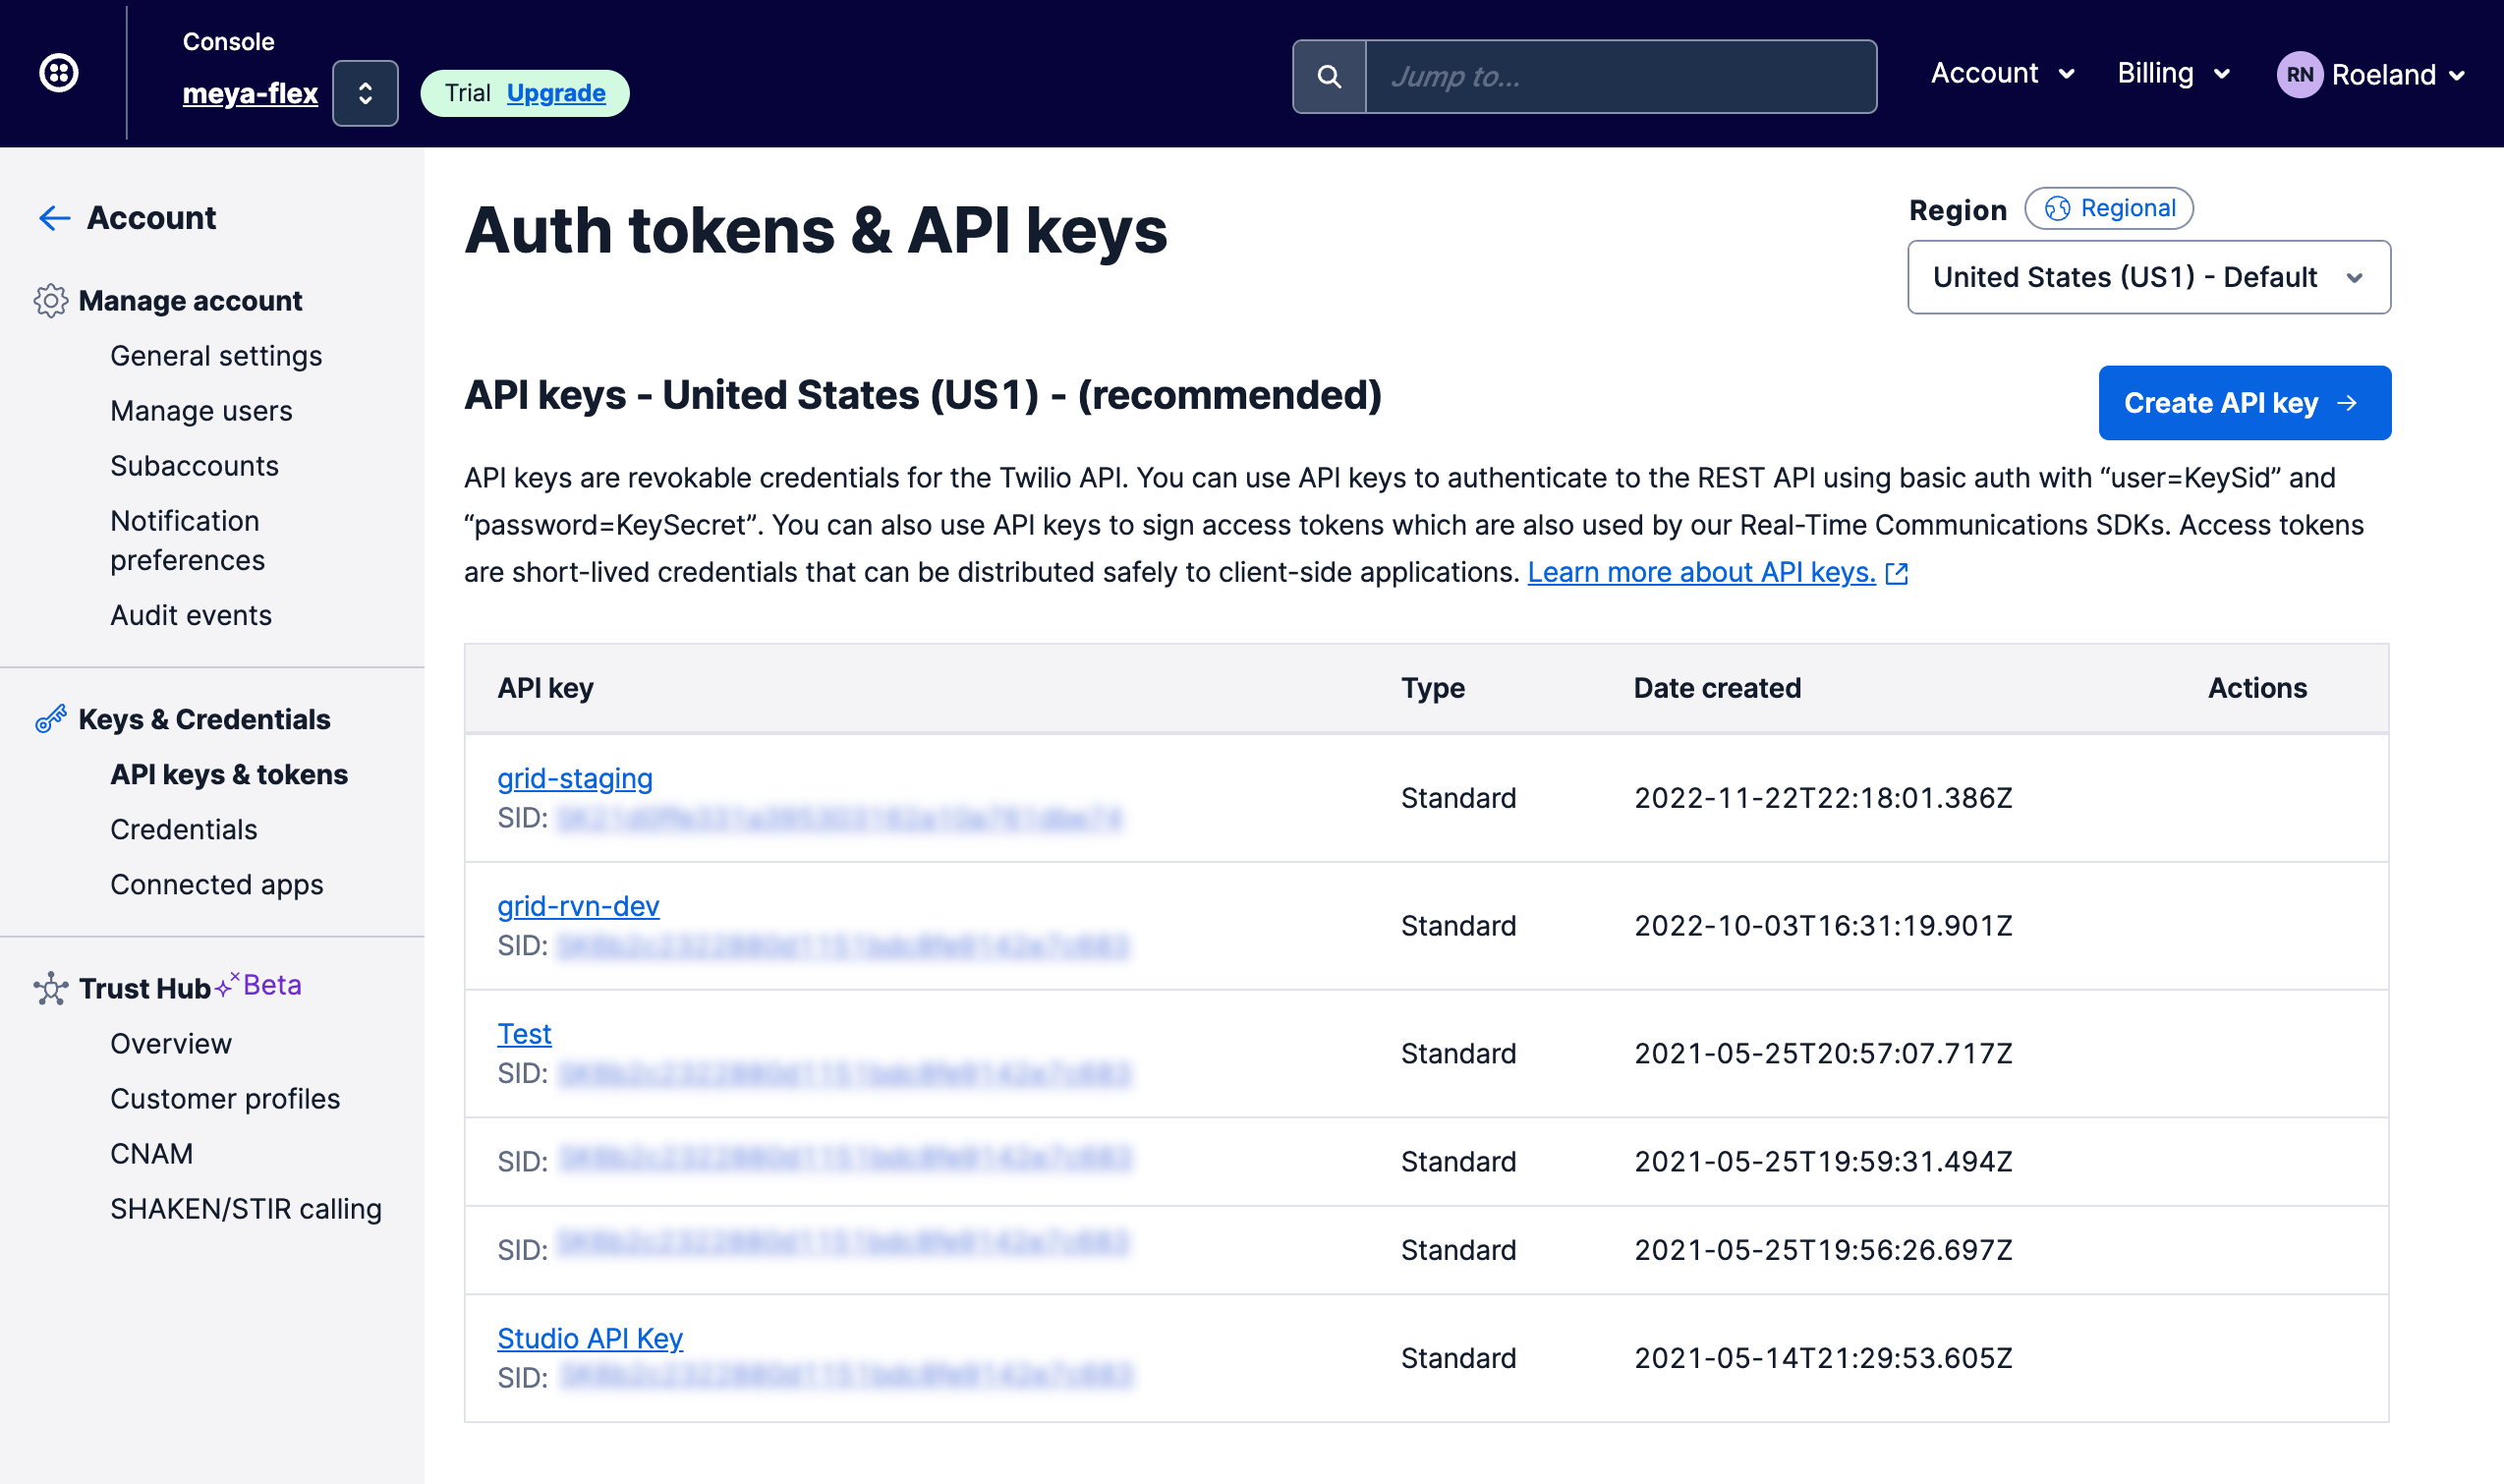
Update the vault.secret.yaml file:
- Paste to the
twilio.api_key_sidvalue. - Paste to the
twilio.api_key_secretvalue.
Enable Twilio Flex
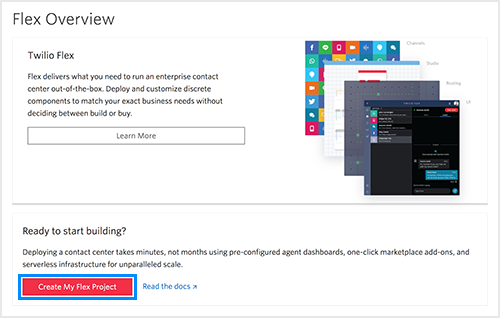
Navigate to the Twilio Flex overview page and create a new Flex project.
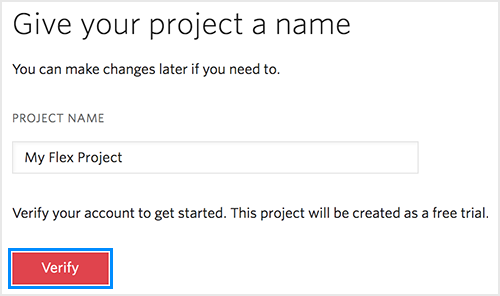
Give the project a name, and click Verify.
Retrieve Flex Chat Service SID
Go to your Programmable Chat dashboard. You should see an entry in the Chat Services section called Flex Chat Service. Next to it is the Chat Service SID.
Update the vault.secret.yaml file:
- Paste to the
twilio.flex_chat_service_sidvalue.

The Flex Chat Service SID
Retrieve Flex Flow SID
On your Flex overview page, click Launch Flex.
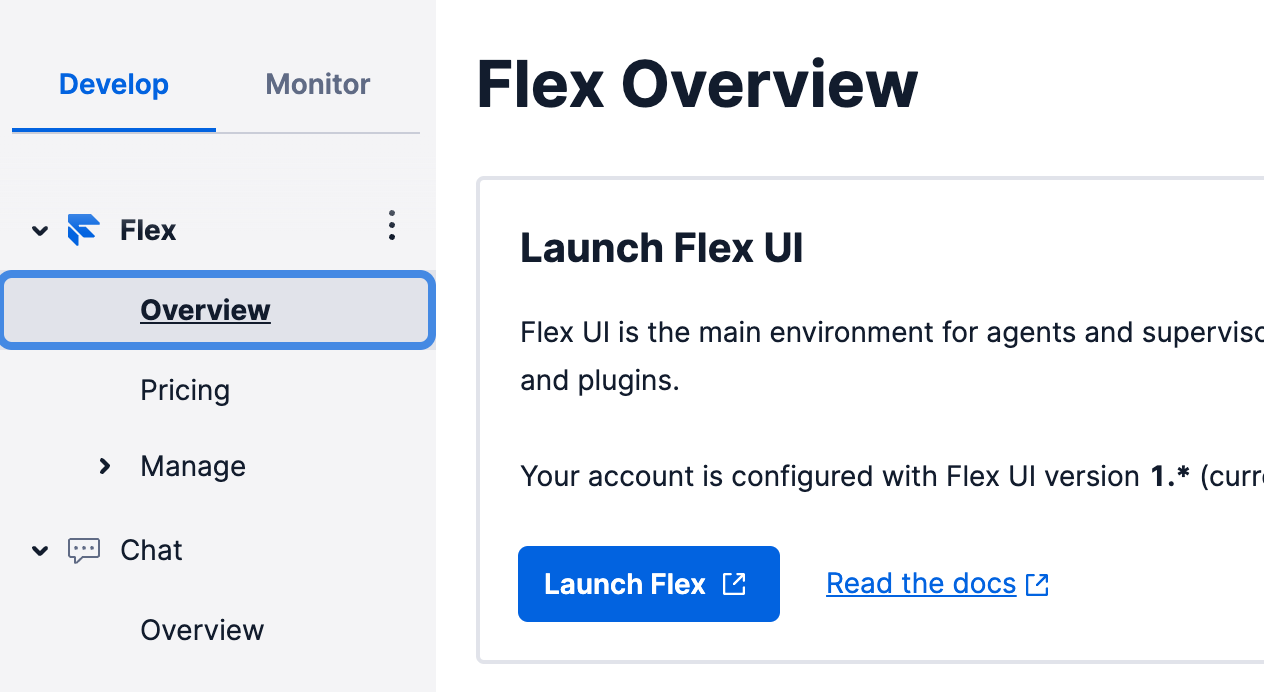
Launch Twilio Flex
Click Edit under the Developer Setup heading.
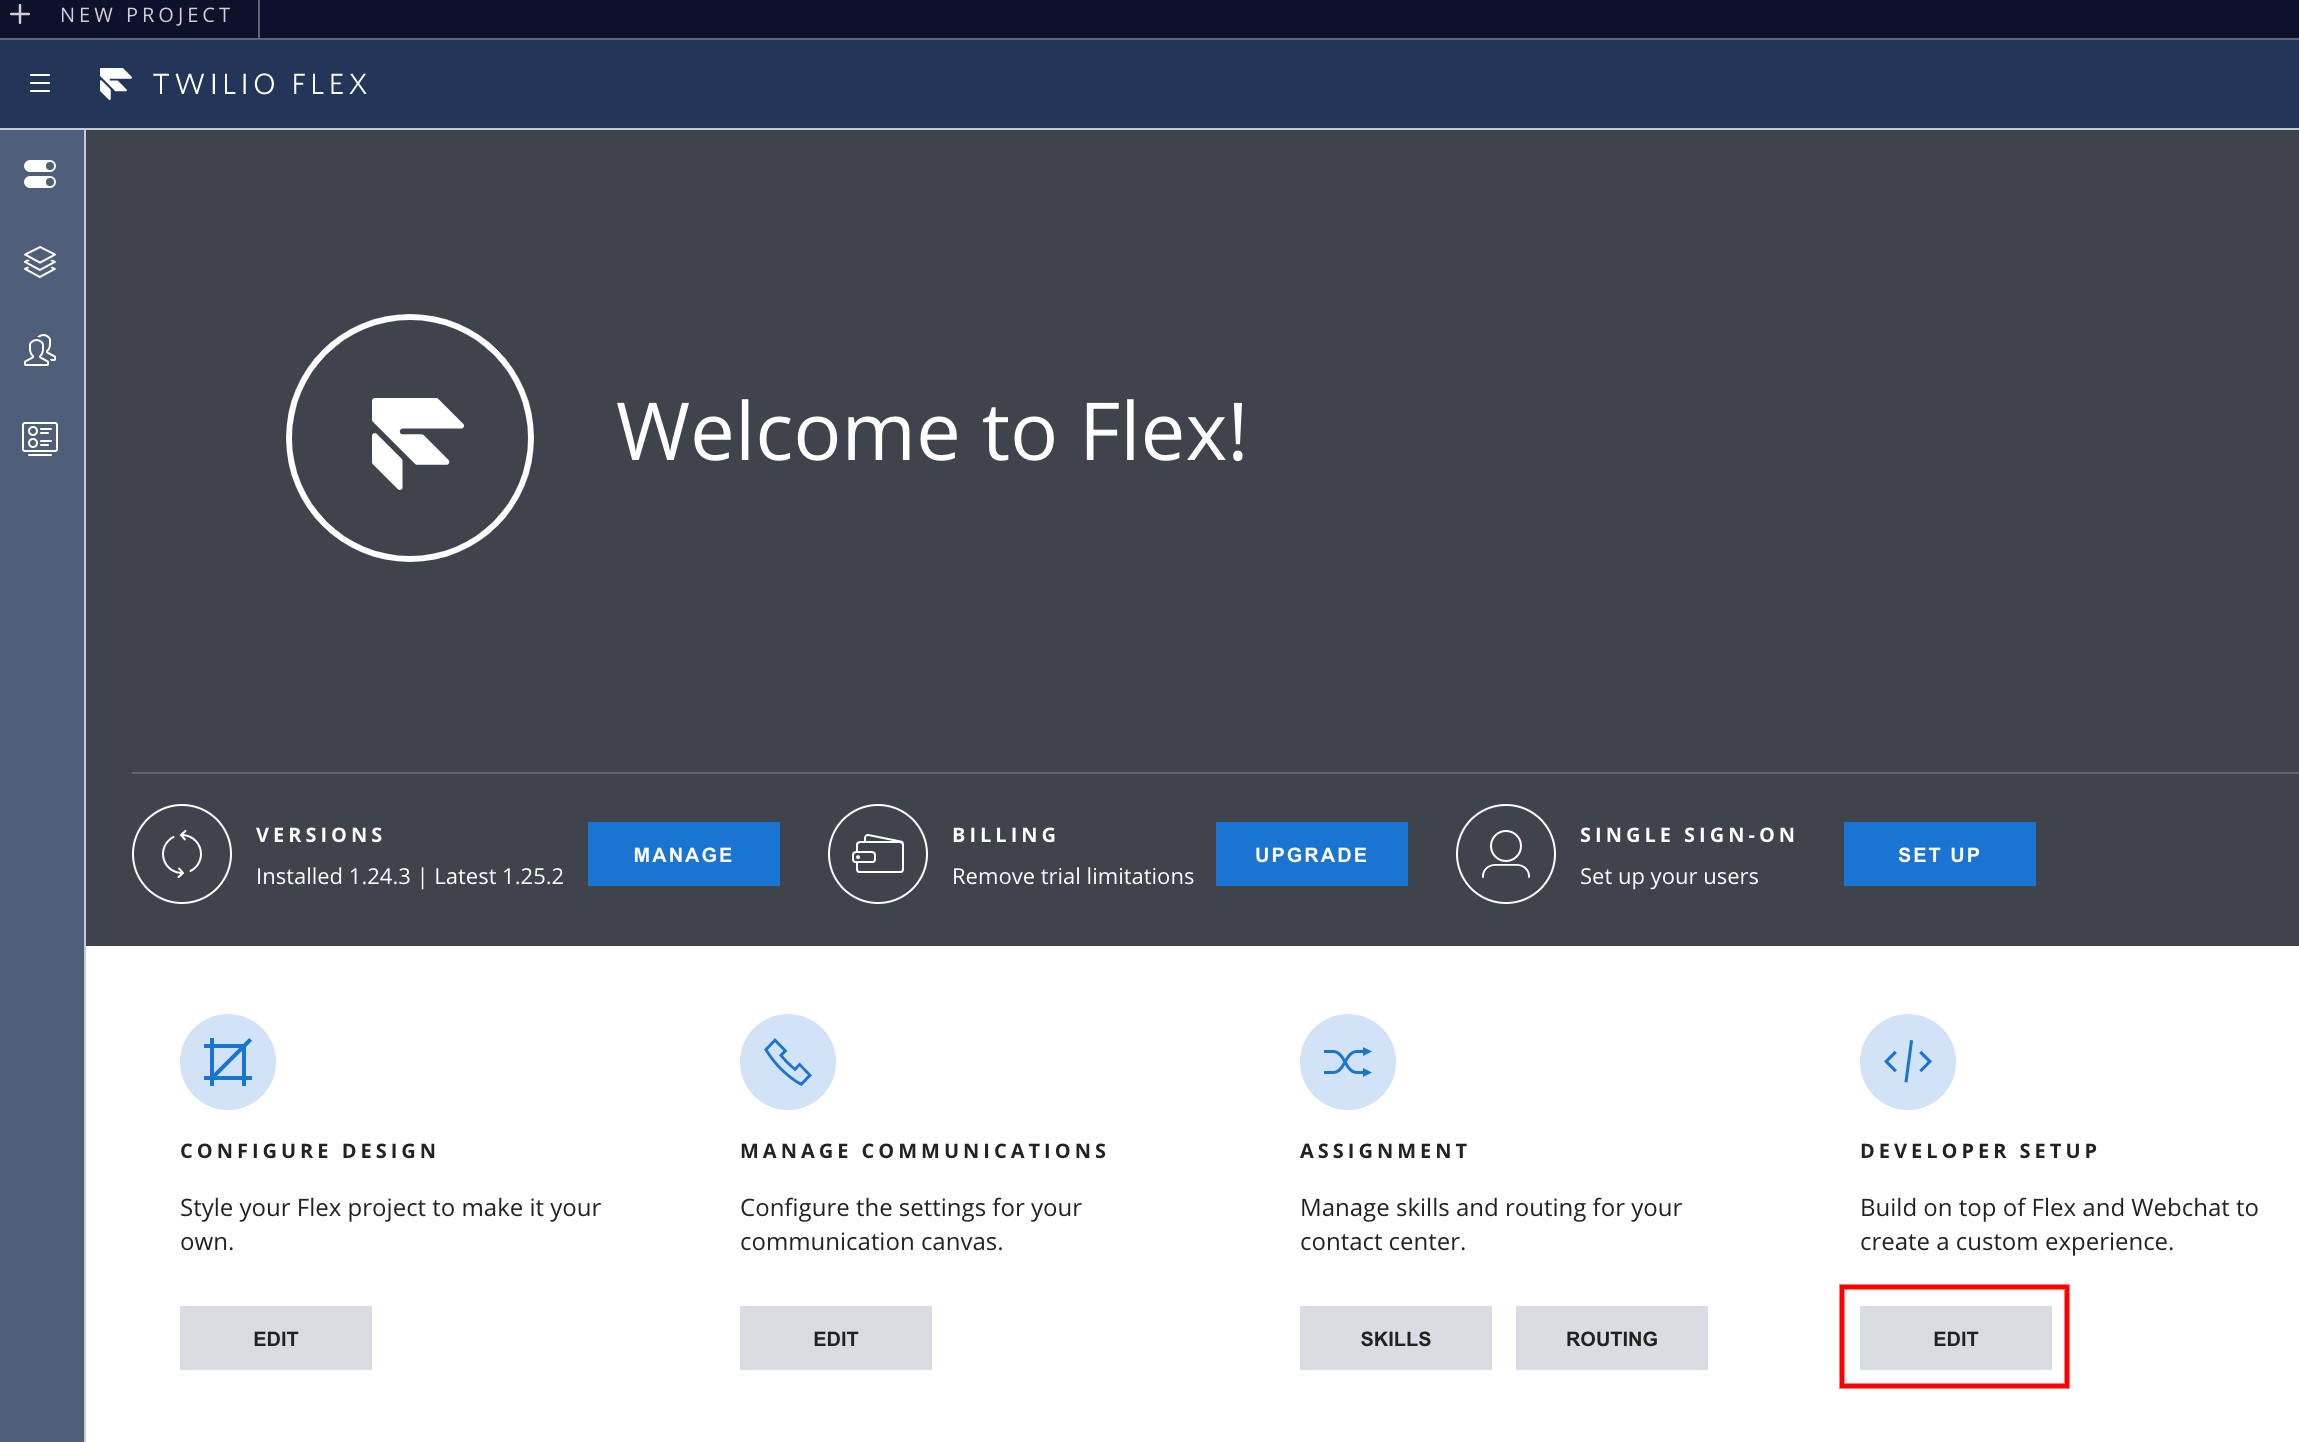
Open developer setup
In the Webchat section, copy the flexFlowSid.
Update the vault.secret.yaml file:
- Paste to the
twilio.flex_flow_sidvalue.
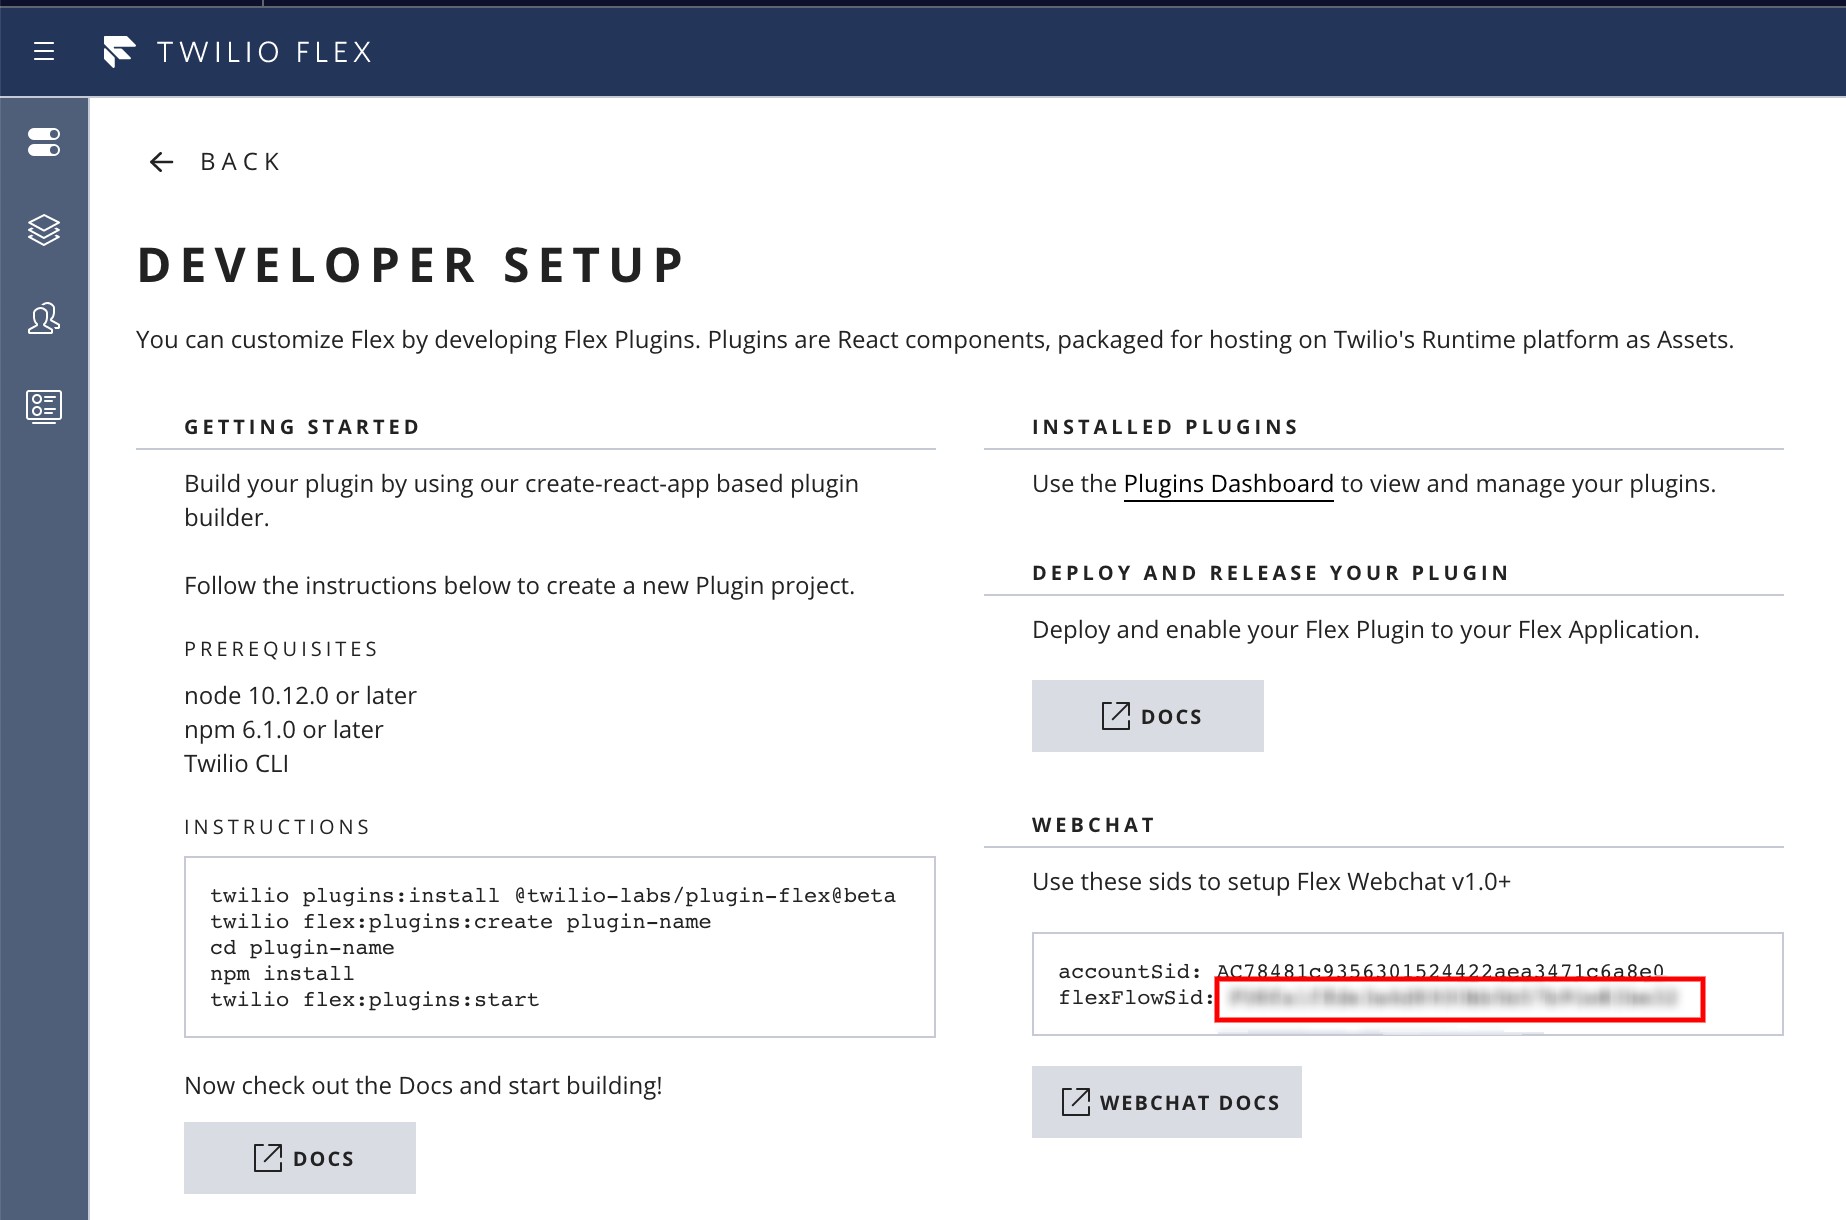
Copy the Flex Flow SID
Your vault.secret.yaml file should now have all four secrets it needs for Twilio Flex. Save the file and upload it to the vault using this command:
meya vault upload --file vault.secret.yamlSetup the Flex web channel
Navigate to the Flex messaging page. Click the pen icon next to the WebChat channel to edit it.

Edit the web channel
Set the Task Channel to Programmable Chat and click Submit.
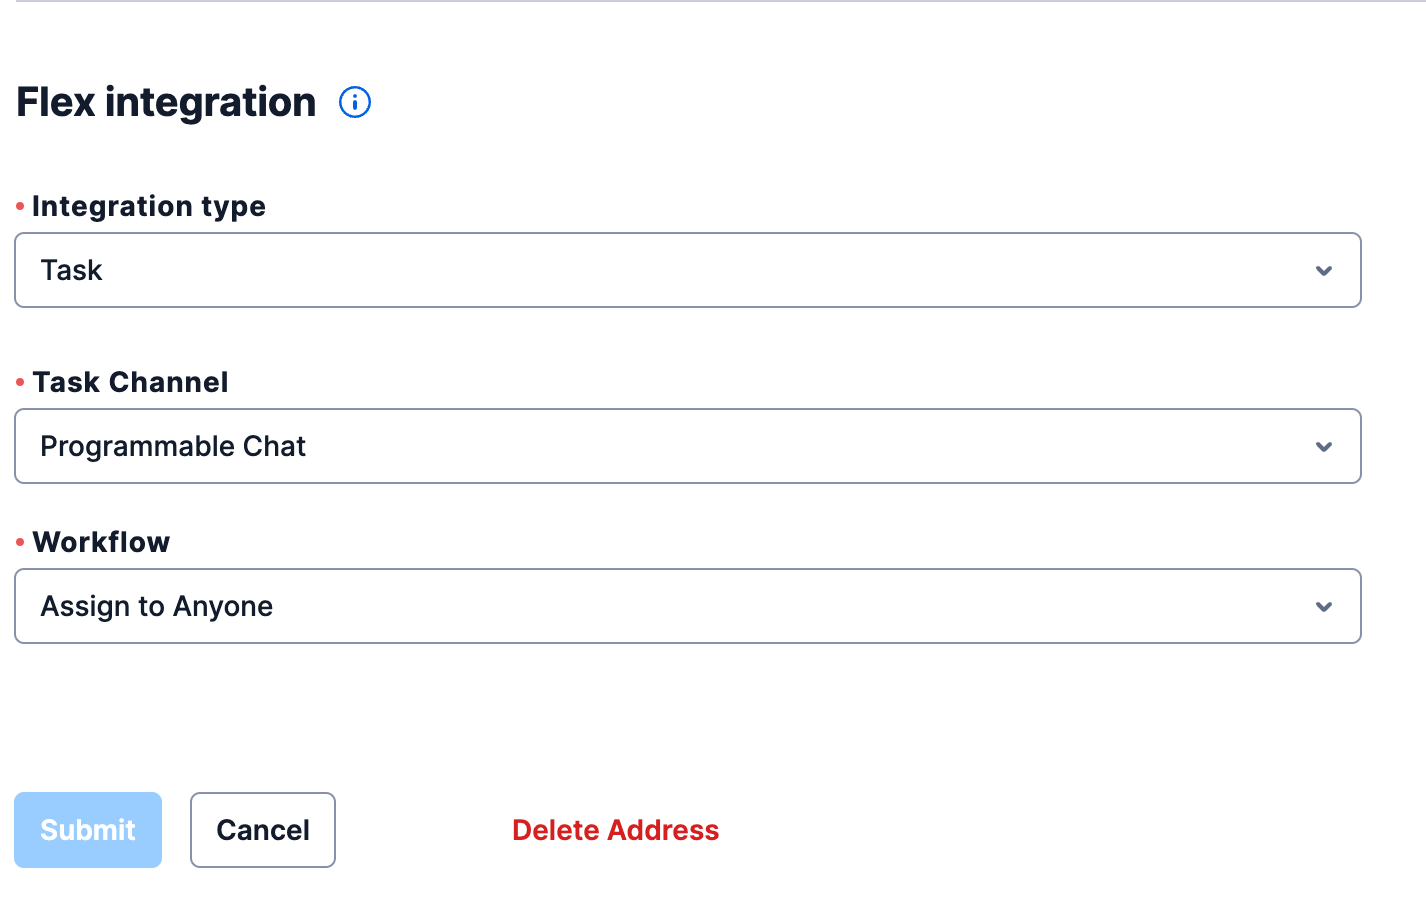
Set the task channel to Programmable Chat
Add webhook to Twilio
Now we need to add our integration webhook URL to Twilio so the app can receive events and messages from Twilio.
Flex Channel Service
In your terminal, run this command to retrieve your app's Twilio Flex webhook:
meya webhooksOn the Flex Chat Service page, select Webhooks from the left-hand menu. Scroll down to the Post-Event Webhooks section and paste your webhook into the Callback URL text box.
Make sure HTTP POST is selected in the dropdown next to the URL.
Make sure the following are checked:
- onMessageSent: Sent a Message
- onMediaMessageSent: Sent a Media Message
Uncheck everything else. Your settings should look like this:
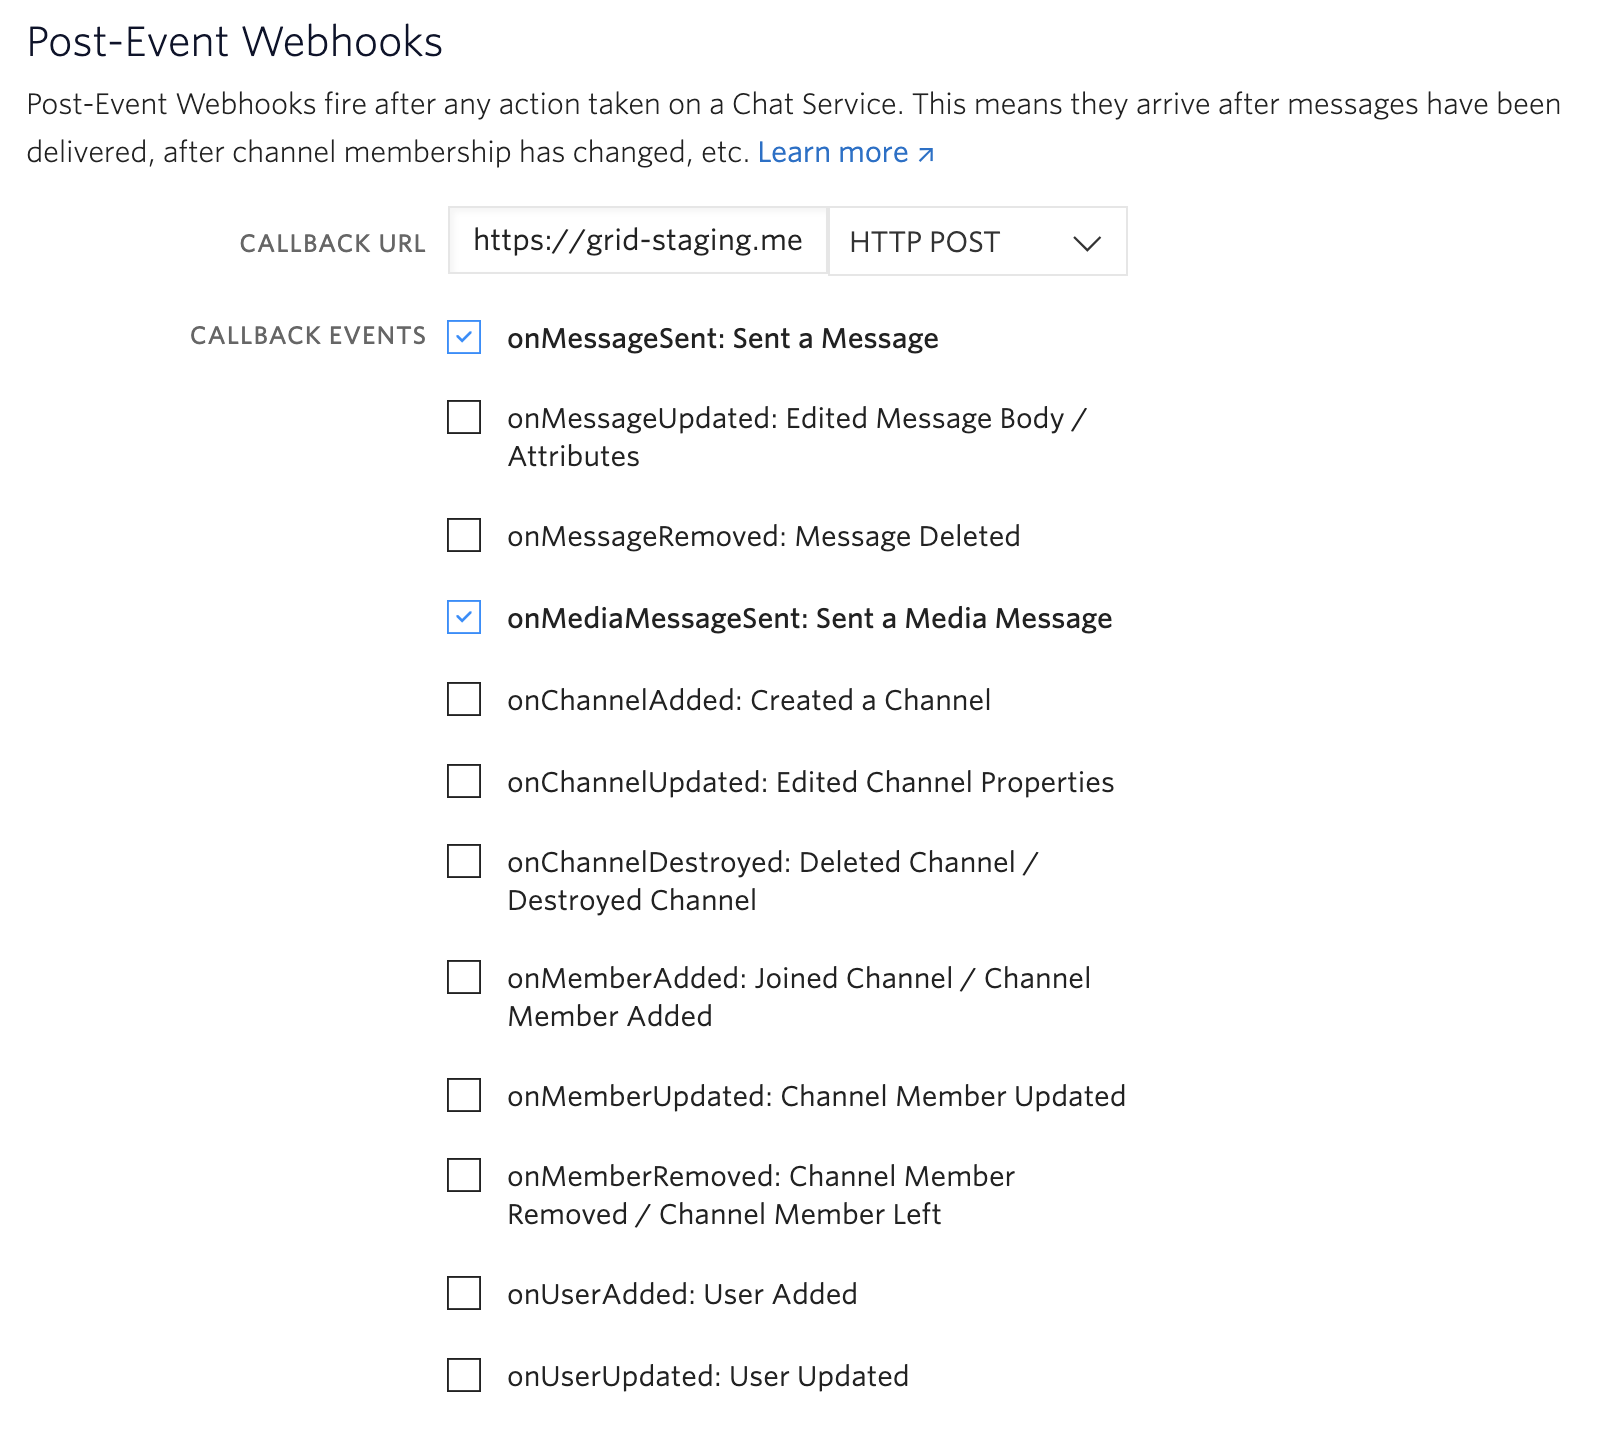
Post-event webhook settings
TaskRouter
Navigate to your TaskRouter workspaces and select Flex Task Assignment.
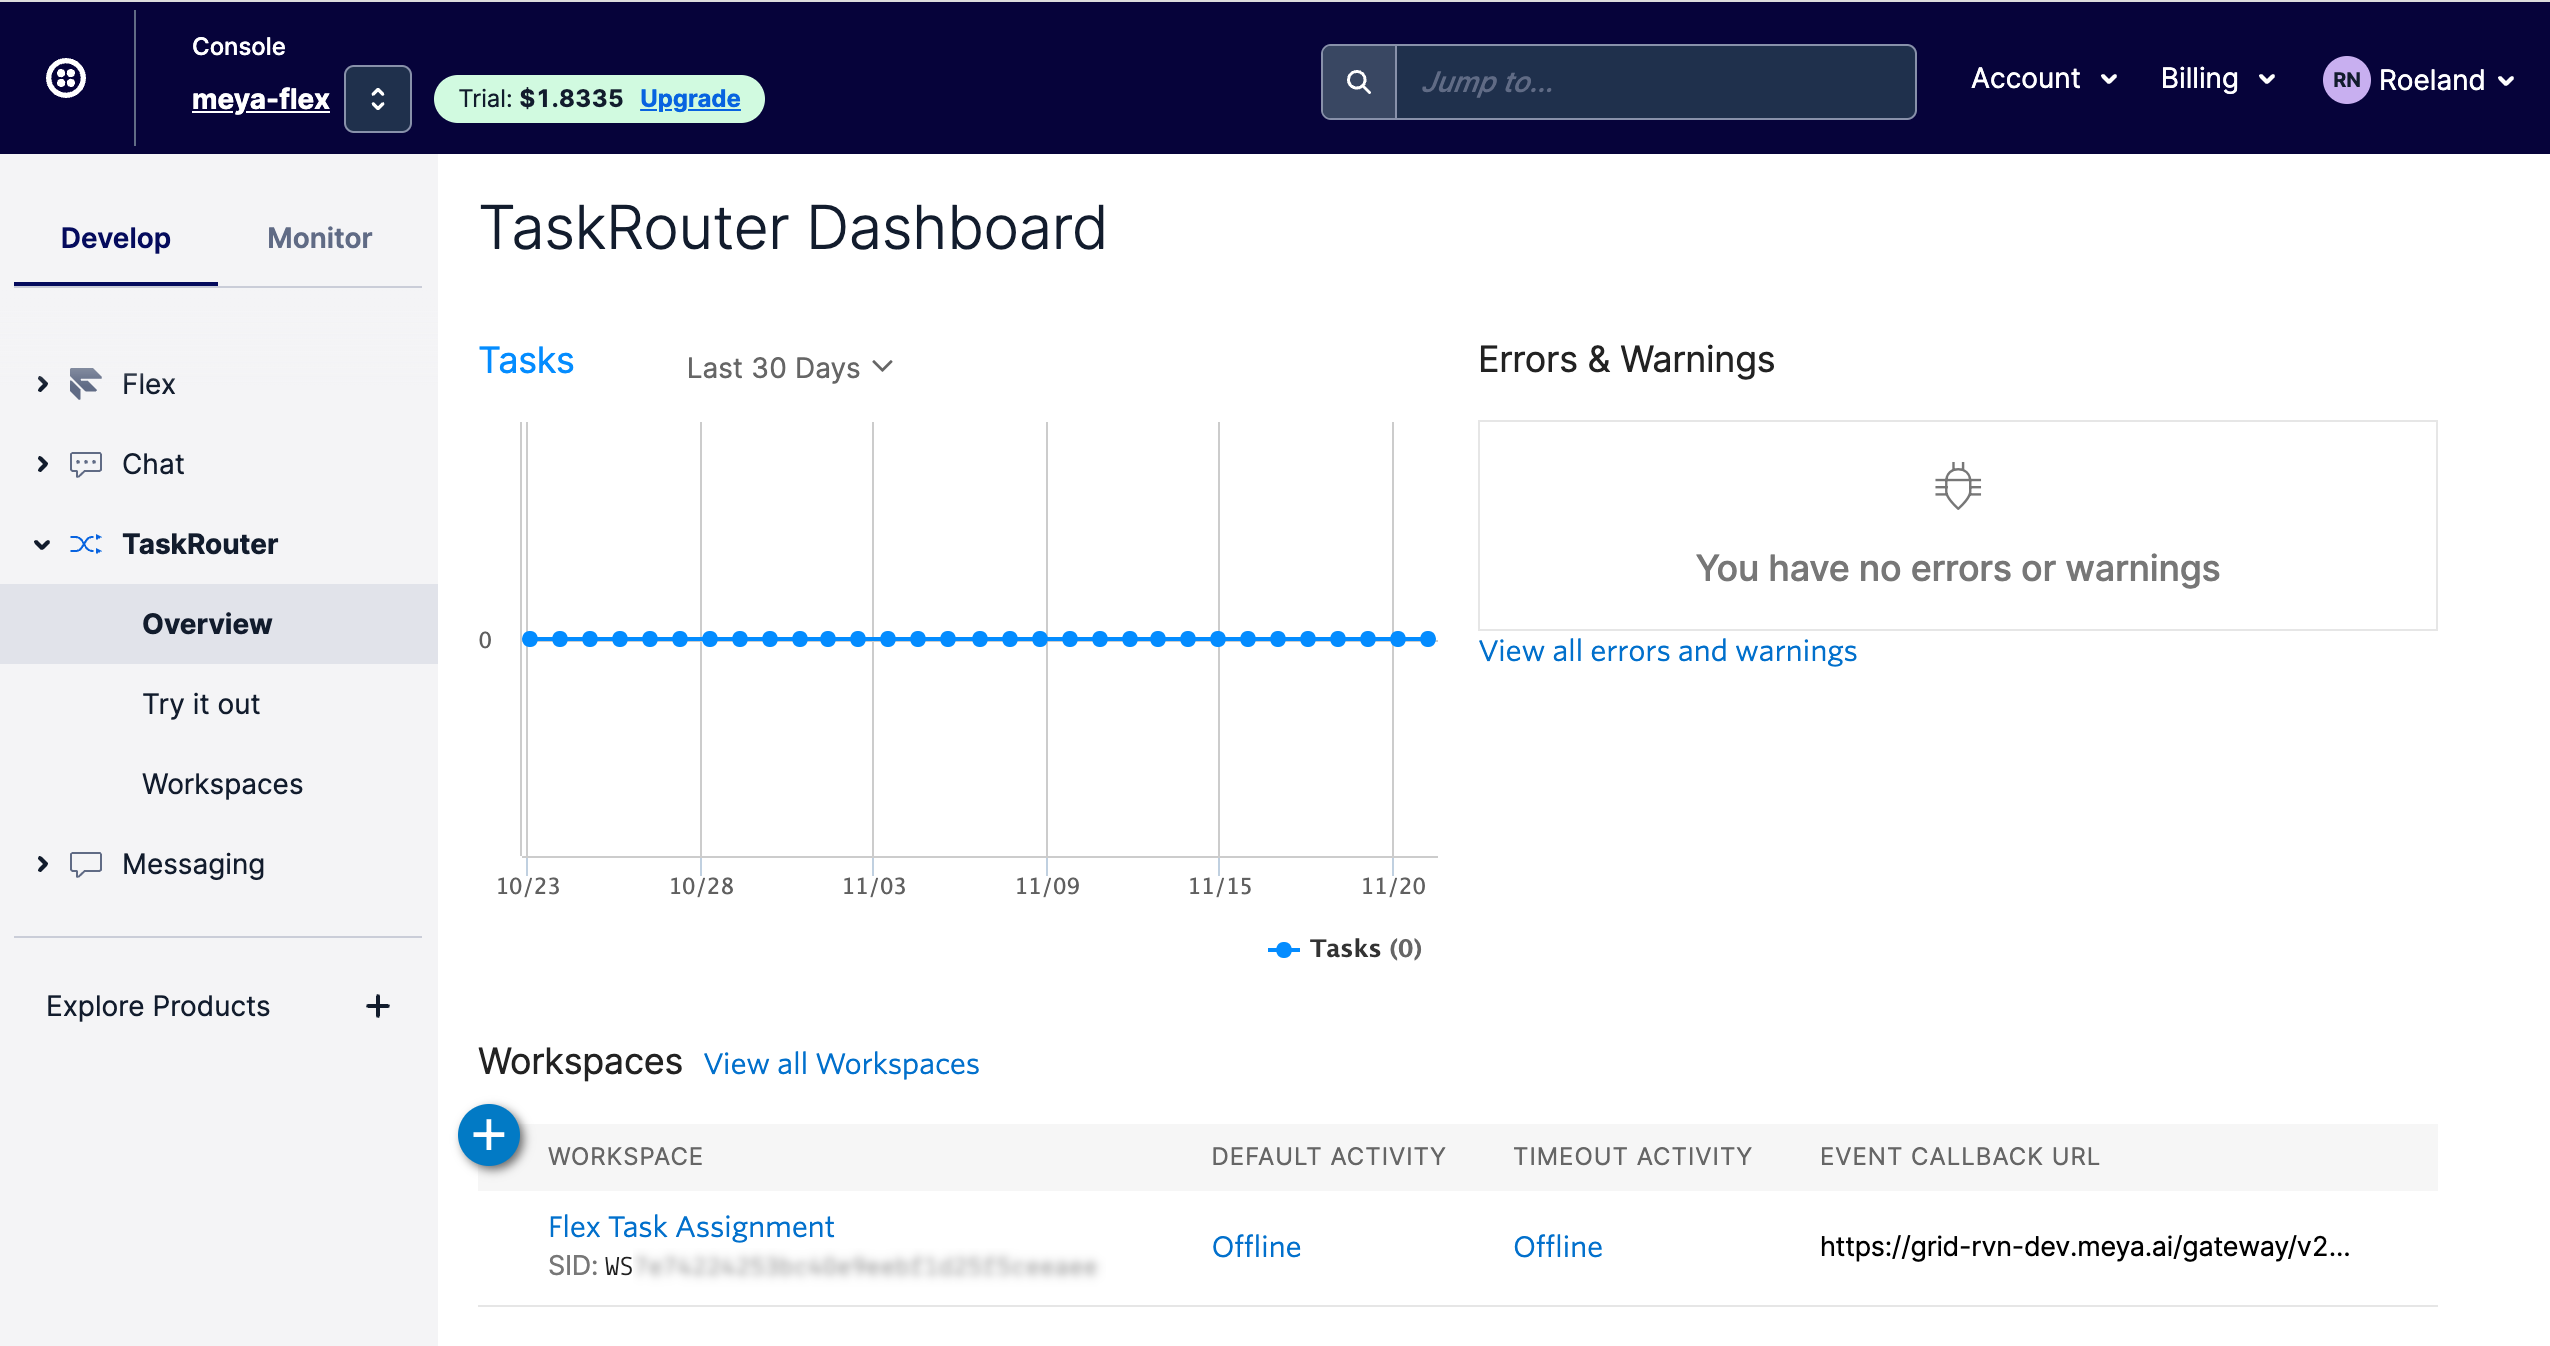
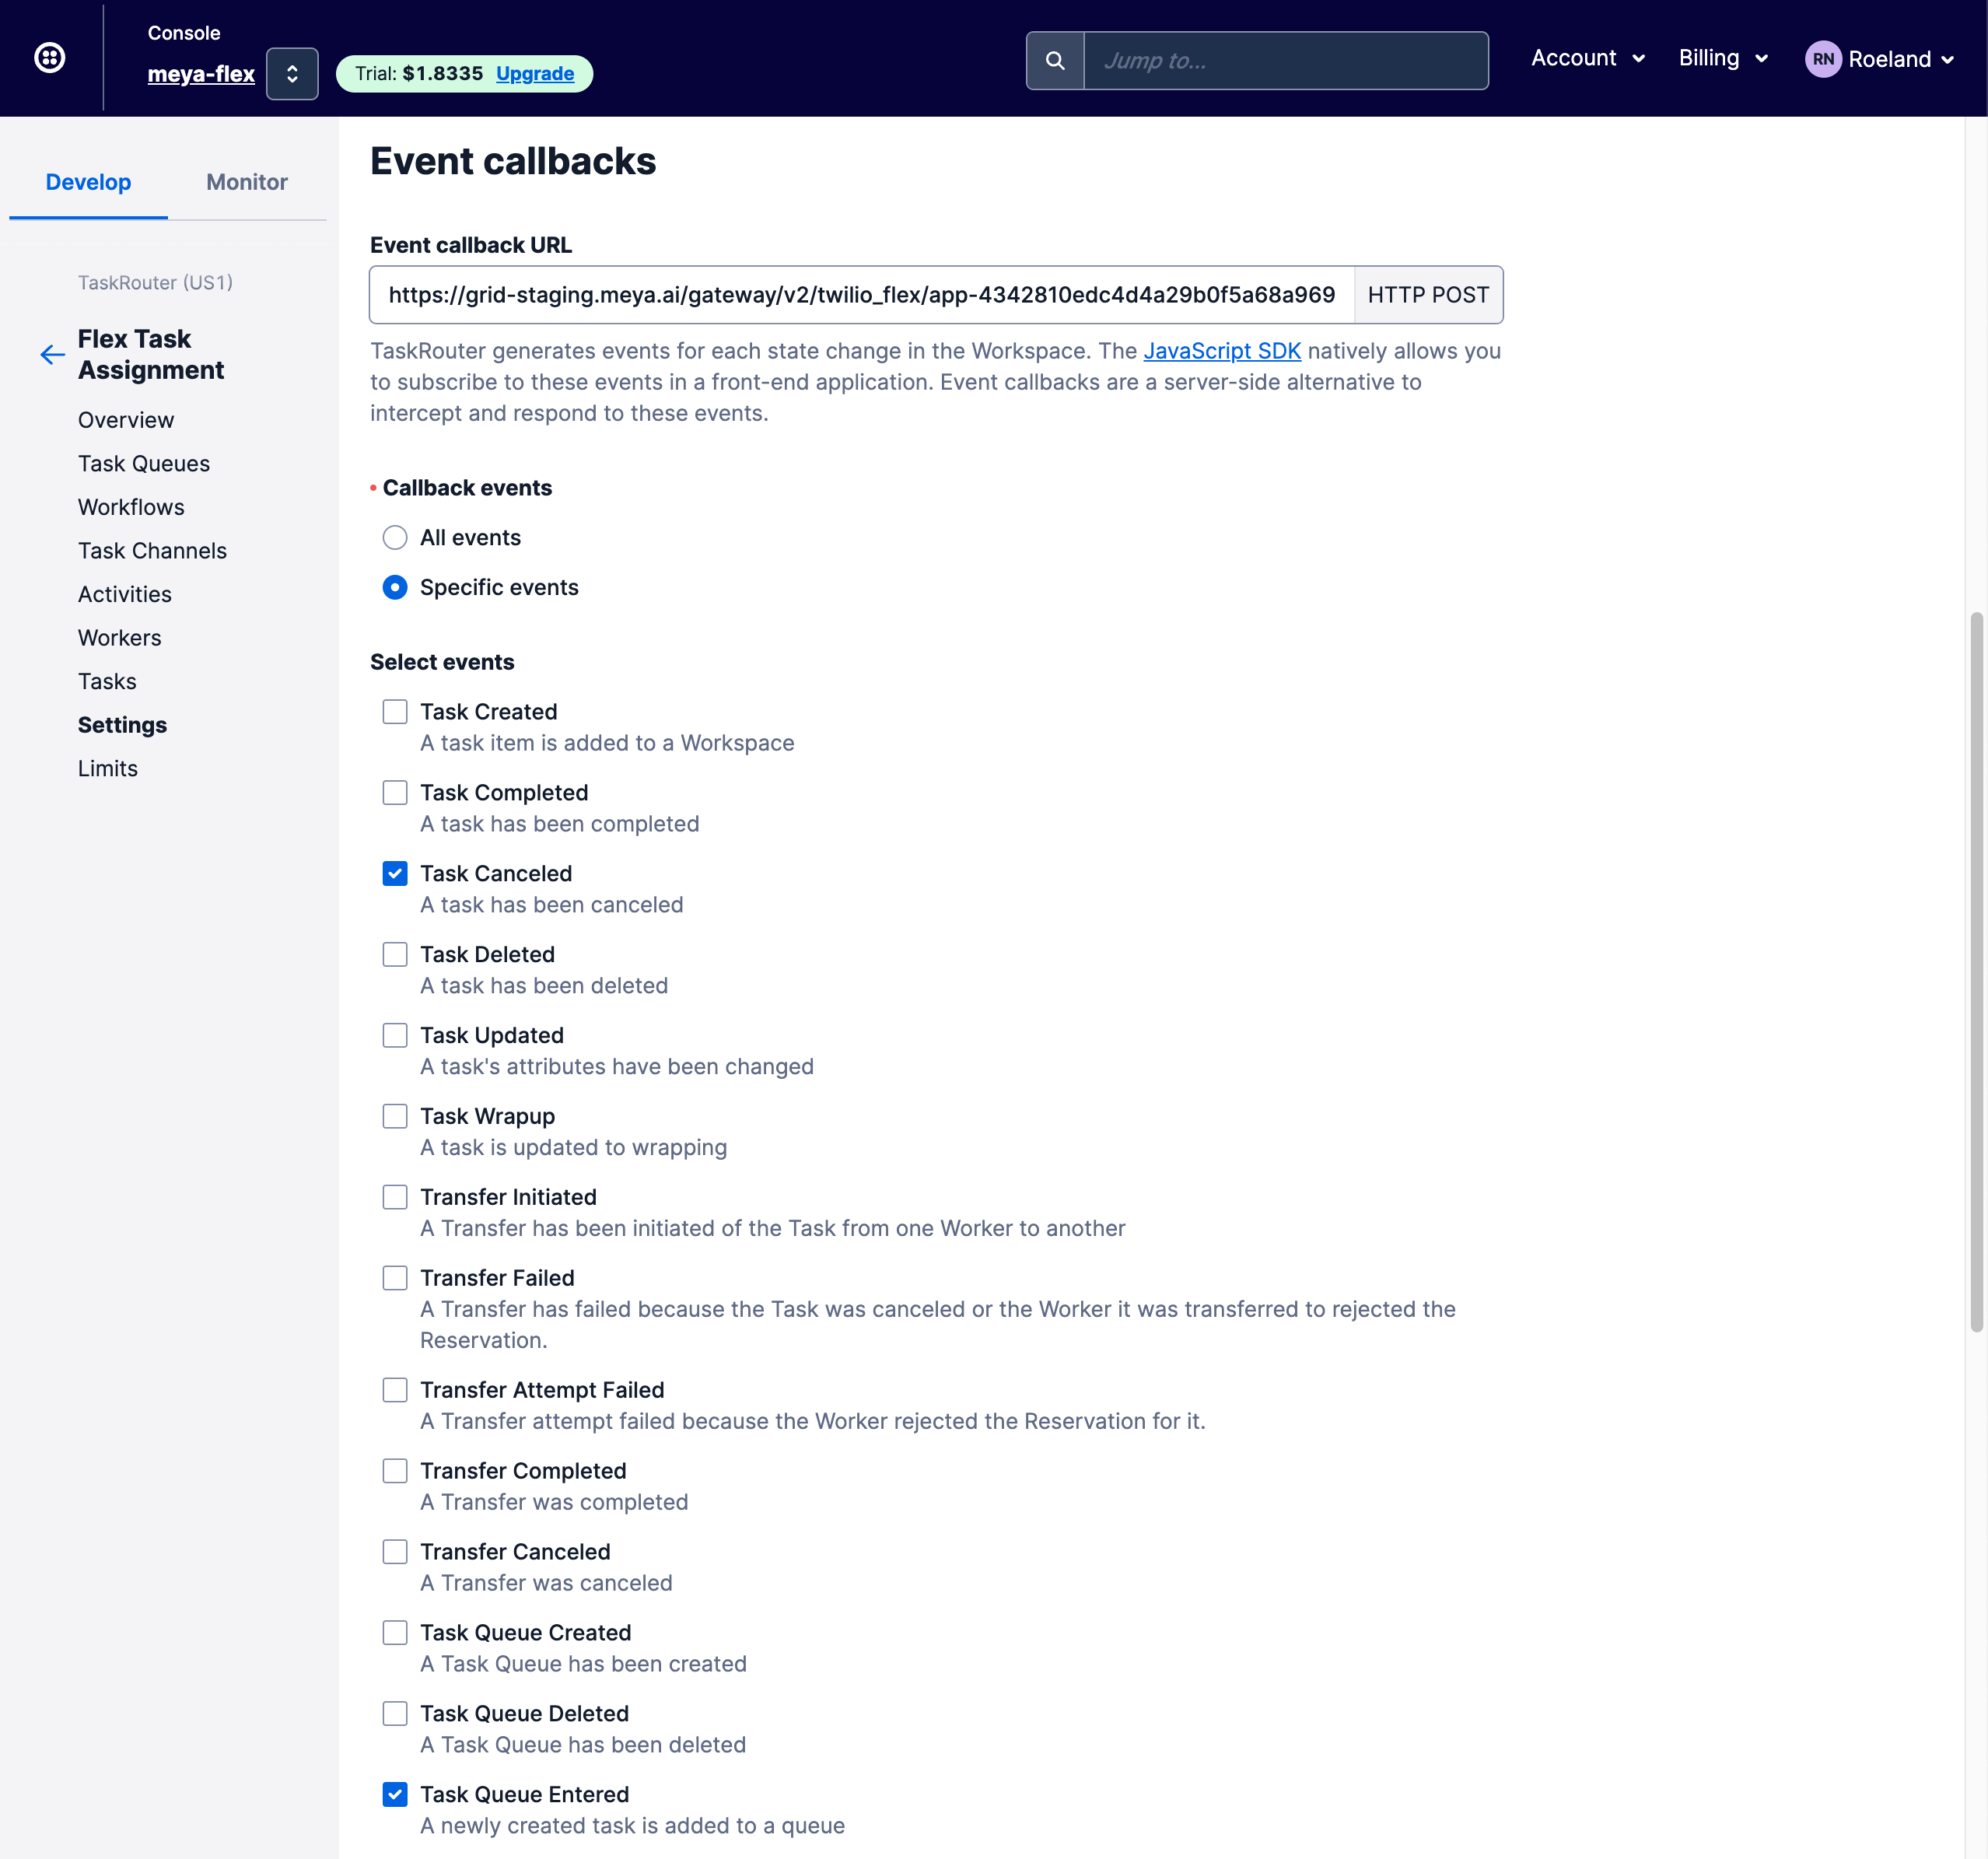
Select Settings from the left-hand menu and scroll down to the Event Callbacks section.
Add your webhook to the Event Callback URL text box.
Set Callback Events to Specific events and select these checkboxes:
Event | Description |
|---|---|
Reservation Accepted | The agent accepted the Task. |
Reservation Completed | The agent ended the chat and marked the Task as complete. |
Task Queue Entered | The user's Task is in a TaskQueue and is waiting to be accepted by an agent. |
Task Canceled | The user's Task has been canceled by an agent. |
Uncheck the other events types and save your changes.
Add the flows
Now that we have our integration set up, let's add a few flows to manage chat with the Flex agent.
Let's keep all of our Flex flows in one folder, so they're easier to manage. Inside your app's flow folder, create a subfolder called twilio. Inside that folder, create another folder called flex. All of the following flows should be stored in the flex folder.
Pre-chat
Let's create a flow that runs whenever the user opens the chat widget. It will ask for some basic info that we can pass to the Flex agent later to give them some context for the chat.
triggers:
  - type: page_open
    when: (@ not thread.page_open )
  - keyword: start

steps:
  - if: (@ user.name )
    then:
      jump: salutation
    else: next
  - ask_form: What's your name?
  - user_set: name

  - (salutation)
  - say: Hello (@ user.name)

  - ask: What type of issue are you experiencing?
    buttons:
      - text: Hardware
        result: hardware
      - text: Software
        result: software

  - say: Cool, let me find someone to help you with that.

  - flow: flow.twilio.flex.start_chat
    data:
      issue: (@ flow.result)
Line 4: This trigger is optional, but makes it easy for you as a developer to re-trigger the flow while you're testing.
Line 28: We send the user's issue to the start_chat flow. We leave it on flow scope since the user may have a different issue each time they chat with the agent (recall that flow scope data is ephemeral).
Start the chat
steps:
  - type: meya.twilio.flex.component.start_chat
    chat_friendly_name: (@ user.name) - (@ flow.issue) issue
    task_attributes:
      language: (@ user.language)
    send_transcript: true
    integration: integration.twilio.flex
Line 3: The chat-friendly name is what will be shown to the Flex agent. By including the user's issue in the name, agents will have some context for the chat before accepting the Task.
Line 4-5: By passing in the user's language as a Task attribute, we could configure Twilio Flex to route the Task to an agent who speaks the user's language. That's beyond the scope of this guide, but it's good to know in case you need to support complex Task routing.
Task attributeTask attribute are a powerful Twilio Flex feature. You can assign multiple attributes to a Task, then use TaskRouter Workflows to assign Tasks to TaskQueues depending on the Task's attributes.
For a more detailed explanation of Flex terminology and how the different Twilio components work together, check out this video.
Receive status updates
We need to let the user know what's going on, especially if your agents are busy and the user will be waiting a while. Let's create a flow that listens to a few key webhook events and posts a status message to the user.
Multiple flows in a single fileSince these flows are short and related to each other, we can include them all in one file. The
---syntax indicates the start of a new flow.Note that when including multiple flows in the same file, we need to give each flow a unique
id.
id: flow.twilio.flex.reservation_accepted
triggers:
  - event_type: meya.twilio.flex.event.reservation_accepted

steps:
  - status: (@ flow.event.data.agent_name ) has joined the chat.
---
id: flow.twilio.flex.reservation_completed
triggers:
  - event_type: meya.twilio.flex.event.reservation_completed

steps:
  - status: (@ flow.event.data.worker_attributes.full_name ) has left the chat.
---
id: flow.twilio.flex.task_queue_entered
triggers:
  - event_type: meya.twilio.flex.event.task_queue_entered

steps:
  - status: You're in the queue. An agent will be with you shortly.

---
id: flow.twilio.flex.task_canceled
triggers:
  - event_type: meya.twilio.flex.event.task_canceled

steps:
  - status: Unfortunately, no agent is available at the moment. Please try again later.
What about queue position updates?Twilio Flex queues don't behave like traditional first in, first out queues. Instead, Flex can be configured to assign priority values to each Task. Tasks with higher priorities will move to the top of the queue. This approach means that there is no way to let the user know how long they'll be waiting in line for an agent.
Test it out
Open up your app's simulator. The pre_chat flow should run automatically, but you can also trigger it with the start keyword.
After filling out some info, you'll be connected to Twilio Flex.
Agents must be availableWhen testing, make sure that an agent has their status set to Available. The agent also needs to be assigned to the TaskQueue the Task was routed to by the TaskRouter workflow.
As the agent, accept the Task and begin chatting with the user. Confirm that the agent's message is displayed to the user, and vice versa.
As the agent, click the End Chat button, then Complete to transfer control back to the Meya app.
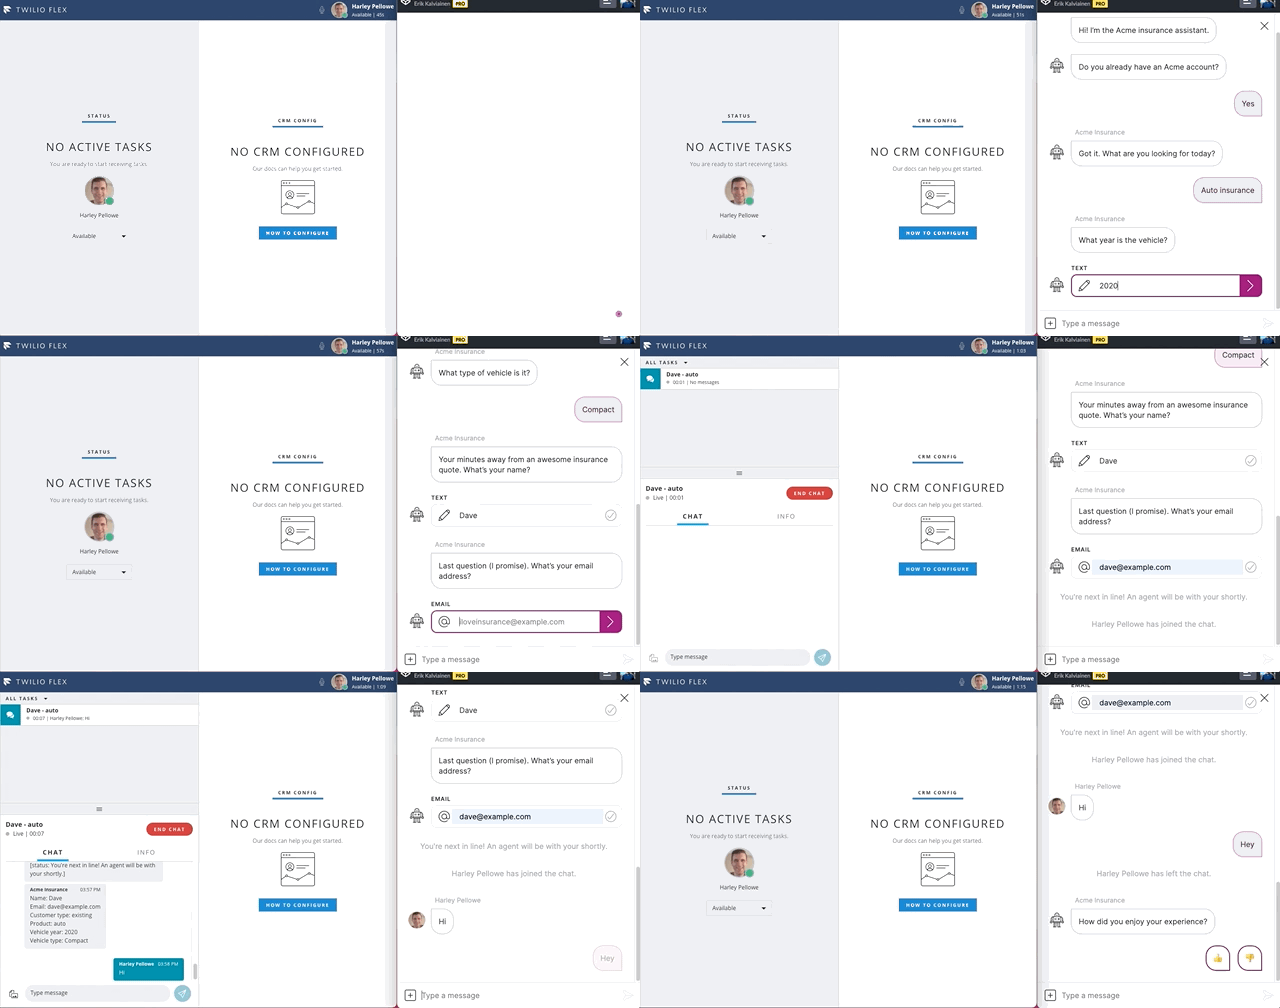
Awesome! You've successfully added the Twilio Flex integration to your Meya app.
Agent commands
Like our other CSP integrations, the Twilio Flex integration supports agent commands.
Agent commandsAgent commands are special phrases agents can send that are not displayed to the user, but instead trigger flows. These commands use the
/prefix, by default. Agent commands make your agents more efficient by letting them offload additional work to the your Meya app.
In your app's flow/twilio/flex folder, create a file called agent_command.yaml and copy this code into it:
triggers:
  - agent_command: ask_issue_frequency

steps:
  - ask: How frequently does the issue occur?
    buttons:
      - text: Once a week
        result: once a week
      - text: Two to four times a week
        result: two to four times a week
      - text: Everyday
        result: everyday
      - text: Multiple times a day
        result: multiple times a day
Line 2: The agent_command trigger will be matched whenever an agent sends the message: /ask_issue_frequency.
Thread modeNormally, when a user is chatting with an agent, the thread mode is set to
agent. Agent commands cause the bot to temporarily be active while the flow is running. Once the flow is complete, the bot becomes inactive so it doesn't interfere with the conversation.
Updated 8 months ago
