Custom components
This guide will walk you through the basics of how to develop custom components for your Meya app.
Before you begin
This guide assumes you already have a your local environment set up for development on the Meya platform and that you’re connected to a test app you can experiment with.
If you’re using a virtual environment, make sure it’s activated.
If you haven’t setup your local environment yet, check out Getting started with local Meya development.
Creating a component
Let’s build a simple component that welcomes the user.
- Run this command in the terminal so your code changes will be automatically pushed to the Meya platform:
meya push --watch-
Inside your app’s root folder, create a folder called
component, if it doesn’t already exist. Inside thecomponentfolder, create a file calledwelcome.py. -
Copy this code into
welcome.pyand save. In your terminal, you should see the code being pushed automatically.
from dataclasses import dataclass
from meya.component.element import Component
from meya.entry import Entry
from meya.text.event.say import SayEvent
from typing import List


@dataclass
class WelcomeComponentElement(Component):

    async def start(self) -> List[Entry]:
        text = f"Welcome, friend!"
        text_event = SayEvent(text=text)
        return self.respond(text_event)
Here are some important things to notice:
- All components are subclasses of the Component class (lines
2and10). - All components must override the
startmethod, which is the main point of entry (line12). - The
startmethod must be async (line12). - The
startmethod returns a list of entries to publish (List[Entry]) and can optionally return some data to the flow scope as well.
Using a component
Now that we’ve created our component, let’s create a flow that uses it.
- In your app’s root folder, create a subfolder called
flow,if it doesn’t already exist. Inside theflowfolder, create a file calledwelcome.yamland copy/paste this code:
triggers:
  - keyword: welcome

steps:
  - type: component.welcome
Notice how we reference our component using component.<COMPONENT_FILENAME>. Subfolders are also supported, which makes organizing your code much easier. For example, if your component folder looks like this:

You would reference it in BFML like this:
- type: component.general.welcome
The rest of this guide assumes yourwelcome.pyfile is still located directly within thecomponentfolder. If you moved it to test out the nested folder structure, it’s recommended you move it back into thecomponentfolder before continuing.
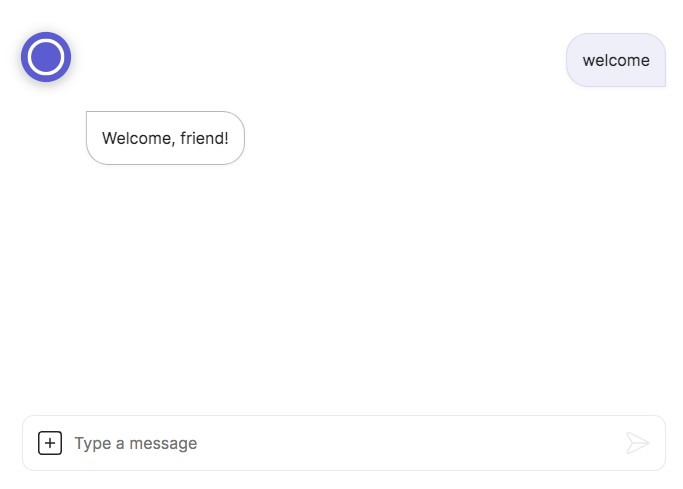
Go ahead and save the file. After it uploads, go to the app’s simulator located in the Grid console and test it with the keyword welcome.

You now have a basic custom component working!
Adding properties
Often, you’ll want to provide input to your component. One way of doing that is through properties.
So far we’ve been welcoming our users with a generic greeting. Let’s change that now.
Required properties
- In
welcome.py, importelement_field:
from meya.element.field import element_fieldAdd a new property called name:
@dataclass
class WelcomeComponentElement(Component):
    name: str = element_field()
Finally, let’s update the response text to use the new property:
text = f"Welcome, {self.name}!"The finished code should look like this:
from dataclasses import dataclass
from meya.component.element import Component
from meya.element.field import element_field
from meya.entry import Entry
from meya.text.event.say import SayEvent
from typing import List


@dataclass
class WelcomeComponentElement(Component):
    name: str = element_field()

    async def start(self) -> List[Entry]:
        text = f"Welcome, {self.name}!"
        text_event = SayEvent(text=text)
        return self.respond(text_event)
If you save the file, you’ll notice an error in the terminal:

Since name is a required property, we need to update our BFML code to provide a value. Update welcome.yaml so it looks like this:
triggers:
  - keyword: welcome

steps:
  - type: component.welcome
    name: Kermit
Save the file and give it a test in the simulator.

You now know how to add properties to your components.
Optional properties
Right now name is a required property. We can make it optional by specifying a default value in the component code. Update welcome.py so it looks like this:
from dataclasses import dataclass
from meya.component.element import Component
from meya.element.field import element_field
from meya.entry import Entry
from meya.text.event.say import SayEvent
from typing import List


@dataclass
class WelcomeComponentElement(Component):
    name: str = element_field(default="friend")

    async def start(self) -> List[Entry]:
        text = f"Welcome, {self.name}!"
        text_event = SayEvent(text=text)
        return self.respond(text_event)
Notice the change on line 11.
You can also specifydefault_factorywhich takes a zero-argument callable that will be called when a default value is needed for this field. For example, generate an empty list like this:my_list: list = element_field(default_factory=list)
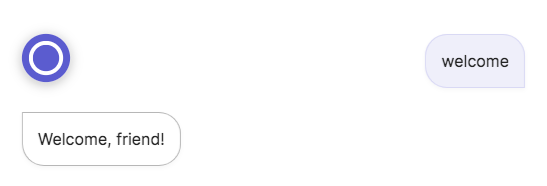
In the welcome.yaml flow, remove the name property, save and push the file, then test the flow in the simulator. Since we didn’t specify a value for name, you should see the default value:

You now know how to make properties optional and provide default values for them.
Signature properties
Many of the built-in components have a shorthand way of referring to them called a signature. This makes writing BFML code faster. You can easily create signatures for your custom components as well.
Built-in components
First let’s take a look at the normal way of referring to a component:
steps:
  - type: meya.button.component.ask
    buttons:
      - text: Result 1
        result:
          key: 1
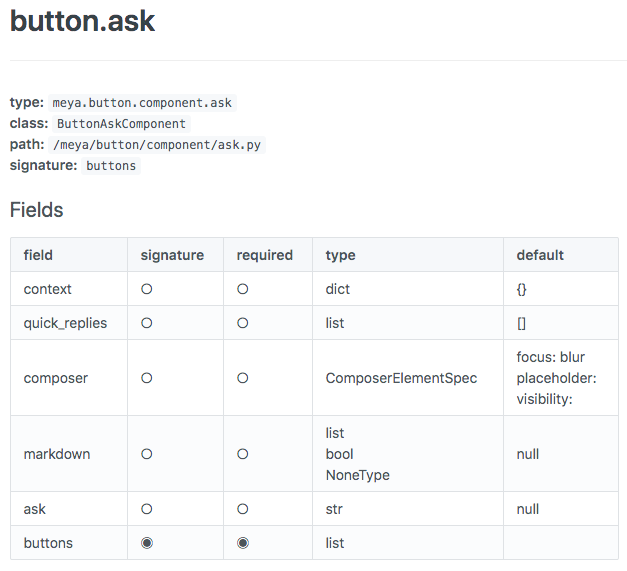
If you refer to the documentation for this component, you’ll see that the buttons property is designated as the signature for this component.

So instead of specifying the component’s type, we can just use the signature:
steps:
  - buttons:
      - text: Result 1
        result:
          key: 1
Custom components
Let’s take a look at how to create a signature for a custom component.
- Open
component/welcome.py. If you’ve been following along with this guide, the code should look like this:
from dataclasses import dataclass
from meya.component.element import Component
from meya.element.field import element_field
from meya.entry import Entry
from meya.text.event.say import SayEvent
from typing import List


@dataclass
class WelcomeComponentElement(Component):
    name: str = element_field(default="friend")

    async def start(self) -> List[Entry]:
        text = f"Welcome, {self.name}!"
        text_event = SayEvent(text=text)
return self.respond(text_event)- In the
element_fieldfor the name property, setsignature=True:
name: str = element_field(default="friend", signature=True)- Open
flow/welcome.yamland update the code to look like this:
triggers:
  - keyword: welcome

steps:
  - name: Bill
Save the files. Test out the change in the simulator.
You can now create signatures for your components. This gives you an easier way of referring to them than using their fully qualifiedtype.
Returning results to the flow
Often you’ll want to have a component do some work and return a result to the flow.
Best practice for component inputs and outputs
Although it is possible to read user, thread, and flow scope data from within a component, it is better to explicitly define the component’s expected input properties.
Likewise, while a component can write user, thread, and flow scope data itself, it is better to return a response object to the flow and use a user_set, thread_set, or flow_set component to explicitly save the output. This makes your code more readable since it’s possible to understand what a component is doing just by reviewing the BFML code.
Compare these two example:
BAD example
from dataclasses import dataclass
from meya.component.element import Component
from meya.entry import Entry
from random import randint
from typing import List


@dataclass
class WelcomeComponentElement(Component):

    async def start(self) -> List[Entry]:
        name = self.user.name or "friend"
        self.user.greeting = f"Welcome, {name}!"
        self.user.random_int = randint(1, 100)
return self.respond()triggers:
- keyword: welcome_bad
steps:
- type: component.welcome
- say: (@ user.greeting ) Your number is (@ user.random_int )GOOD example
from dataclasses import dataclass
from meya.component.element import Component
from meya.element.field import element_field
from meya.element.field import response_field
from meya.entry import Entry
from random import randint
from typing import List


@dataclass
class WelcomeComponentElement(Component):
    name: str = element_field(default="friend")

    @dataclass
    class Response:
        num: int = response_field()
        greeting: str = response_field()

    async def start(self) -> List[Entry]:
        text = f"Welcome, {self.name}!"
        n = randint(1, 100)
        response_data = self.Response(
            num=n,
            greeting=text
        )
return self.respond(data=response_data)triggers:
- keyword: welcome
steps:
- type: component.welcome
name: Bill
- user_set:
random_int: (@ flow.num )
greeting: (@ flow.greeting )
- say: (@ user.greeting ) Your number is (@ user.random_int )
The above example contains a customResponseclass, but the Meya SDK also provides a built-inComponentResponseclass you can use. It takes any kind of data and stores it atflow.result. The class definition looks like this:@dataclass class ComponentResponse: result: Any = response_field()Here’s an example of it in use:
from dataclasses import dataclass
from meya.component.element import Component
from meya.component.element import ComponentResponse
from meya.entry import Entry
from typing import List


@dataclass
class HttpGetComponent(Component):
    async def start(self) -> List[Entry]:
        response = await self.http.get("https://httpbin.org/json")
        return self.respond(data=ComponentResponse(response.data))
You can now return data from your custom components.
Async Python
The Meya v2 platform runs on async Python. This enables multiple elements to run in parallel in a single Python process. When one async task is doing I/O (e.g. network communication), another task can start running.
Because the component start method is declared async, you can use the await keyword to run other async methods. For example, you can use response = await self.http.get("https://httpbin.org/json") to make an HTTP GET request or use await asyncio.sleep(1) to delay (like the builtin time.delay component).
No blocking I/ODo not use blocking I/O in your custom element code. If your custom element blocks on I/O, this will block the Python event loop, restricting your app's ability to process entries in parallel. This will cause delays or timeouts for your app's end users.
Examples of blocking I/O include built-in Python libraries like io (for reading/writing files) and urllib.request. The time.sleep method also blocks the event loop. The third-party requests library also uses blocking I/O.
To avoid using blocking I/O, you need to find a library that achieves the same result using async I/O. Some functionality is included in the Meya SDK.
If you need help switching to async Python, contact us at [email protected].
Testing your component
You can, and should, add unit tests for custom component code. The Meya CLI uses pytest for testing. To run your tests, use the meya test command in your terminal.
Let’s write a sample unit test.
- In your app’s root folder, add a file called
pytest.ini, if it doesn’t already exist. Copy this code into the file:
[pytest]
python_files = *_test.py
norecursedirs = .direnv .git .idea .meya .pytest_cache node_modules venv __pycache__
filterwarnings = ignore::DeprecationWarning:jinja2
This file tells pytest to run Python test files that end in _test.py. It also tells pytest not to look for tests in certain directories, and to not print certain warnings in the test results.
- If you’ve been following along with this guide, you should have a file called
component/welcome.pythat looks like the code below. If you don’t have this file yet, create it now.
from dataclasses import dataclass
from meya.component.element import Component
from meya.element.field import element_field
from meya.element.field import response_field
from meya.entry import Entry
from random import randint
from typing import List


@dataclass
class WelcomeComponentElement(Component):
    name: str = element_field(default="friend")

    @dataclass
    class Response:
        num: int = response_field()
        greeting: str = response_field()

    async def start(self) -> List[Entry]:
        text = f"Welcome, {self.name}!"
        n = randint(1, 100)
        response_data = self.Response(num=n, greeting=text)
        return self.respond(data=response_data)
In the component folder, create a new file called welcome_test.py and enter the following code:
import pytest
import random

from component.welcome import WelcomeComponentElement
from meya.element.element_test import create_component_start_entry
from meya.element.element_test import create_flow_next_entry
from meya.element.element_test import verify_process_element

random.seed(0)


@pytest.mark.asyncio
async def test_component():
    component = WelcomeComponentElement()
    component_start_entry = create_component_start_entry(component)
    flow_next_entry = create_flow_next_entry(
        component_start_entry, dict(greeting="Welcome, friend!", num=50)
    )
    await verify_process_element(
        component, component_start_entry, [flow_next_entry]
    )
Save the file.
The Meya SDK comes with several classes and functions that make testing easier.
create_component_start_entrytakes a component and returns aComponentStartEntrywhich defines the starting conditions of the test.create_flow_next_entrytakes theComponentStartEntry, plus our expected output data and generates aFlowNextEntry.verify_process_elementtakes theWelcomeComponentElement, theComponentStartEntryand a list of entries we expect to be published after running the component (in this caseFlowNextEntry).
- In your terminal, run:
meya testThe output should look like the image below, indicating the tests have passed.

Reviewmeya/element/element_test.pyto see other functions and classes that are available to help you test your code.
You now know how to test your custom components.
Updated 9 months ago
