Salesforce Live Agent
Embed chat support on your website — and in your apps — with Live Agent. Don’t lose customers over confusion or questions. Support your customers and prospects while they’re still on your site or in your app with real-time, live chat software.
By connecting each live chat with the complete customer profile, answers can be delivered both in context and with an eye toward the overall customer experience. Chats can be quickly routed to the right subject matter experts. And agents can provide answers faster with a sneak peek to customer chat and keyboard shortcuts to pre-written messages.
Take a look at Meya's Salesforce Live Agent integration in action:
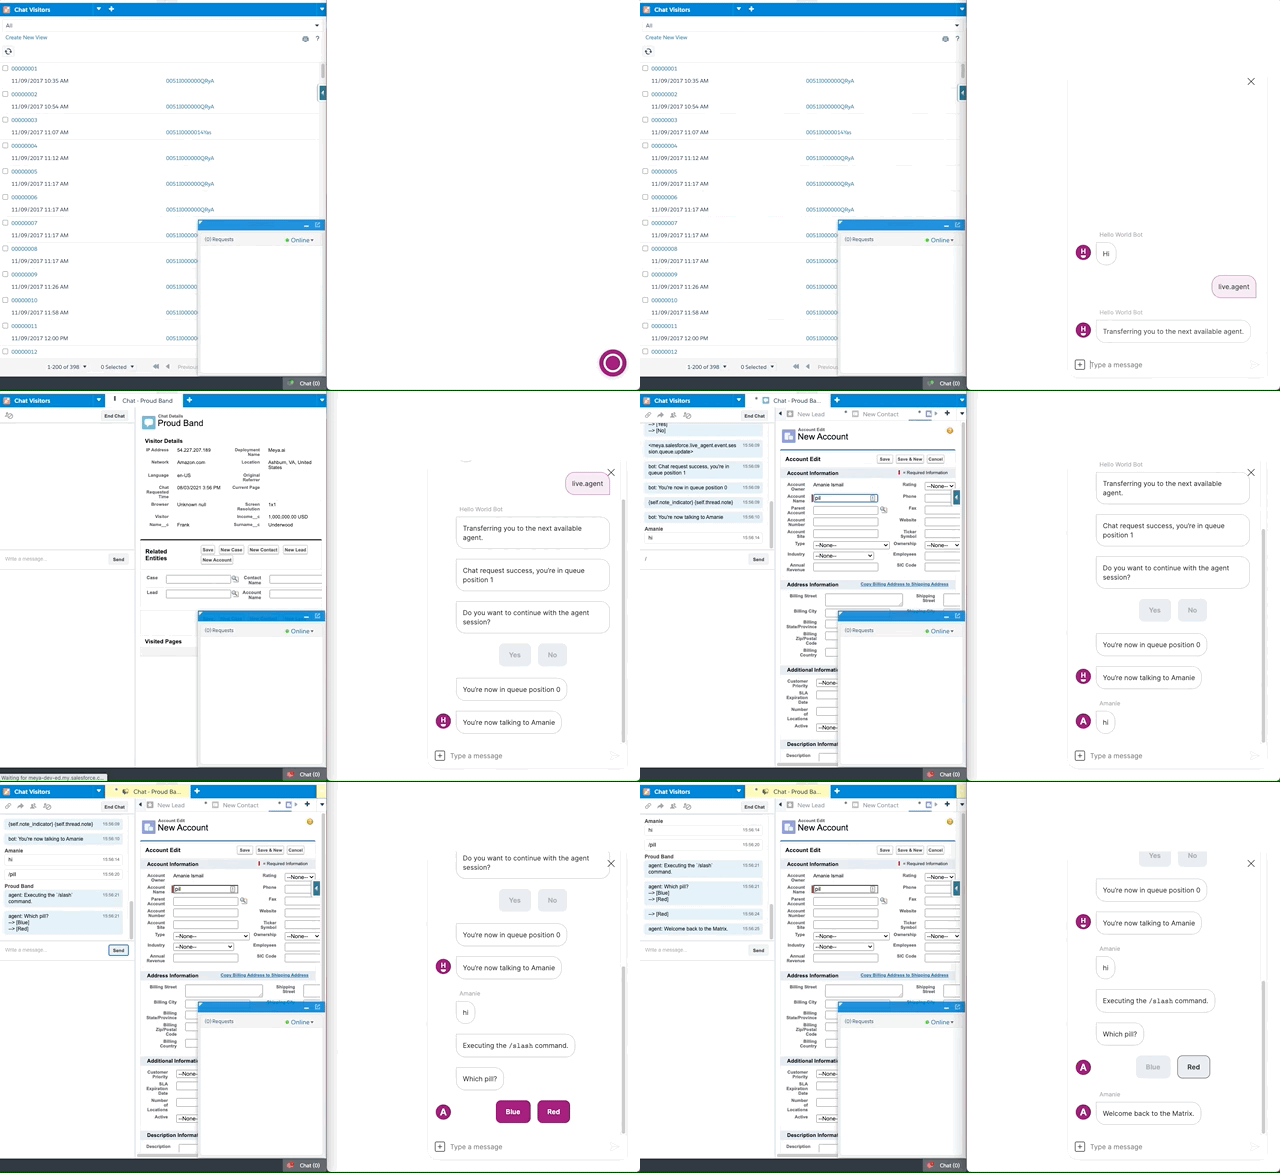
Keep reading to learn how to connect your app to Salesforce Live Agent.
Enable Live Agent in Salesforce
First, let's make sure you have a working setup of Live Agent within your Salesforce organization. Click here for detailed instructions on setting up Live Agent.
Retrieve Live Agent credentials
As a Salesforce administrator, navigate to the Salesforce Setup page (make sure you switch to Classic view, the Live Agent settings do not come up under the Lightning Experience view).
API endpoint
In the left-hand menu, navigate to Build > Customize > Chat > Chat Settings.
Look for the Live Agent API Endpoint text box and copy this URL somewhere since we'll need it shortly.

The Live Agent API Endpoint.
Organization ID
Go to the Administer > Company Profile > Company Information page and look for the Salesforce.com Organization ID field. Copy this Organization ID somewhere since we'll need it as well.
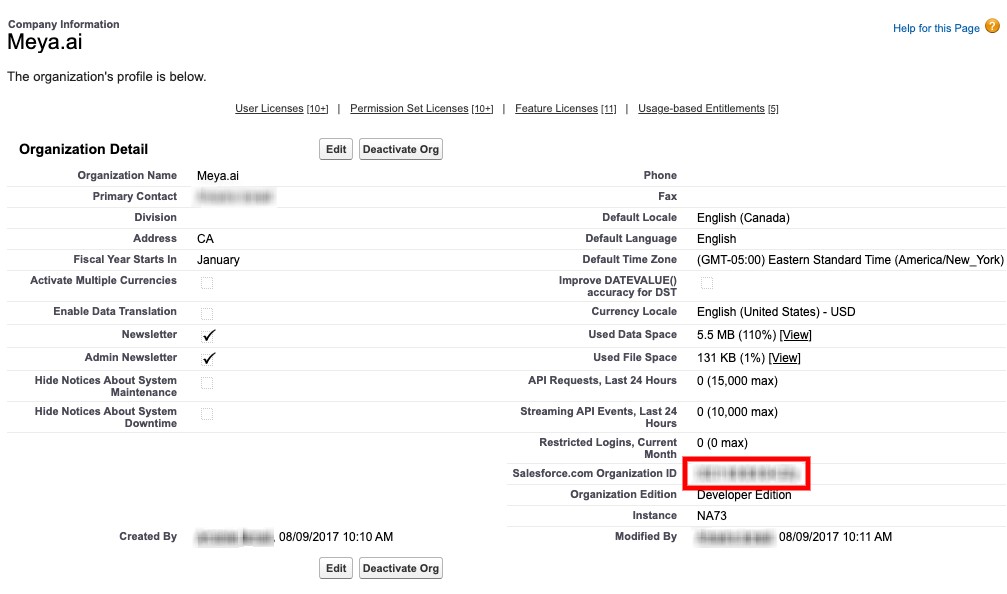
Deployment ID
Next, navigate to the Build > Customize > Chat > Deployments page, and click on the deployment which you would like to use for this integration. Make a note of the Deployment ID, which is the string of characters after the last / in the URL. For example: https://meya-dev-ed.my.salesforce.com/5721I000000PLax
Button ID
Finally, go to the Build > Customize > Chat > Chat Buttons & Invitations page, and click on the button which you would like to use for this integration. The Button ID is the string of characters after the last / in the URL. For example: https://meya-dev-ed.my.salesforce.com/5731I000000PL9G
Add the integration secrets
Now that you've collected your Live Agent credentials, it's time to add them to your app's vault.
In your app's root folder, open vault.yaml and add the following lines:
live_agent.api_endpoint: xxx
live_agent.organization_id: xxx
live_agent.deployment_id: xxx
live_agent.button_id: xxx
Do not put your actual account key invault.yaml. Recall that this file is committed to version control and shouldn’t contain actual secrets. It’s intended to be used as a reference for developers.
Next, open vault.secret.yaml and copy this code into it:
live_agent.api_endpoint: xxx
live_agent.organization_id: xxx
live_agent.deployment_id: xxx
live_agent.button_id: xxx
Make sure to replacexxxwith your actual secrets.
Save the file and upload the new secrets to your vault by running this command in your terminal:
meya vault upload --file vault.secret.yamlAdd the integration
With the secrets stored in the vault, we can now refer to them in the integration file.
In your app's integration folder, create a new file called live_agent.yaml and copy this code into it:
type: meya.salesforce.live_agent.integration
api_endpoint: (@ vault.live_agent.api_endpoint )
organization_id: (@ vault.live_agent.organization_id )
deployment_id: (@ vault.live_agent.deployment_id )
button_id: (@ vault.live_agent.button_id )
Create the flows
The Live Agent integration supports many callbacks for events like "chat ended", "queue position updated", and more. Handling these callbacks is not mandatory, but is recommended since they keep the user up-to-date about what is happening.
In your app's flow folder, create a subfolder called salesforce. Inside the salesforce folder, create a file called live_agent.yaml and copy this code into it:
id: flow.live_agent.request_agent
triggers:
  - regex: live.agent
    ignorecase: true

steps:
  - open_chat
  - type: meya.csp.component.session.agent.request
    say: Transferring you to the next available agent.
    integration: integration.live_agent
    note: Here is a note for the agent.
    data:
      Name__c: Frank
      Surname__c: Underwood
      Income__c: 1,000,000.00 USD
---
id: flow.live_agent.chat_request_failed
triggers:
  - event_type: meya.salesforce.live_agent.event.session.agent.request.error

steps:
  - say: Chat request failed.
---
id: flow.live_agent.chat_request_success
triggers:
  - event_type: meya.salesforce.live_agent.event.session.agent.request.ok

steps:
  - say: Chat request success, you're in queue position (@ flow.event.data.queue_position
      | int )
  - if: (@ flow.event.data.queue_position > 0 )
    then:
      flow: flow.live_agent.end_session
      transfer: true
    else: end
---
id: flow.live_agent.chat_ended
triggers:
  - event_type: meya.salesforce.live_agent.event.session.ended

steps:
  - say: Chat ended.
---
id: flow.live_agent.chat_established
triggers:
  - event_type: meya.salesforce.live_agent.event.session.established

steps:
  - say: You're now talking to (@ flow.event.data.agent_name )
---
id: flow.live_agent.transfer_to_button
triggers:
  - event_type: meya.salesforce.live_agent.event.session.transfer_to_button

steps:
  - say: |
      (@ flow.event.data.agent_name ) is transferring you, please wait for the
      next available agent.
---
id: flow.live_agent.agent_transfer
triggers:
  - event_type: meya.salesforce.live_agent.event.session.assign

steps:
  - say: You've been transferred to (@ flow.event.data.agent_name )
---
id: flow.live_agent.agent_join
triggers:
  - event_type: meya.salesforce.live_agent.event.session.agent.conference.join

steps:
  - say: (@ flow.event.data.agent_name ) has joined the conversation.
---
id: flow.live_agent.agent_leave
triggers:
  - event_type: meya.salesforce.live_agent.event.session.agent.conference.leave

steps:
  - say: (@ flow.event.data.agent_name ) has left the conversation.
---
id: flow.live_agent.agent_disconnect
triggers:
  - event_type: meya.salesforce.live_agent.event.session.agent.disconnect

steps:
  - say: The agent has disonnected
  - flow: flow.live_agent.end_session
    transfer: true
---
id: flow.live_agent.queue_update
triggers:
  - event_type: meya.salesforce.live_agent.event.session.queue.update
    # This prevents event spoofing
    # TODO: We need to create a meya.trigger.system_type trigger with the check built in
    when: (@ event_user.type.system )

steps:
  - say: You're now in queue position (@ flow.event.data.position | int )
  - if: (@ flow.event.data.position > 0 )
    then:
      flow: flow.live_agent.end_session
      transfer: true
    else: end
---
id: flow.live_agent.end_session
steps:
  - ask: Do you want to continue with the agent session?
    buttons:
      - text: Yes
        result:
          option: yes
      - text: No
        result:
          option: no
  - if: (@ flow.result.option == "no" )
    then: next
    else: end
  - type: meya.csp.component.session.end
    integration: integration.live_agent
---
id: flow.live_agent.command.pill
triggers:
  - agent_command: ^.*pill.*

steps:
  # Publish as the agent
  - flow_set:
      event_user_id: (@ flow.event.data.user_id )
  - say: Executing the `/slash` command.
  - ask: Which pill?
    buttons:
      - text: Blue
        action:
          jump: blue_pill
      - text: Red
        action:
          jump: red_pill

  - (blue_pill)
  - say: Welcome to the real world!
  - thread_set:
      mode: blue
  - end

  - (red_pill)
  - say: Welcome back to the Matrix.
  - thread_set:
      mode: red
  - end
---
id: flow.live_agent.command.training
triggers:
  - agent_command: training
    when: (@ thread.mode == "blue" )

steps:
  # Publish as the agent
  - flow_set:
      event_user_id: (@ flow.event.data.user_id )
  - say: Neo training
  - url: https://media.giphy.com/media/V2ojLo7PvhVug/giphy.gif
    alt: Neo gestures "come on"
---
id: flow.live_agent.command.matrix
triggers:
  - agent_command: matrix
    when: (@ thread.mode == "red" )

steps:
  # Publish as the agent
  - flow_set:
      event_user_id: (@ flow.event.data.user_id )
  - say: This is what the matrix looks like
  - url: https://media.giphy.com/media/fV0oSDsZ4UgdW/giphy.gif
    alt: The Matrix visible as flowing green code
Multiple flows per fileDid you know you can define multiple flows in a single file? This is a handy feature when you have several short related flows, like we do in this example.
The
---indicates the end of one flow and the beginning of the next.Remember that when you have multiple flows in a single file, you need to specify an
idfor each flow, like you see in the example code above.
The file above contains multiple flows, one per callback. If you need to handle one of the callbacks in a more detailed way, consider removing the flow from this file and placing it in its own flow file.
Save the file, then upload your work using these commands in your terminal:
meya format
meya push
Test it out
Log in to Live Agent and set your status to Online.
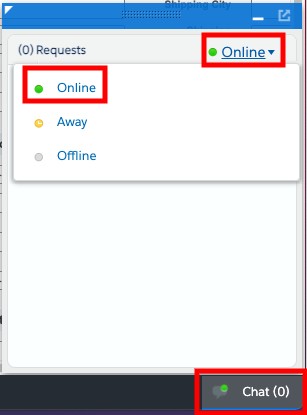
Make sure an agent is online.
In your app's Simulator, enter live.agent to trigger the Live Agent transfer flow. You should see some messages updating you on the status of your request.
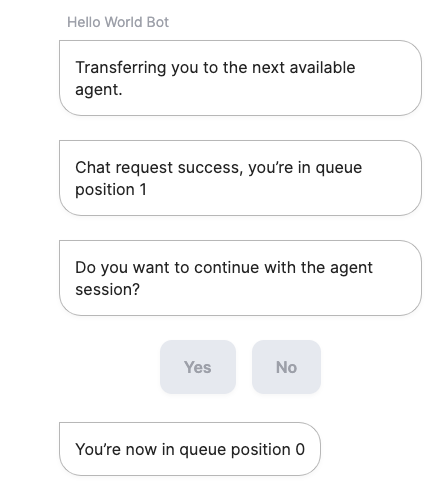
In Live Agent, accept the chat request.
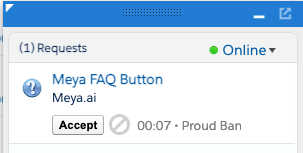
Try sending a message as the agent and as the user.
Success!You've set up the Salesforce Live Agent integration.
Keep reading to learn how to maximize agent efficiency with slash commands.
Slash commands
Slash commands can be used to collect additional information from the user, to tell your app to process data, or to send instructions to a backend system. Let's see how it works in Live Agent.
If you were following the setup guide above, your live_agent.yaml flow already includes a slash command you can test. Here's what the code looks like:
id: flow.live_agent.command.pill
triggers:
  - agent_command: ^.*pill.*

steps:
  # Publish as the agent
  - flow_set:
      event_user_id: (@ flow.event.data.user_id )
  - say: Executing the `/slash` command.
  - ask: Which pill?
    buttons:
      - text: Blue
        action:
          jump: blue_pill
      - text: Red
        action:
          jump: red_pill

  - (blue_pill)
  - say: Welcome to the real world!
  - thread_set:
      mode: blue
  - end

  - (red_pill)
  - say: Welcome back to the Matrix.
  - thread_set:
      mode: red
  - end
Line 3: We're using the agent_command trigger, which means an agent could enter a reply like /pill and, instead of sending the phrase /pill to the user, the app will run this flow.
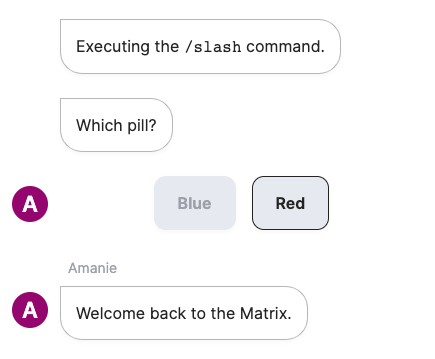
Running a slash command.
Updated 9 months ago
