Amazon Alexa
How to set up an Amazon Alexa integration
Amazon Alexa is one of the most popular voice assistants. Voice is the most natural user interface. With Meya’s Alexa integration, you can enable your users to use their voices to easily access your Meya app—wherever they are and whatever they’re doing.
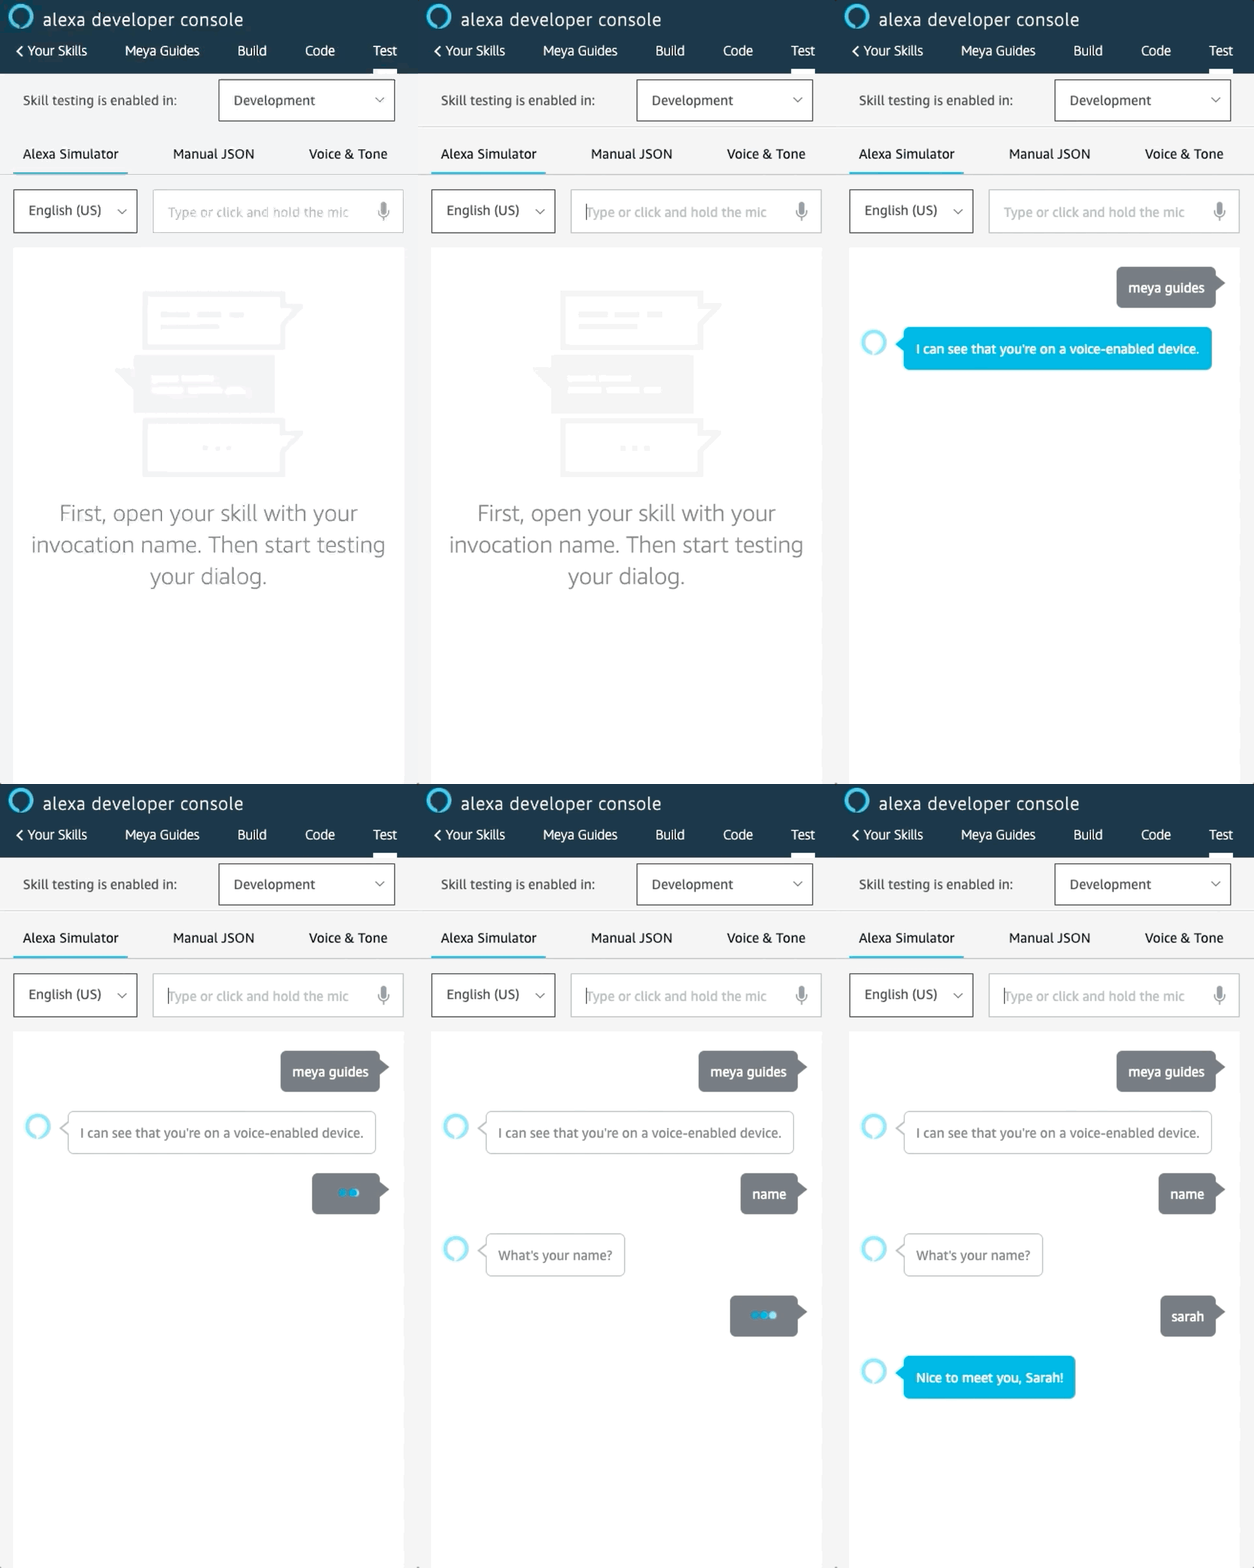
Check out this demo conducted in the Alexa Simulator:
Ready to get started?
Create an Alexa skill
First, let’s create a new Alexa skill.
An Alexa skill is like an app. It determines how users can interact with the skill. It can also be configured to user utterances to your Meya app so it can handle and respond to them.
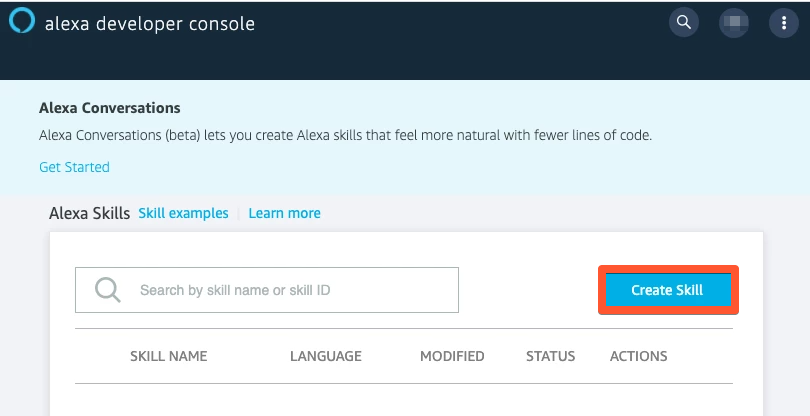
Log in to your Alexa Developer Console. Click Create Skill.
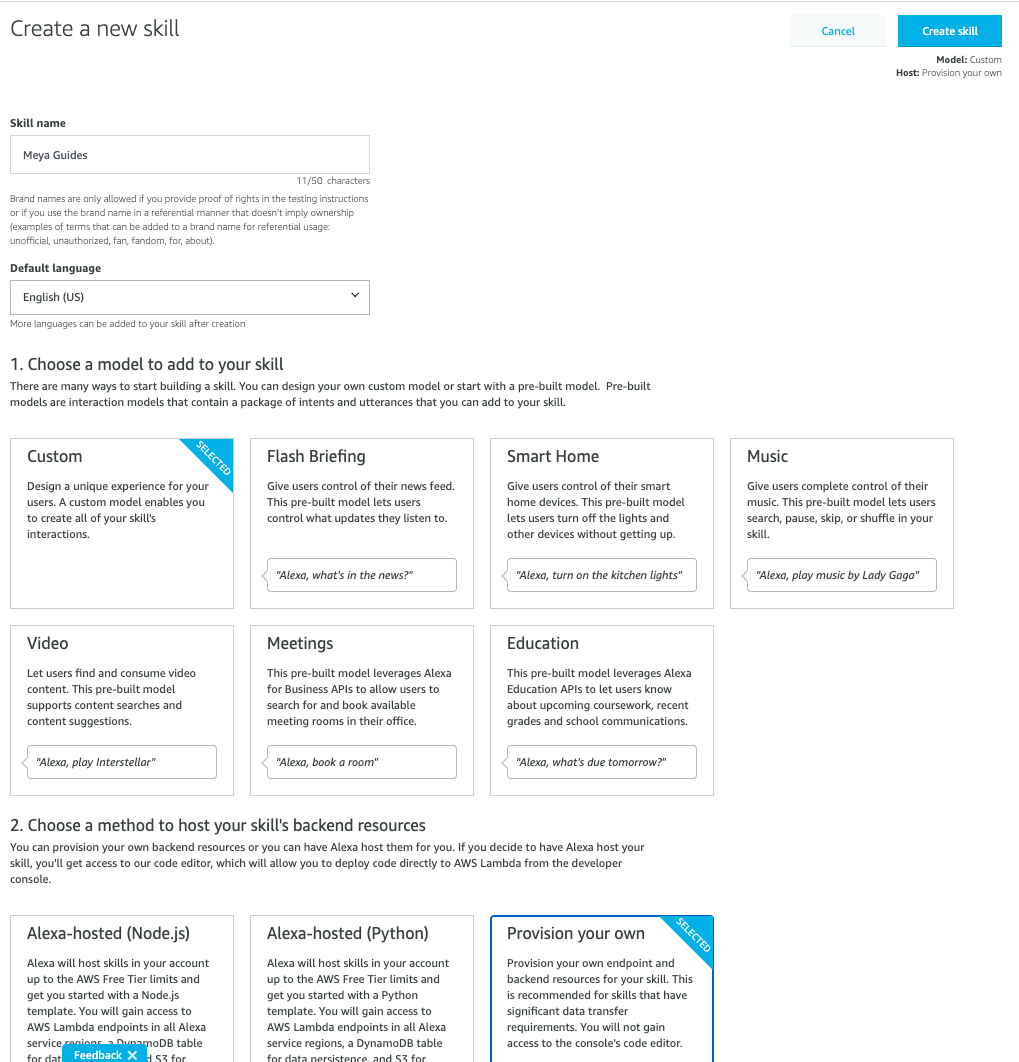
Enter a name for your skill. Choose a default language (you can add more later, as well). Select the Custom model, then choose Provision your own as the method for hosting the backend.
When you’re finished, your settings should look something like this:
Click Create skill.
Select the Start from Scratch template. This will generate a basic “Hello, World” skill for us. This is fine, because the real application logic will be held within the Meya app.
Click the Choose button.
Add an invocation
You should now be on your skill’s dashboard page. Click the Build tab, then choose Invocation from the left-hand menu.
An invocation is a short phrase users can say to activate your Alexa skill. There are several considerations to make when picking a good invocation phrase, as well as rules Amazon enforces.To learn more, check out the documentation.
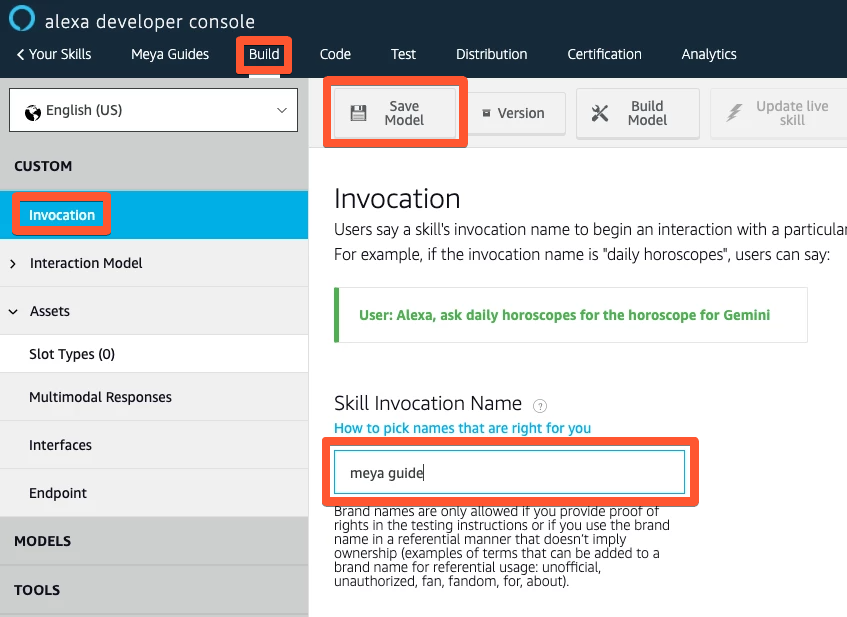
Click Save Model when you’re finished.
Add the interaction model
An interaction model tells Alexa how to handle different intents. A few intents are mandatory to handle, such as CancelIntent, HelpIntent, StopIntent, and NavigateHomeIntent. Our model will also have a CatchAll intent that will handle all other intents.
Click the Build tab, then expand the Interaction Model section of the left-hand menu. Choose JSON Editor.
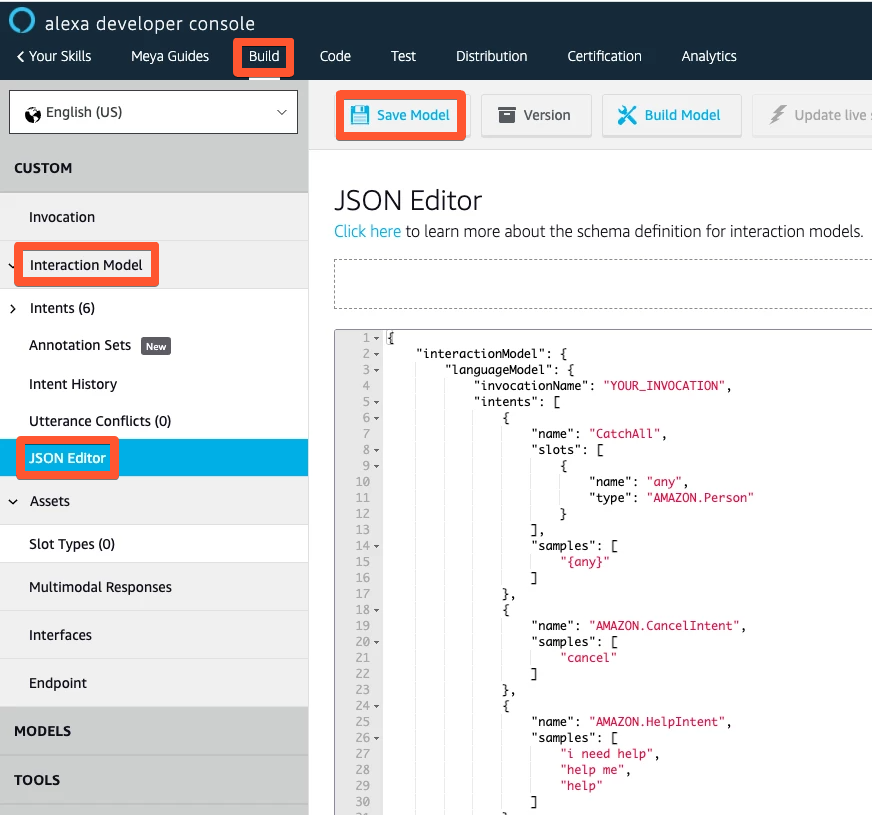
Copy this JSON into the editor:
{
    "interactionModel": {
        "languageModel": {
            "invocationName": "YOUR_INVOCATION",
            "intents": [
                {
                    "name": "CatchAll",
                    "slots": [
                        {
                            "name": "any",
                            "type": "AMAZON.Person"
                        }
                    ],
                    "samples": [
                        "{any}"
                    ]
                },
                {
                    "name": "AMAZON.CancelIntent",
                    "samples": [
                        "cancel"
                    ]
                },
                {
                    "name": "AMAZON.HelpIntent",
                    "samples": [
                        "i need help",
                        "help me",
                        "help"
                    ]
                },
                {
                    "name": "AMAZON.StopIntent",
                    "samples": [
                        "stop"
                    ]
                },
                {
                    "name": "AMAZON.NavigateHomeIntent",
                    "samples": [
                        "reset",
                        "go home",
                        "restart"
                    ]
                }
            ],
            "types": []
        }
    }
}
Make sure to replaceYOUR_INVOCATIONwith your actual invocation phrase you defined in the previous step.
Click Save Model. After it’s finished saving, click the Build Model button.
Retrieve your skill ID
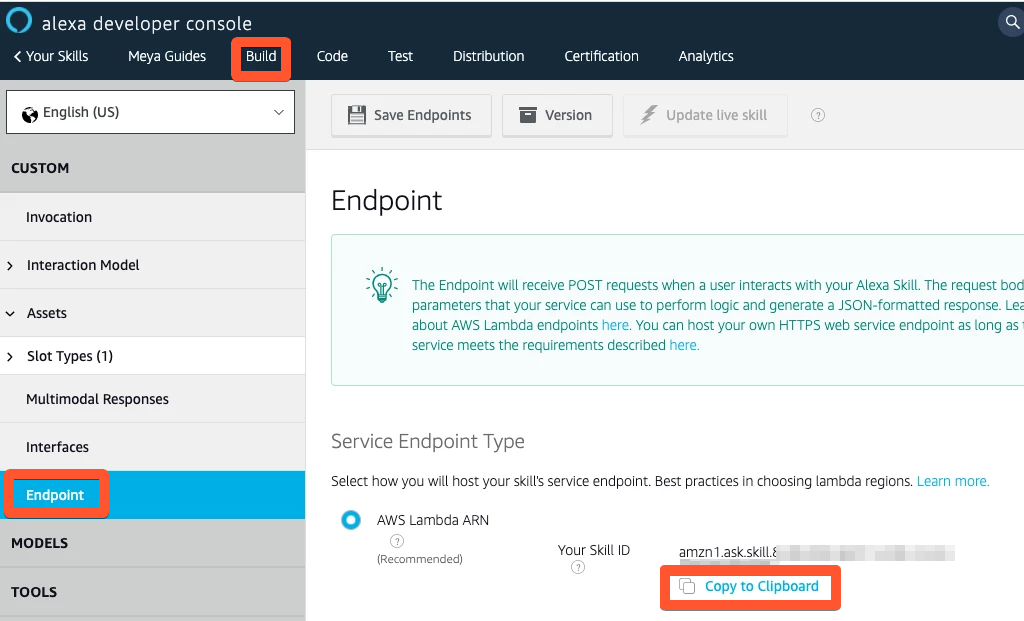
To retrieve your skill ID, go to Build → Endpoint and click the Copy to Clipboard button under your skill ID.
Update the vault
Now we’ll add the skill ID to the app’s vault.
In your app’s root folder, open vault.yaml and copy this code into it:
alexa.skill_id: xxx
This file is committed to version control and is not intended for storing actual secrets. Leave the value set toxxx.
Now, open vault.secret.yaml and copy this code into it:
alexa.skill_id: ALEXA_SKILL_IDReplace ALEXA_SKILL_ID with the actual skill ID you copied earlier.
This file is not committed to version control, so you can safely store secrets here.
Save both files and upload the vault using this command in your terminal:
meya vault upload --file vault.secret.yamlAdd the integration
In your app’s integration folder, create a new subfolder called amazon. Inside that folder, add a new file called alexa.yaml. Copy this code into the new file:
type: meya.amazon.alexa.integration
skill_id: (@ vault.alexa.skill_id )
Save your files, then run these commands in your terminal to push the changes to the Grid:
meya format
meya push
Retrieve your Meya webhook
Next, let’s find your app’s Alexa webhook so Alexa knows where to send the utterances.
In your terminal, run this command:
meya webhooksIn the output, look for an entry for Alexa and copy the URL.

Setup the skill’s endpoint
In your Alexa Developer Console, navigate to your skill, then choose the Build tab. Select Endpoint from the left-hand menu.
Choose the HTTPS option. Paste the webhook URL in the Default Region URL field. Choose My development endpoint has a certificate from a trusted authority from the dropdown menu.
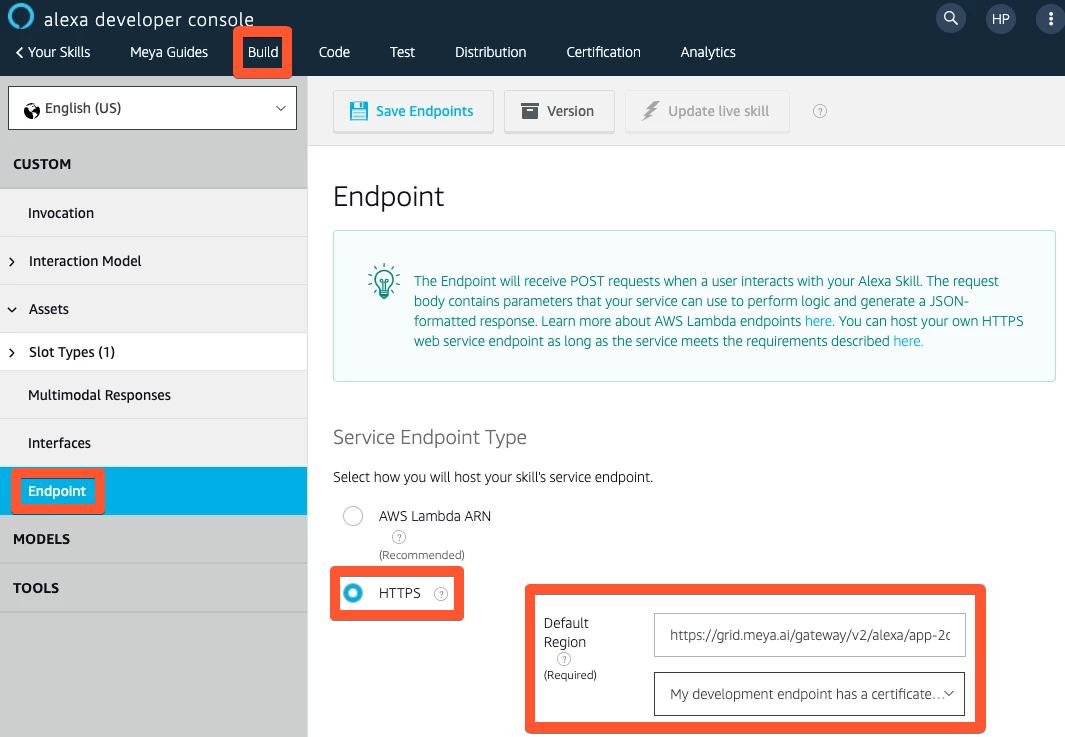
Click Save Endpoints.
Test it out
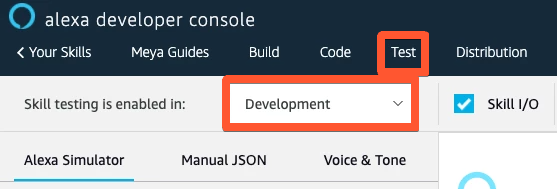
In the Alexa Developer Console, select the Test tab, then enable testing by select Development from the drop-down.
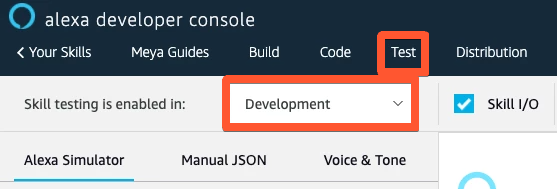
Enter your invocation phrase to start the conversation. Try triggering some of your app’s flows. Here’s an example flow that asks for the user’s name, then greets them:
You’ve connected your app to Alexa and now have a voice-enabled app!
Add flows to handle other Alexa intents
Alexa supports a number of intents for things like cancelling a request, asking for help, and ending the conversation. Your Meya app can handle these intents using the meya.event.trigger.type trigger.
The flows
In your app’s flow folder, create a subfolder called amazon. Inside, you’ll create several files which are described below.
help.yaml
This flow will be triggered when the user says something like help or I don’t understand.
triggers:
  - event_type: meya.amazon.alexa.event.intent.help

steps:
  - say: You triggered the Alexa help intent.
cancel.yaml
This flow is triggered when the user says cancel, or something similar.
triggers:
  - event_type: meya.amazon.alexa.event.intent.cancel

steps:
  - say: You triggered the Alexa cancel intent.
stop.yaml
This flow gives you a chance to say goodbye to the user after they’ve ended the conversation.
If your app needs to do any cleaning up after a conversation ends, this flow is the place to do it.
triggers:
  - event_type: meya.amazon.alexa.event.intent.stop

steps:
  - say: Thank you for using the Meya demo app.
Save all of the flows, then upload them:
meya format
meya push
Test it out
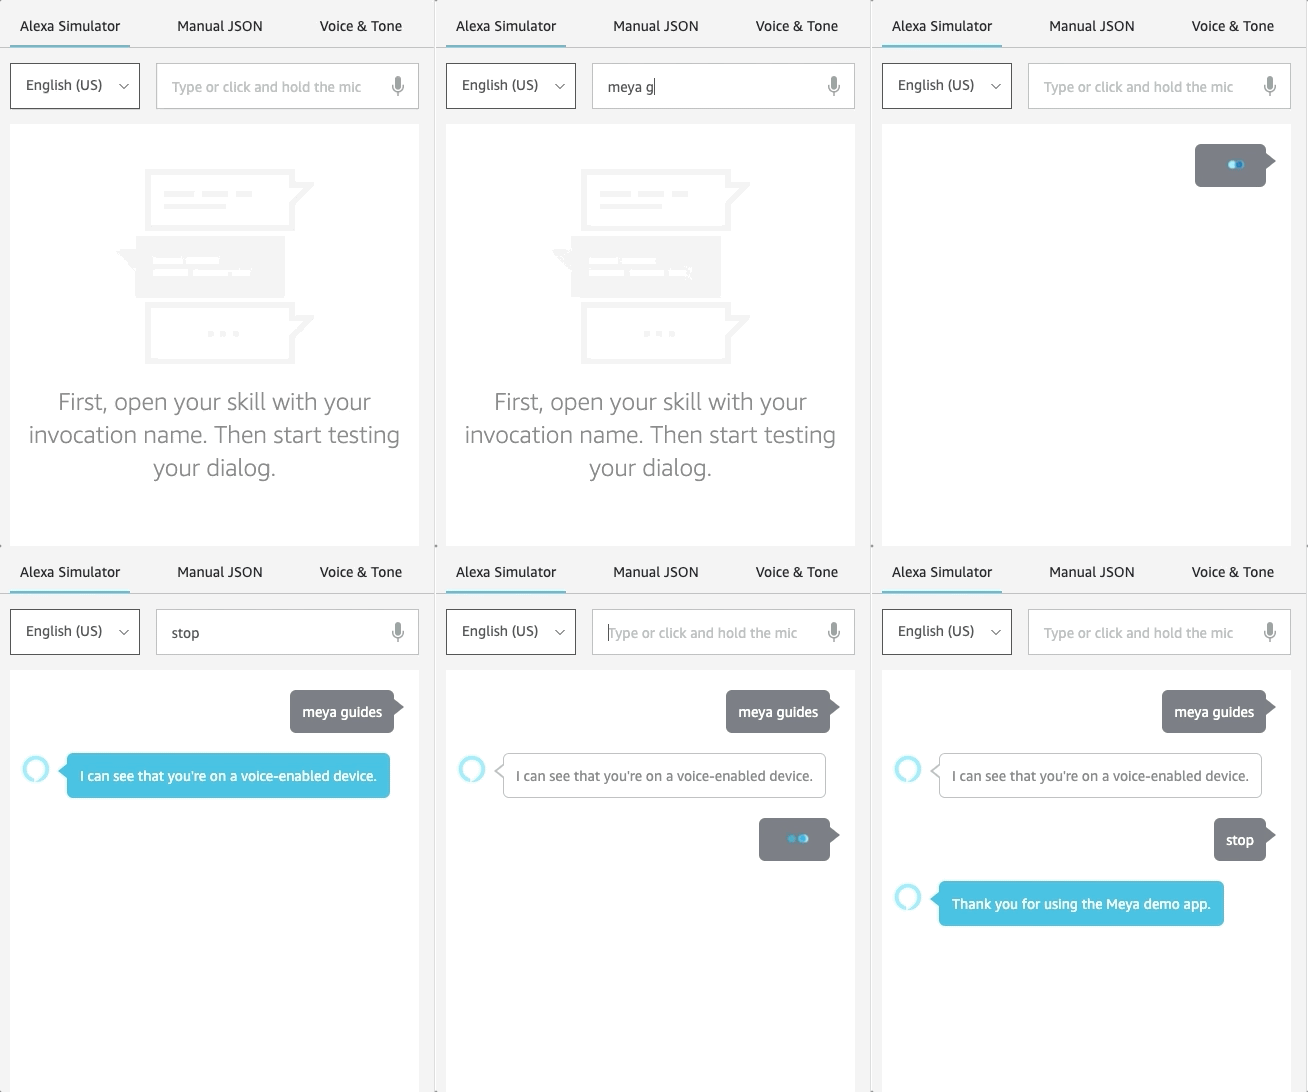
In the Alexa Simulator, invoke your skill, then say something like stop. Verify that the cancel.yaml flow is triggered.
Updated 9 months ago
