Setup
How to set up a WhatsApp integration
WhatsApp is one of the most popular messaging platforms around. In this guide, you’ll learn how to add the WhatsApp integration.
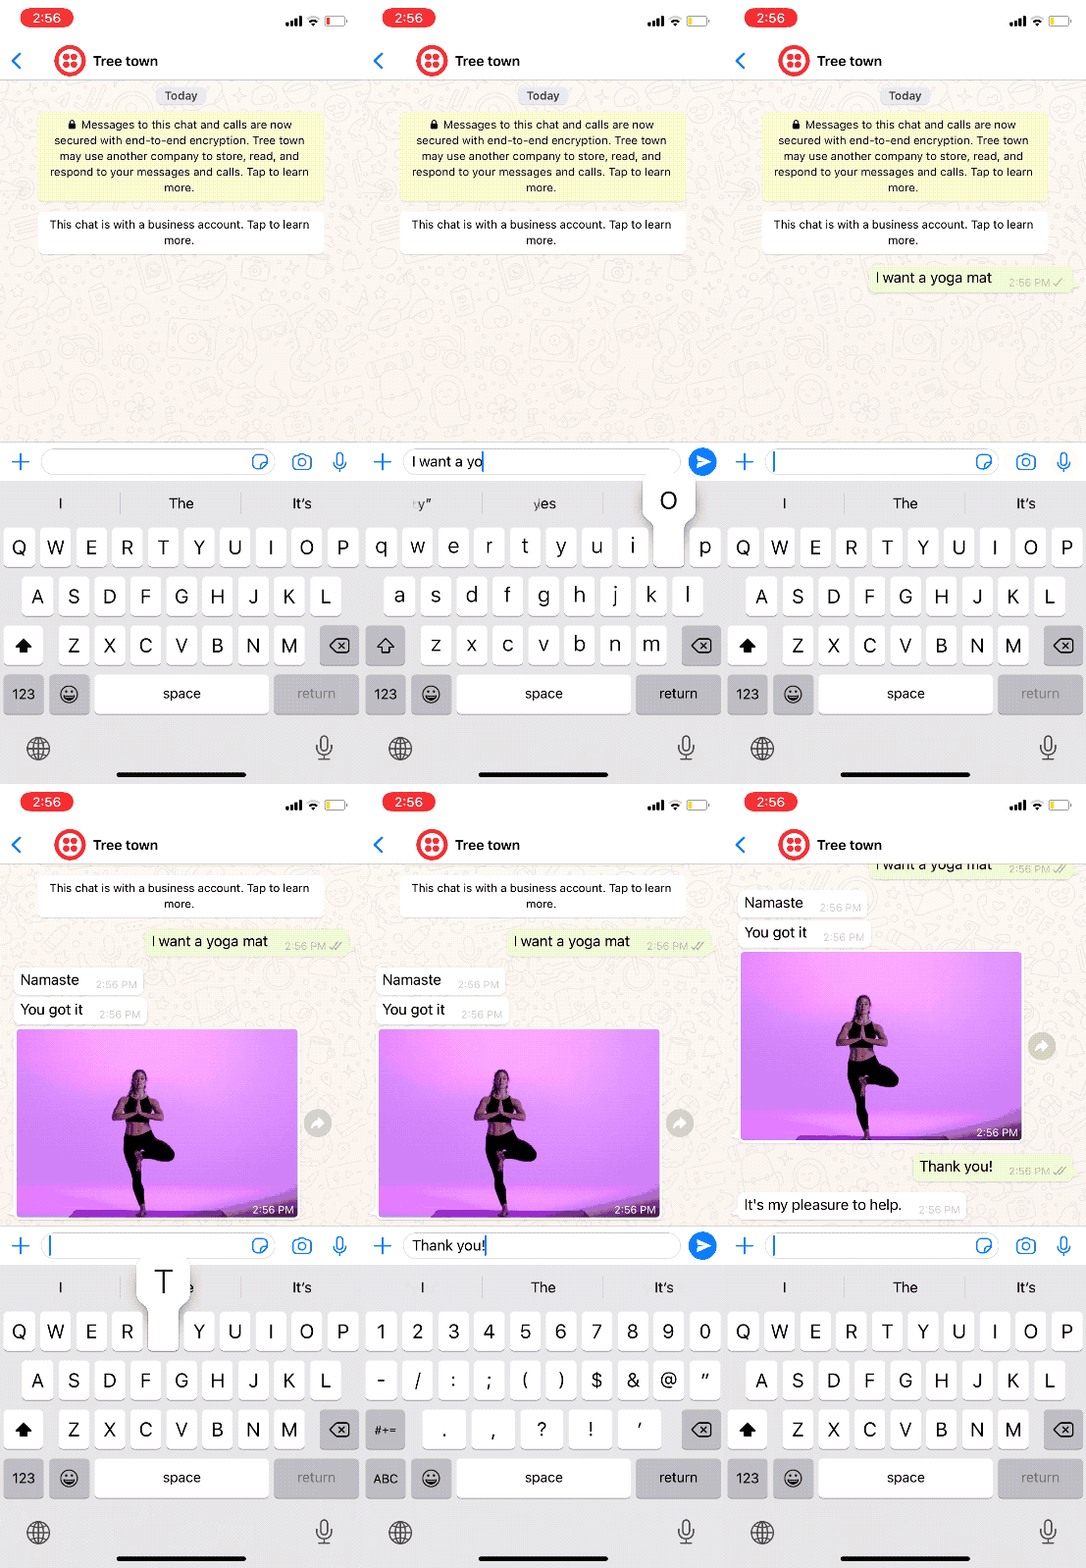
Before you begin
This integration requires a Twilio account. Twilio lets you connect with customers everywhere they want to interact with you, including text messages, emails, phone calls, video, and, of course, WhatsApp.
Adding the Twilio integration
Retrieve Twilio credentials
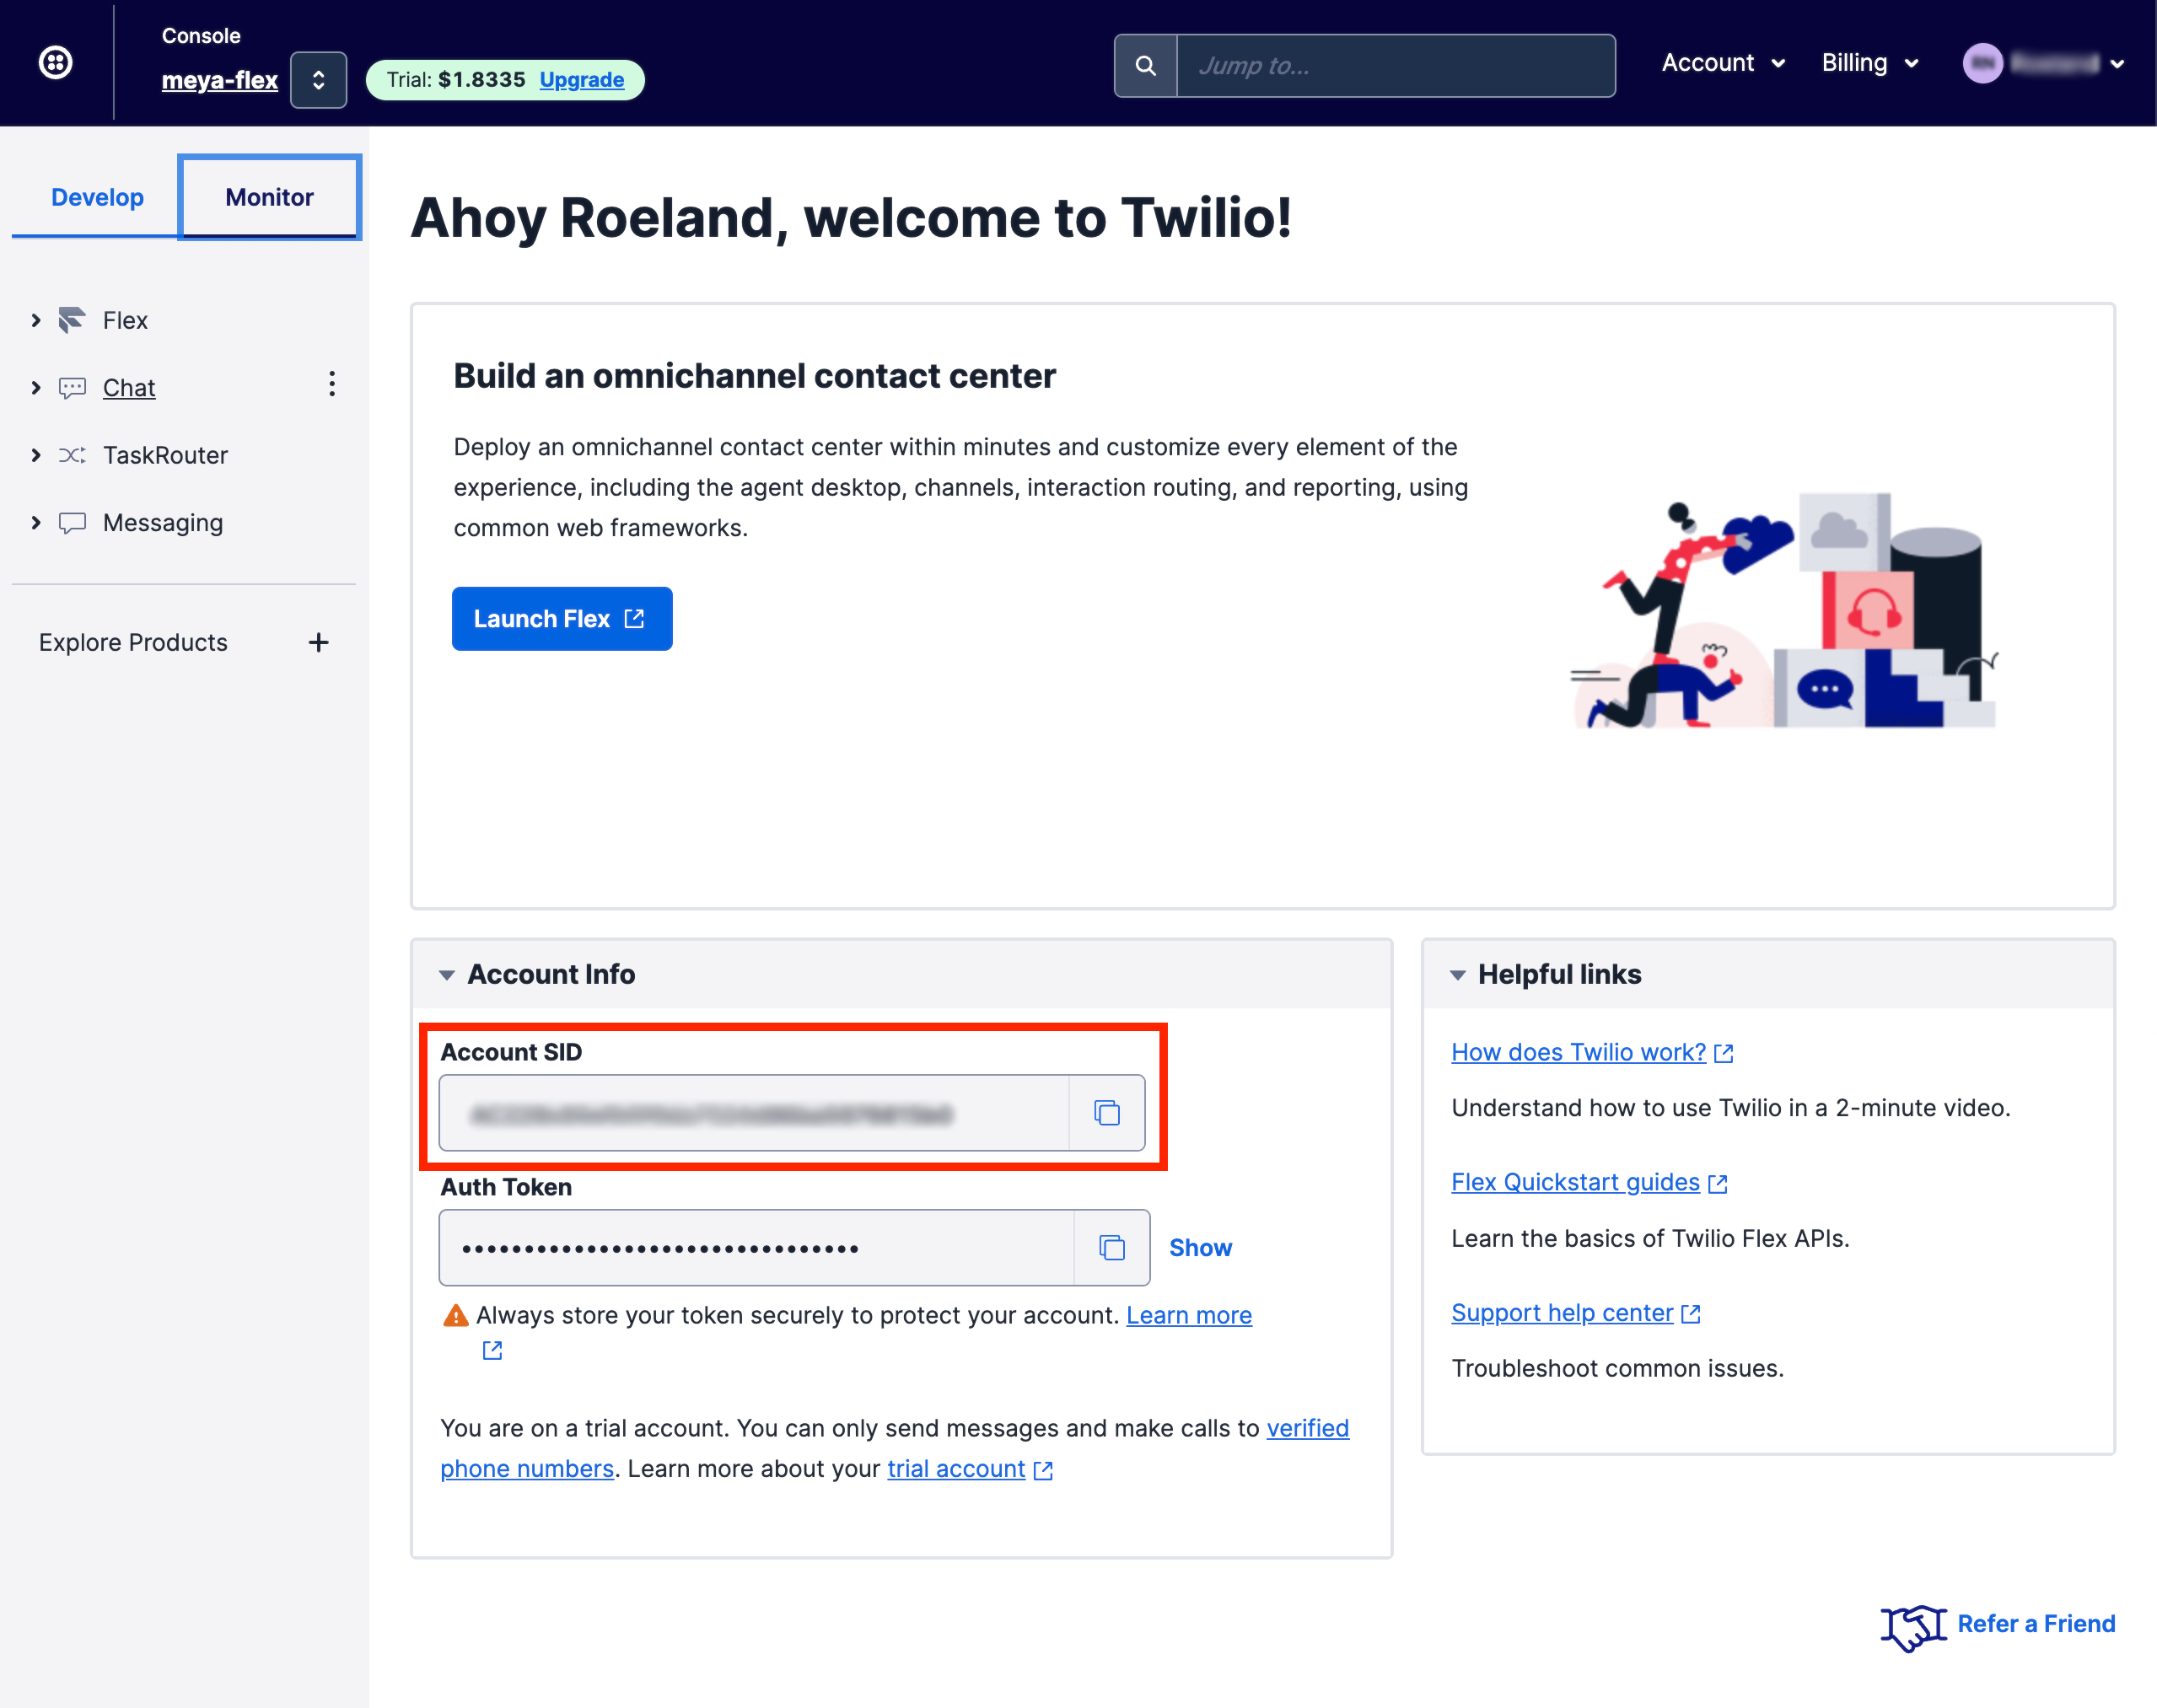
First, you’ll need to gather your Twilio account SID and authentication token.
If you’re just testing the integration out and don’t want to send real messages yet, Twilio provides test credentials you can use. See the Test Credentials section below for details.
Credentials
Login to your Twilio console. In the Project Info box you’ll see your Account SID. Make a note of this value as you’ll be using it in the following step.
Create the API key
Navigate to the API keys & tokens page. Click the Create API key button. Make sure the type is set to Standard.
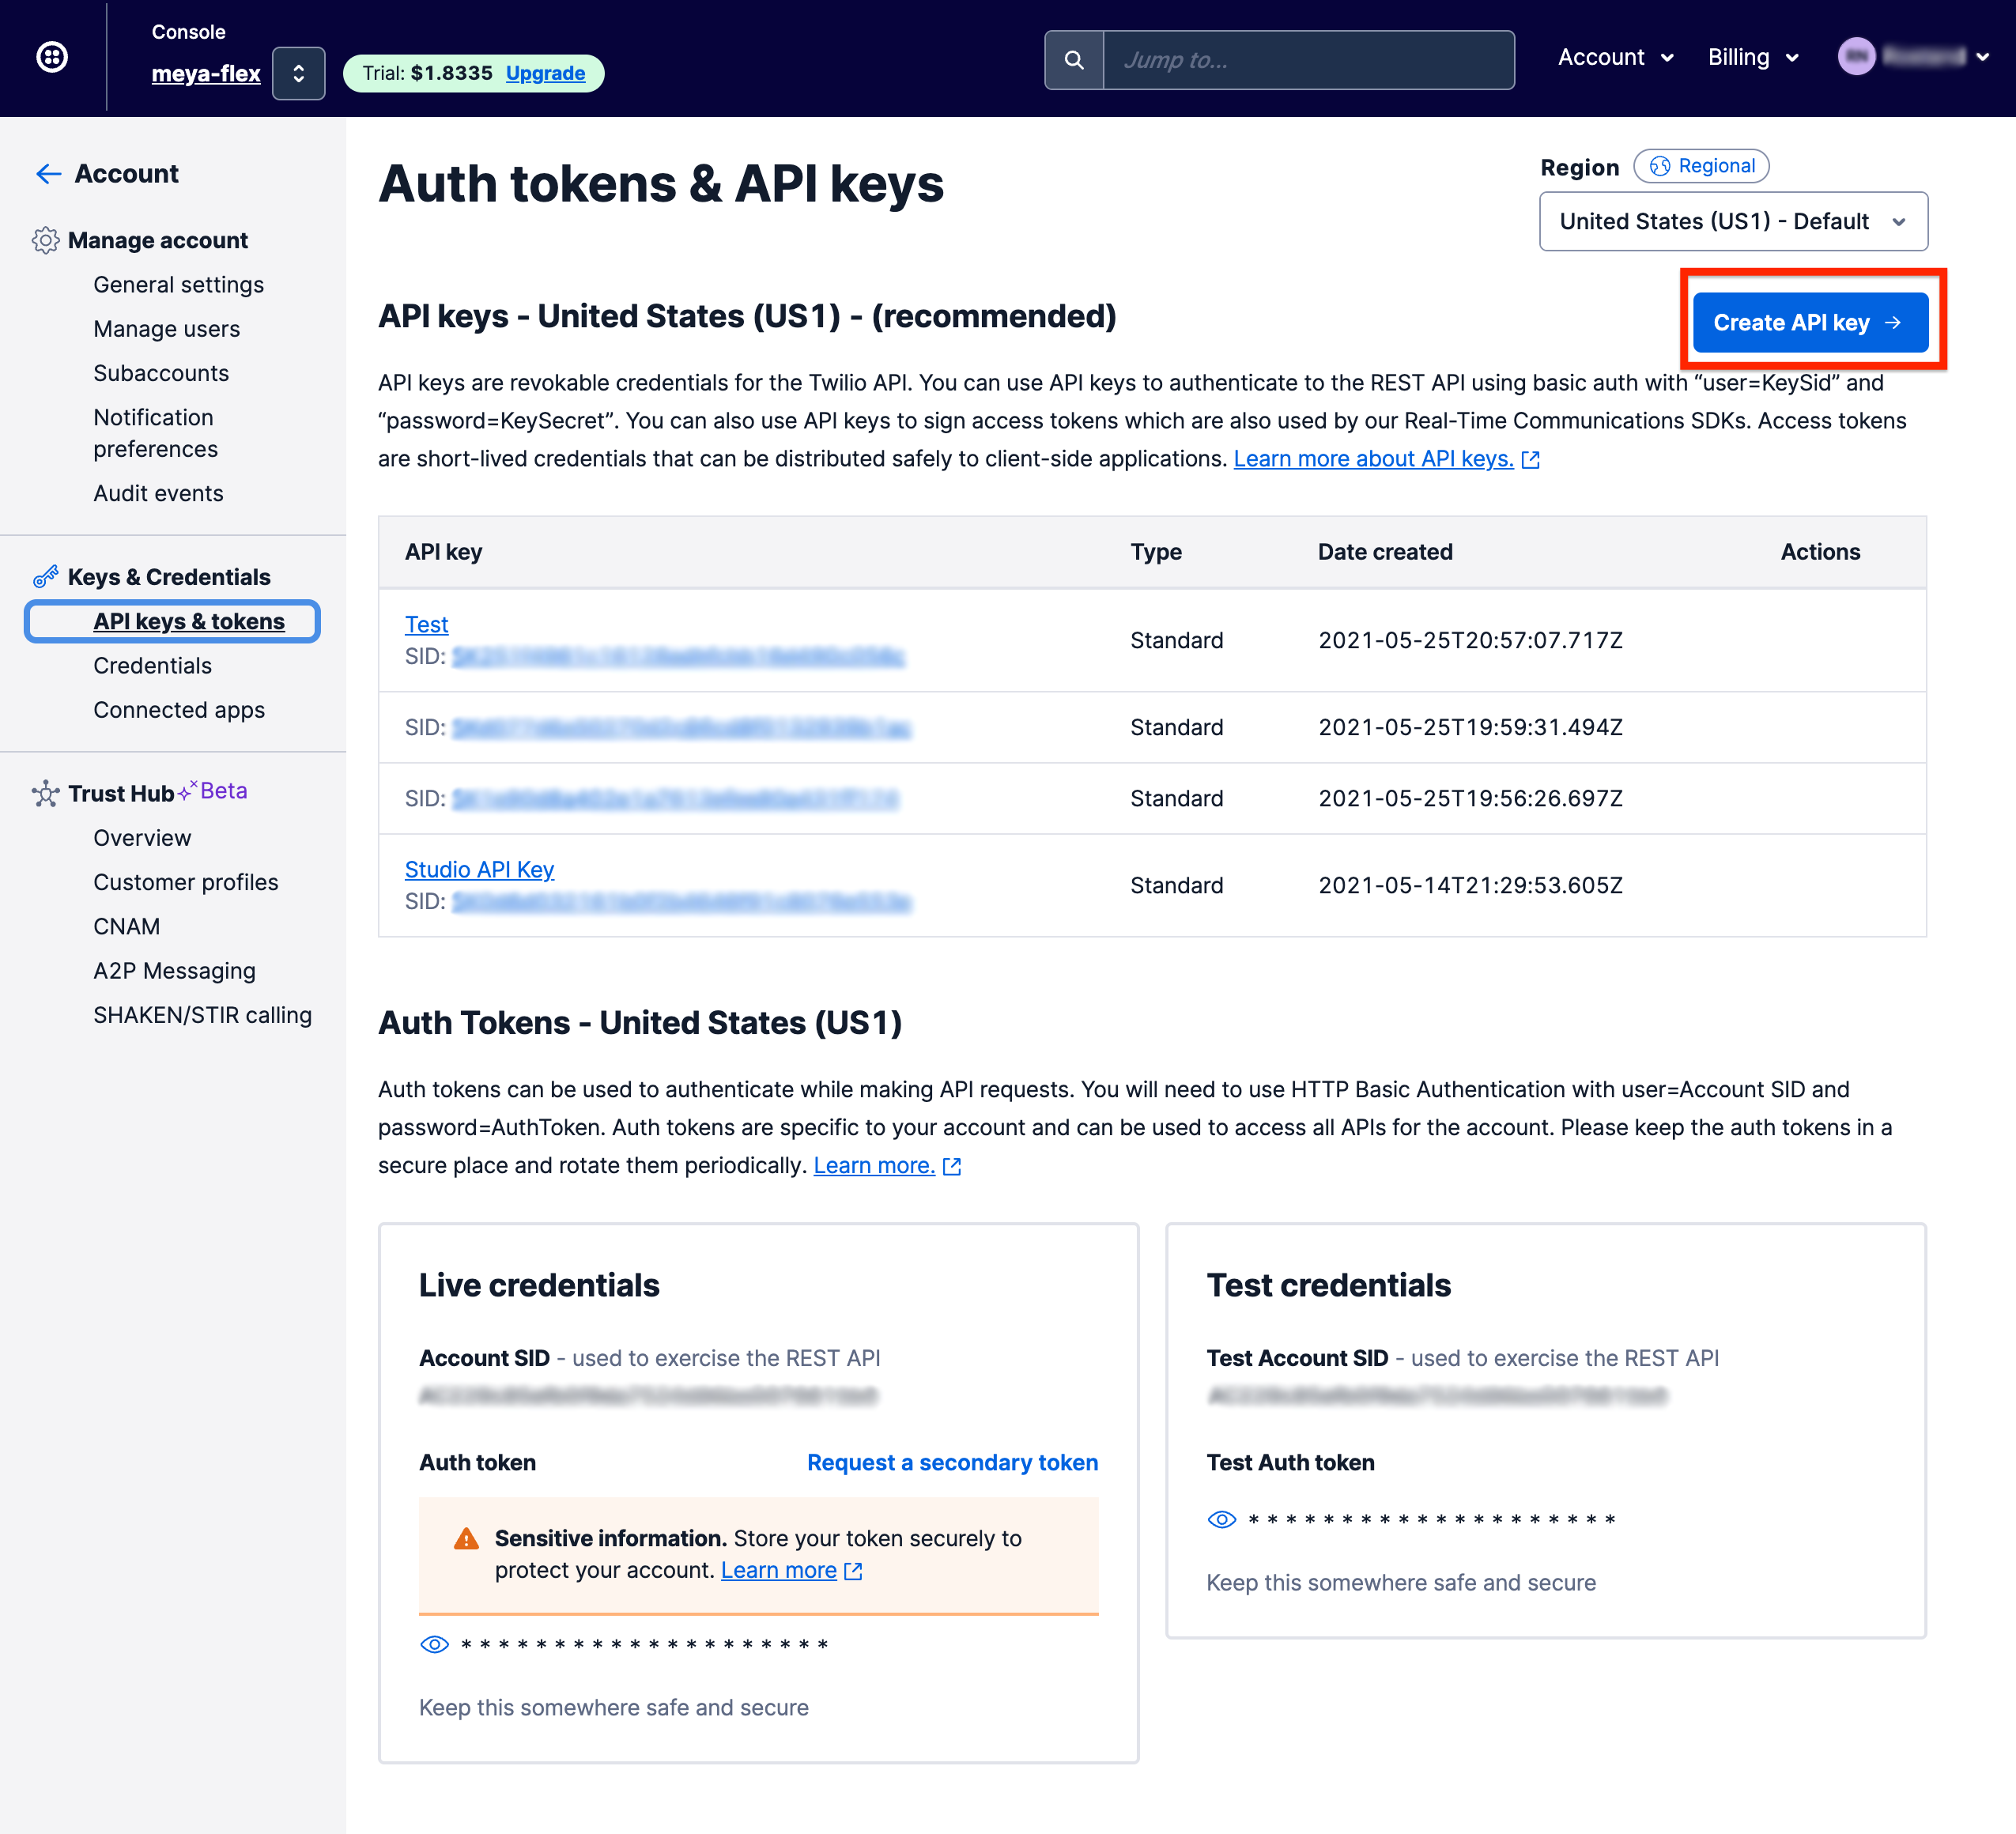
Make a note of the API secret and SID values.
Note, using the Test credentials account SID will not work when using an api key. If you would like to use the test credentials account SID, then you will need to use the auth token for authentication. However, using auth tokens is now deprecated in Twilio in favour of api keys, and the Meya SDK will show a deprecation warning when you use the auth_token field.
Create the integration
Now that you’ve stored your credentials, you can create the integration using references to the vault.
Using the Meya Console
- Open the Meya Console
- Select your app from the app list.
- Go to the Integration page.
- Find the WhatsApp integration and click Add.
- Paste the following configuration into the editor.
type: meya.whatsapp.integration
account_sid: (@ vault.twilio.account_sid )
api_key_sid: (@ vault.twilio.api_key_sid )
api_key_secret: (@ vault.twilio.api_key_secret )
phone_number: (@ vault.whatsapp.phone_number )
markdown: true- Click the Save button.
Using the Meya CLI
In your app’s integration folder, create a new file called whatsapp.yaml and paste this code into it:
type: meya.whatsapp.integration
account_sid: (@ vault.twilio.account_sid )
api_key_sid: (@ vault.twilio.api_key_sid )
api_key_secret: (@ vault.twilio.api_key_secret )
phone_number: (@ vault.whatsapp.phone_number )
markdown: true
Save the file.
Note, you will setup the correct vault values in the next sections.
Add secrets to the vault
The vault is used to store secret information that shouldn’t be committed to version control. Let’s store the Twilio credentials there.
You need to set the following keys in your app vault:
twilio.account_sid: use the Account SID from heretwilio.api_key_sid: use the API key you created in the previous sectiontwilio.api_key_secret: use the API key secret you created in the previous sectionwhatsapp.phone_number: set this aswhatsapp:xxxfor now, you will set this depending on whether you use the WhatsApp sandbox or a WhatsApp sender.
Add it using the Meya Console
- Open the Meya Console
- Select your app from the app list.
- Go to the Vault page.
- Add the above keys and set the values.

Note, the whatsapp.phone_number value must have the following format "whatsapp:+PHONE_NUMBER".
Add it using the Meya CLI
- In your app’s root folder, open
vault.yamland copy this code into it:
twilio.account_sid: xxx
twilio.api_key_sid: xxx
twilio.api_key_secret: xxx
whatsapp.phone_number: xxx
Remember not to store the actual values in yourvault.yamlfile. Just leave them set toxxx.
- Open
vault.secret.yamland copy this code into it:
twilio.account_sid: ACCOUNT_SID
twilio.api_key_sid: API_KEY_SID
twilio.api_key_secret: API_KEY_SECRET
whatsapp.phone_number: "whatsapp:PHONE_NUMBER"
Replace the values with your actual Twilio credentials. The phone number will be the one you created when activating the WhatsApp Sandbox in Twilio, or another Twilio-approved WhatsApp number you’ve purchased.
Note, the whatsapp.phone_number value must have the following format "whatsapp:+PHONE_NUMBER".
- Save these files and upload the new vault secrets using this command in your terminal:
meya vault upload --file vault.secret.yamlGet your WhatsApp webhook
To receive messages from WhatsApp and pass them from Twilio to your app, you’ll need to add your Meya webhook to one of these:
- Twilio WhatsApp sandbox, or
- Twilio WhatsApp sender, or
- Twilio Messaging Service.
Get your webook from the Meya Console
- Open the Meya Console
- Select your app from the app list.
- Go to the Integrations page.
- Find the WhatsApp integration and click Edit.
- Click the Webhook button.
- Copy the webhook.
Get your webhook from the Meya CLI
Run this command in your terminal:
meya webhooksLook for an entry called integration.whatsapp. The webhook will look like this:
https://grid.meya.ai/gateway/v2/whatsapp/APP_ID/integration.whatsappOption 1: WhatsApp sandbox
If you do not have an official WhatsApp business number yet, then you can use the Twilio WhatsApp sandbox to test your bot. The Twilio WhatsApp sandbox is a special WhatsApp number owned by Twilio and can be configured to redirect webhooks to your integration.
Rich ContentNote, the Twilio WhatsApp sandbox number does not support the Rich Content API, so you will not be able to use quick replies and button lists with the sandbox number.
- In your Twilio console, click the project name in the top left bar.
- From the products menu on the left, choose Messaging.
- Then choose Settings → WhatsApp sandbox settings.
Near the bottom there will be a button to activate the sandbox. Click it and walk through the setup instructions. Once complete, you’ll have a number you can send and receive WhatsApp messages with. You should see your phone number in the Sandbox Participants section, as well.
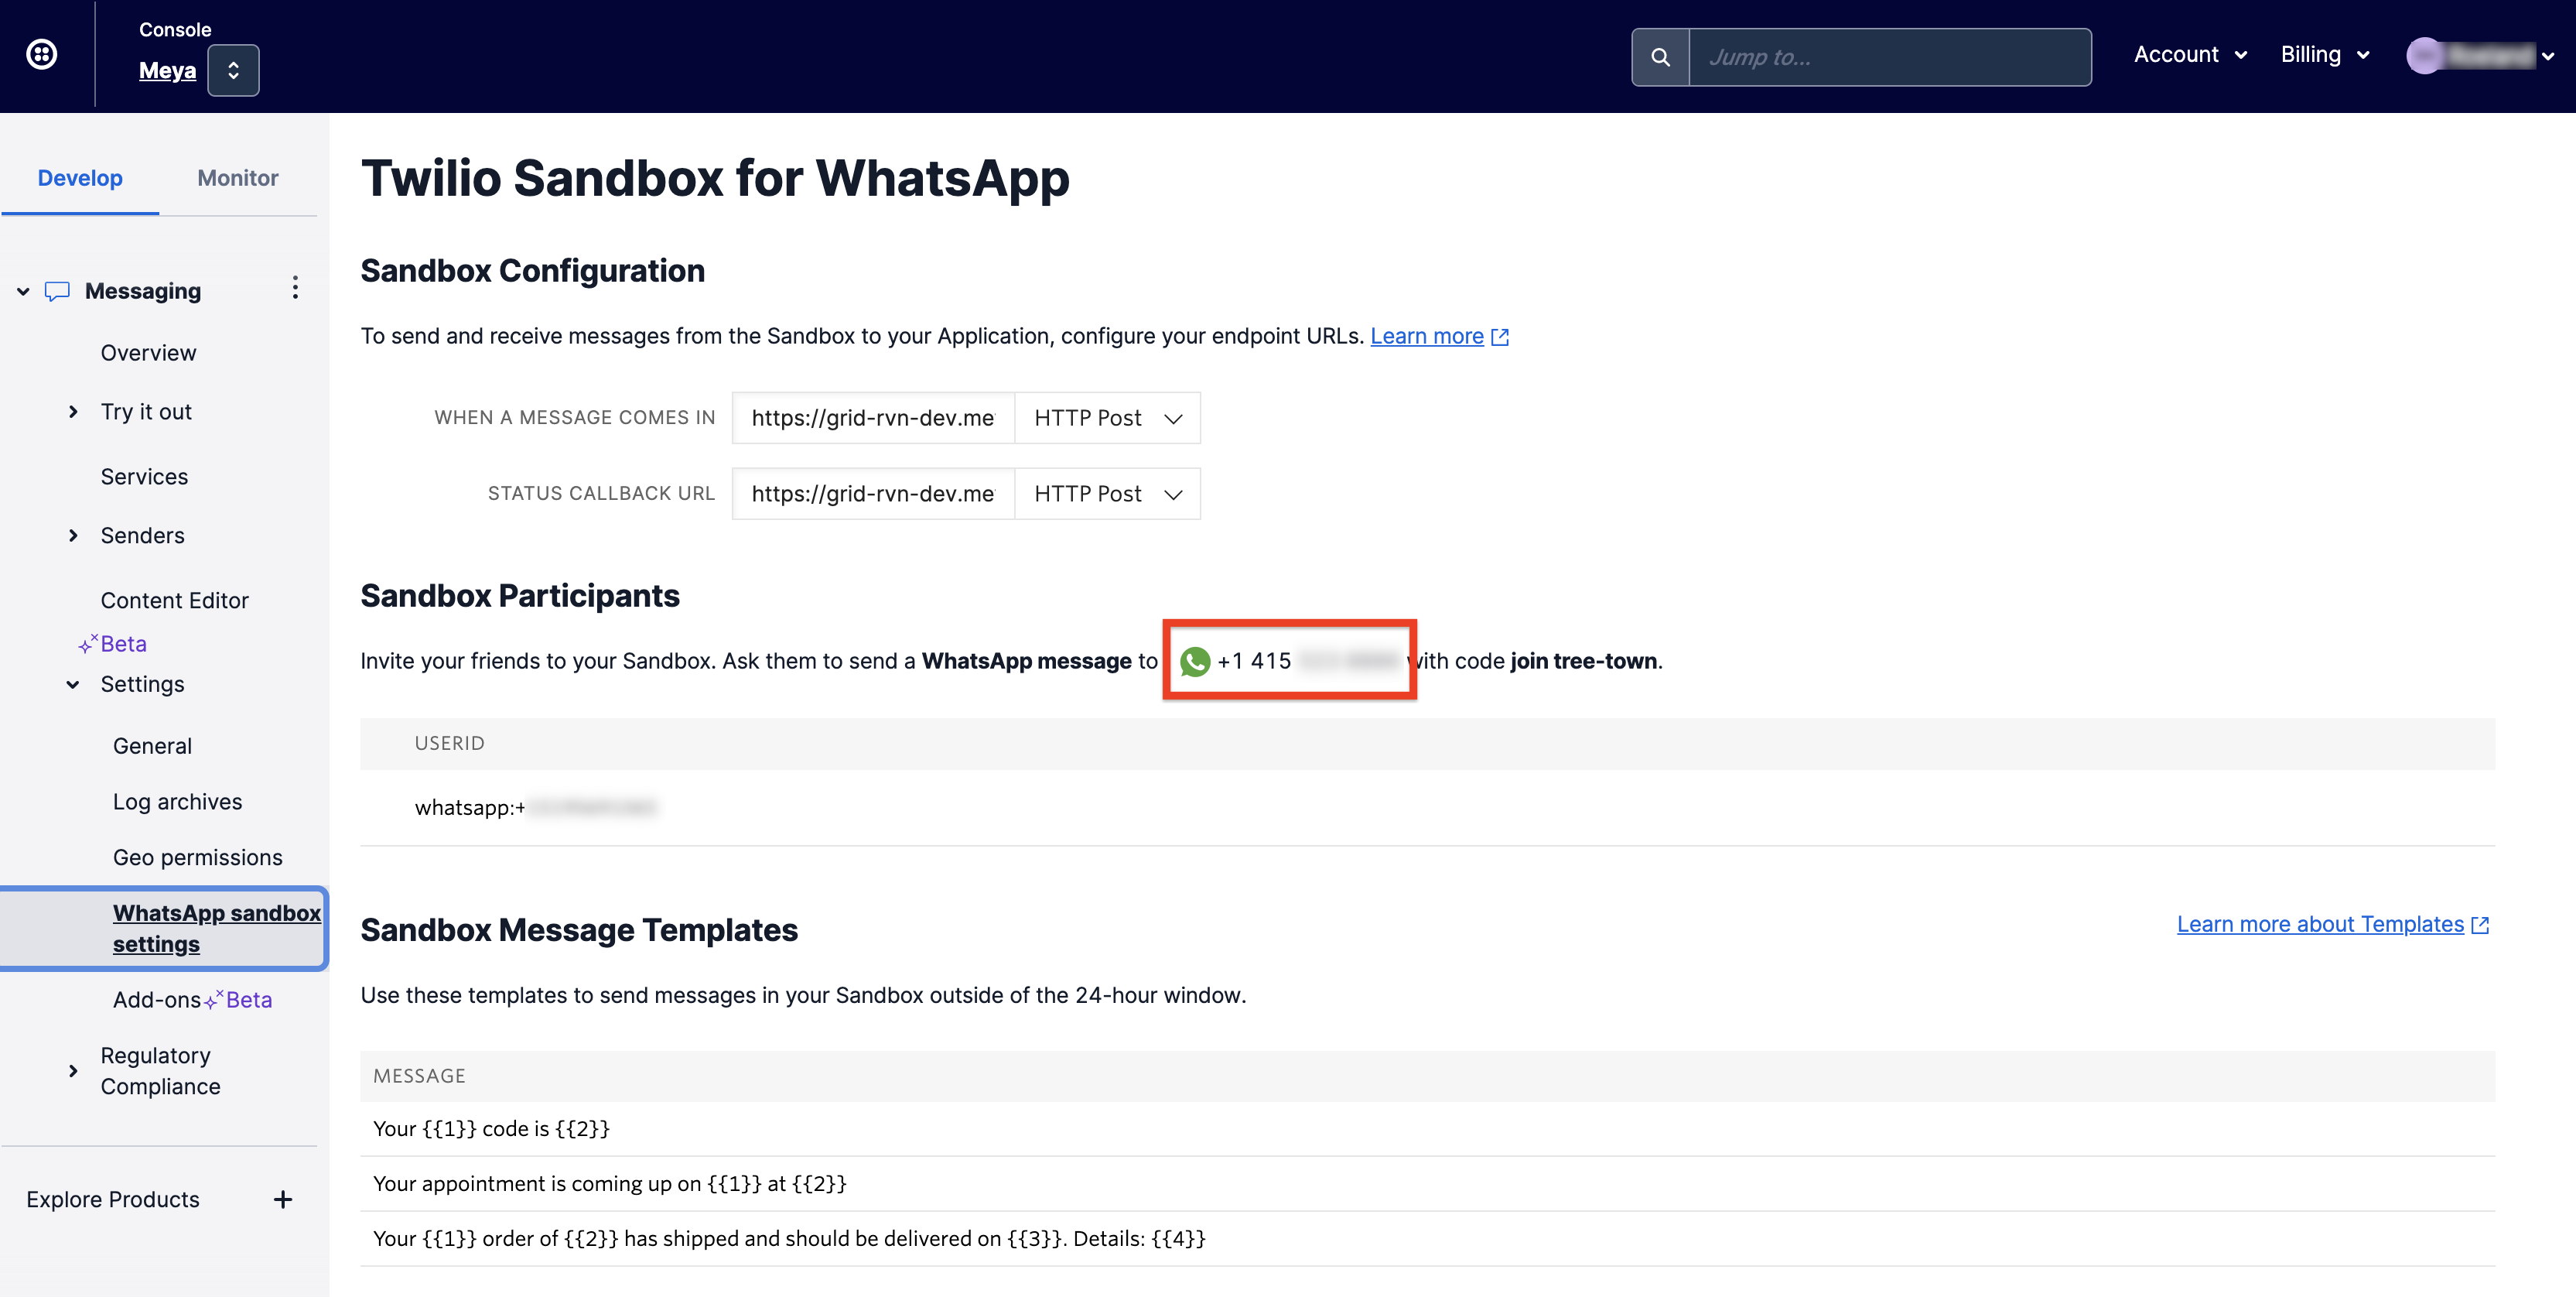
Make a note of the WhatsApp sandbox phone number.
Set the webhook in Twilio
Paste the webhook from the previous section into the When a message comes in and Status callback URL boxes. Make sure both to select HTTP POST in the drop-down menus next to these boxes.
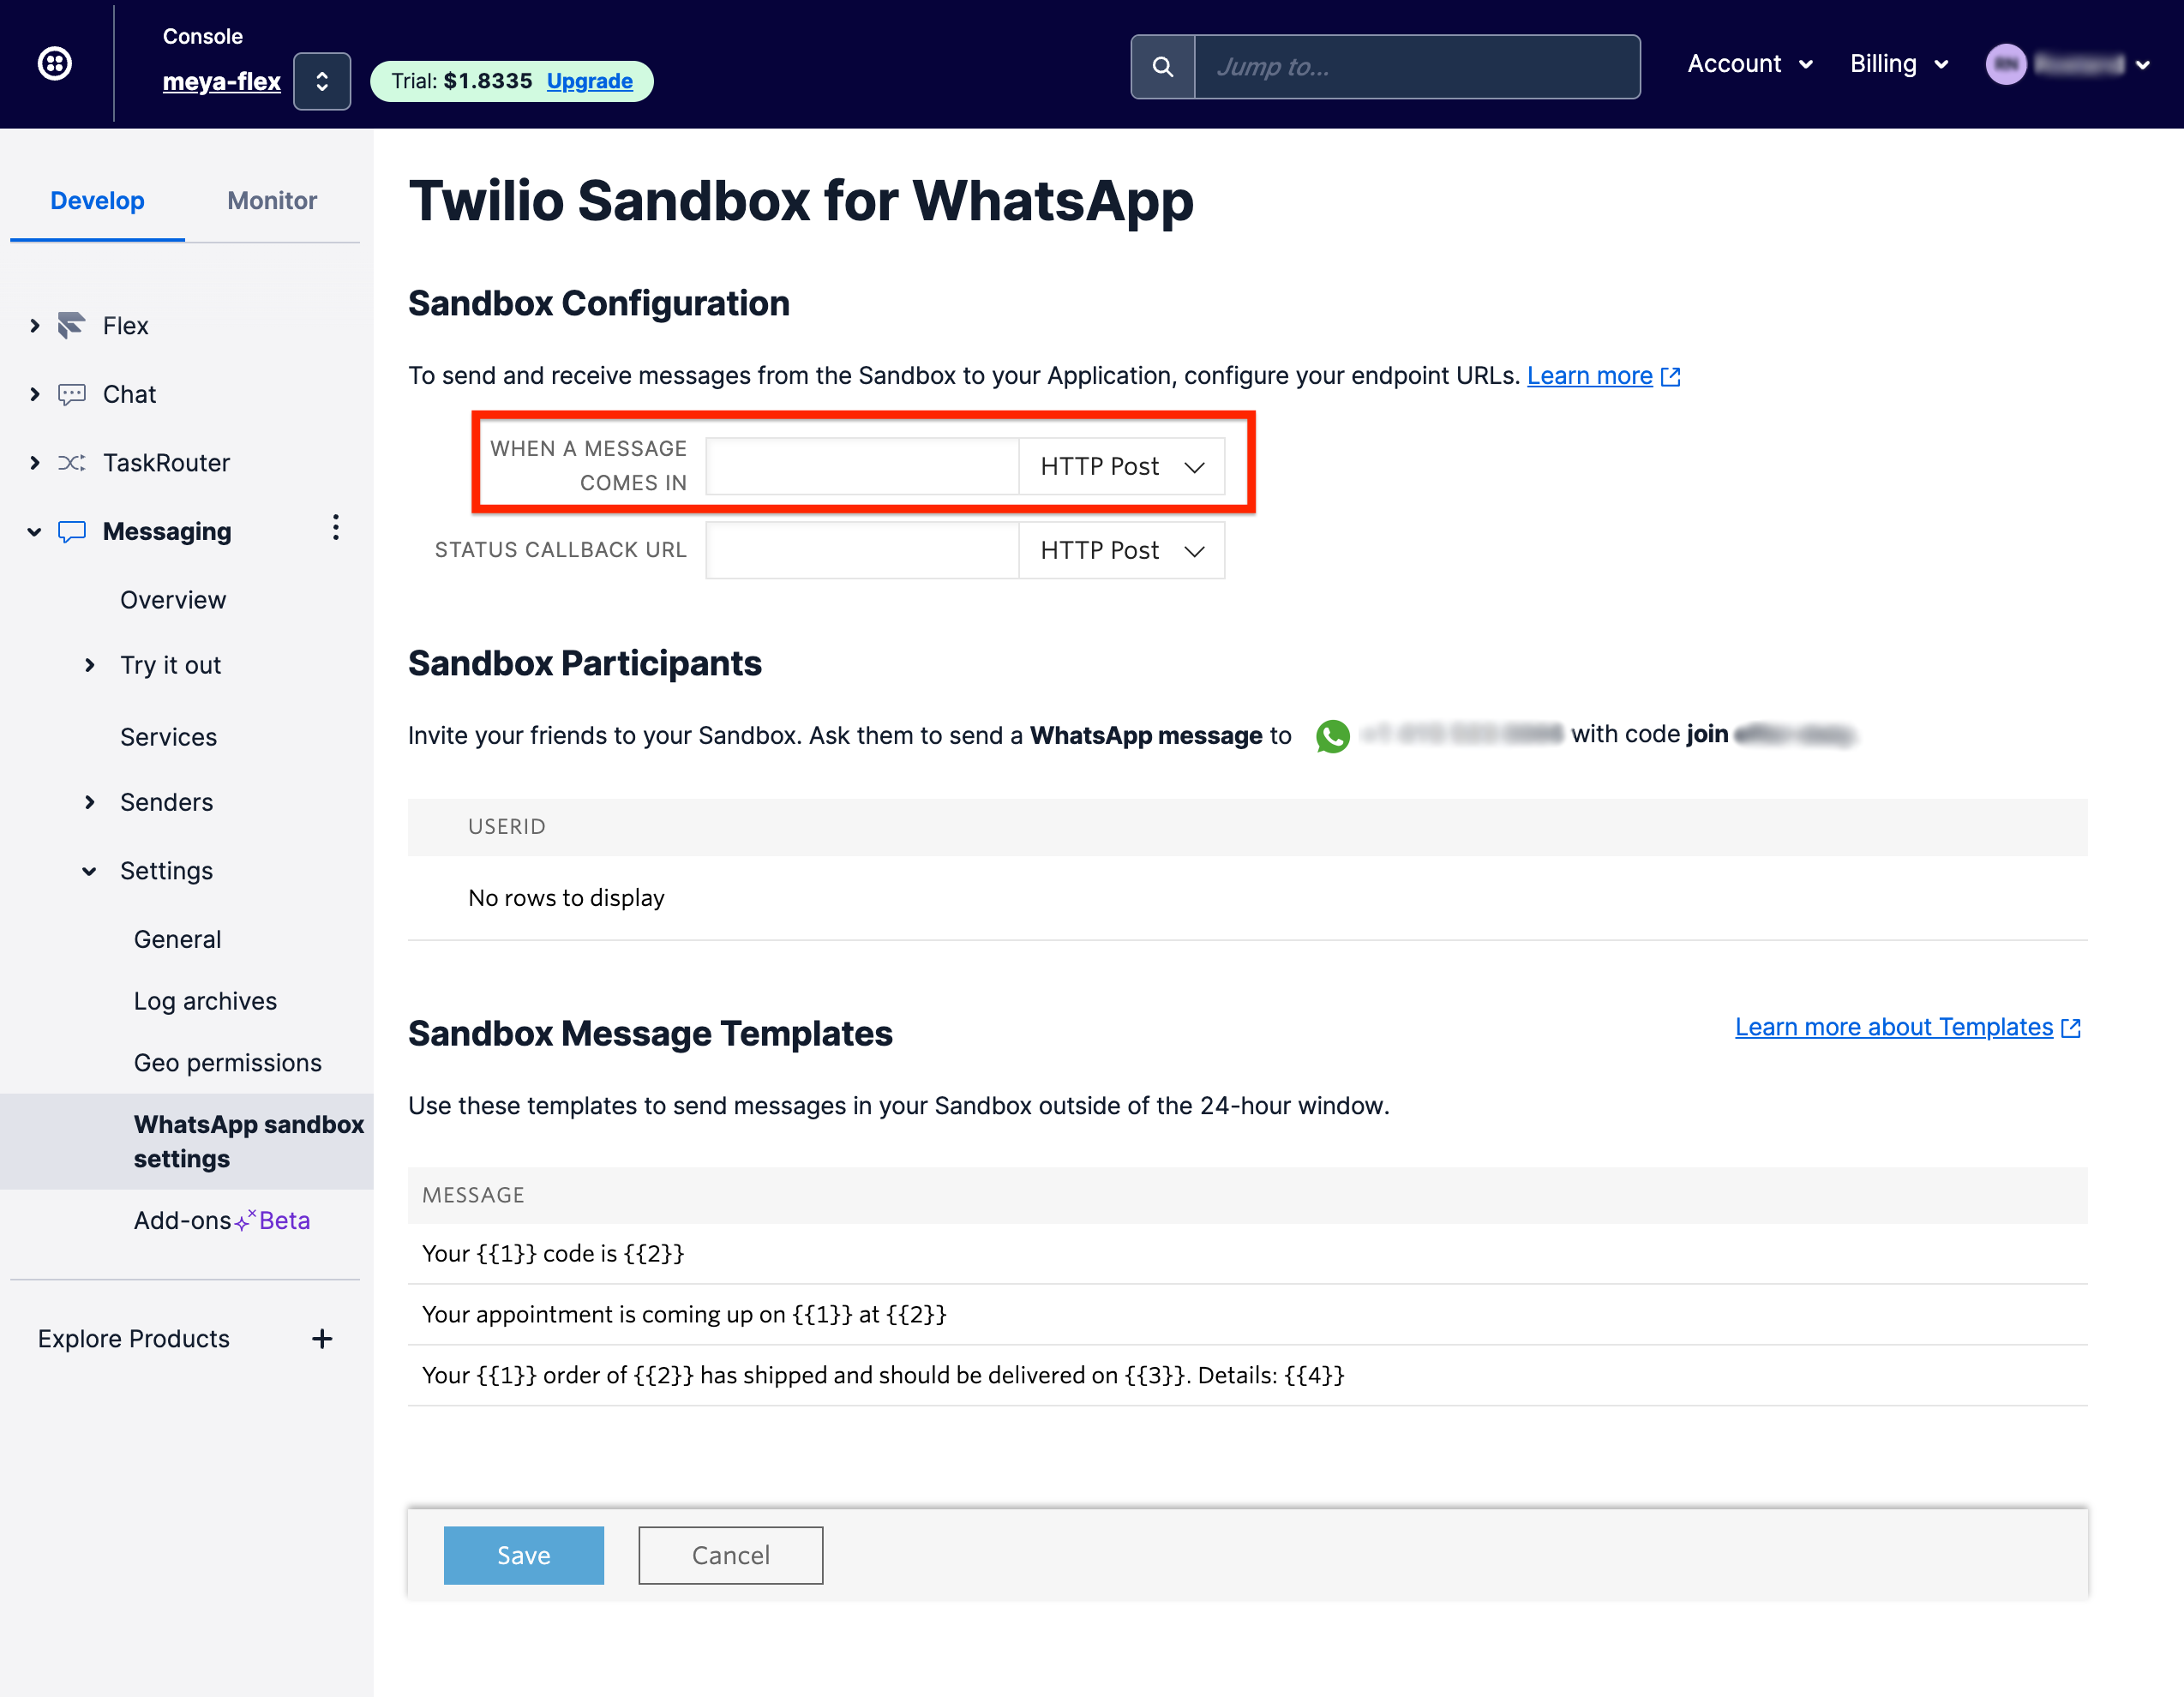
Connecting to your WhatsApp sandbox number
Right above the Sandbox Participants box, you’ll see a note telling you how to begin interacting with your WhatsApp number. There will be a phrase with a format like this: join SOME-PHRASE. Make a note of it since you’ll need it later.
Option 2: WhatsApp sender
If you have a WhatsApp business number, then you need to register a Twilio WhatsApp sender to use your WhatsApp business number with Twilio.
Create a WhatsApp sender
- Follow Twilio's WhatsApp Self Sign-up guide to create a WhatsApp sender.
Configure the WhatsApp sender endpoint
- In your Twilio console, click the project name in the top left bar.
- Choose Messaging from the products section.
- Then choose Senders → WhatsApp senders.
- Select the WhatsApp sender you would like to use.
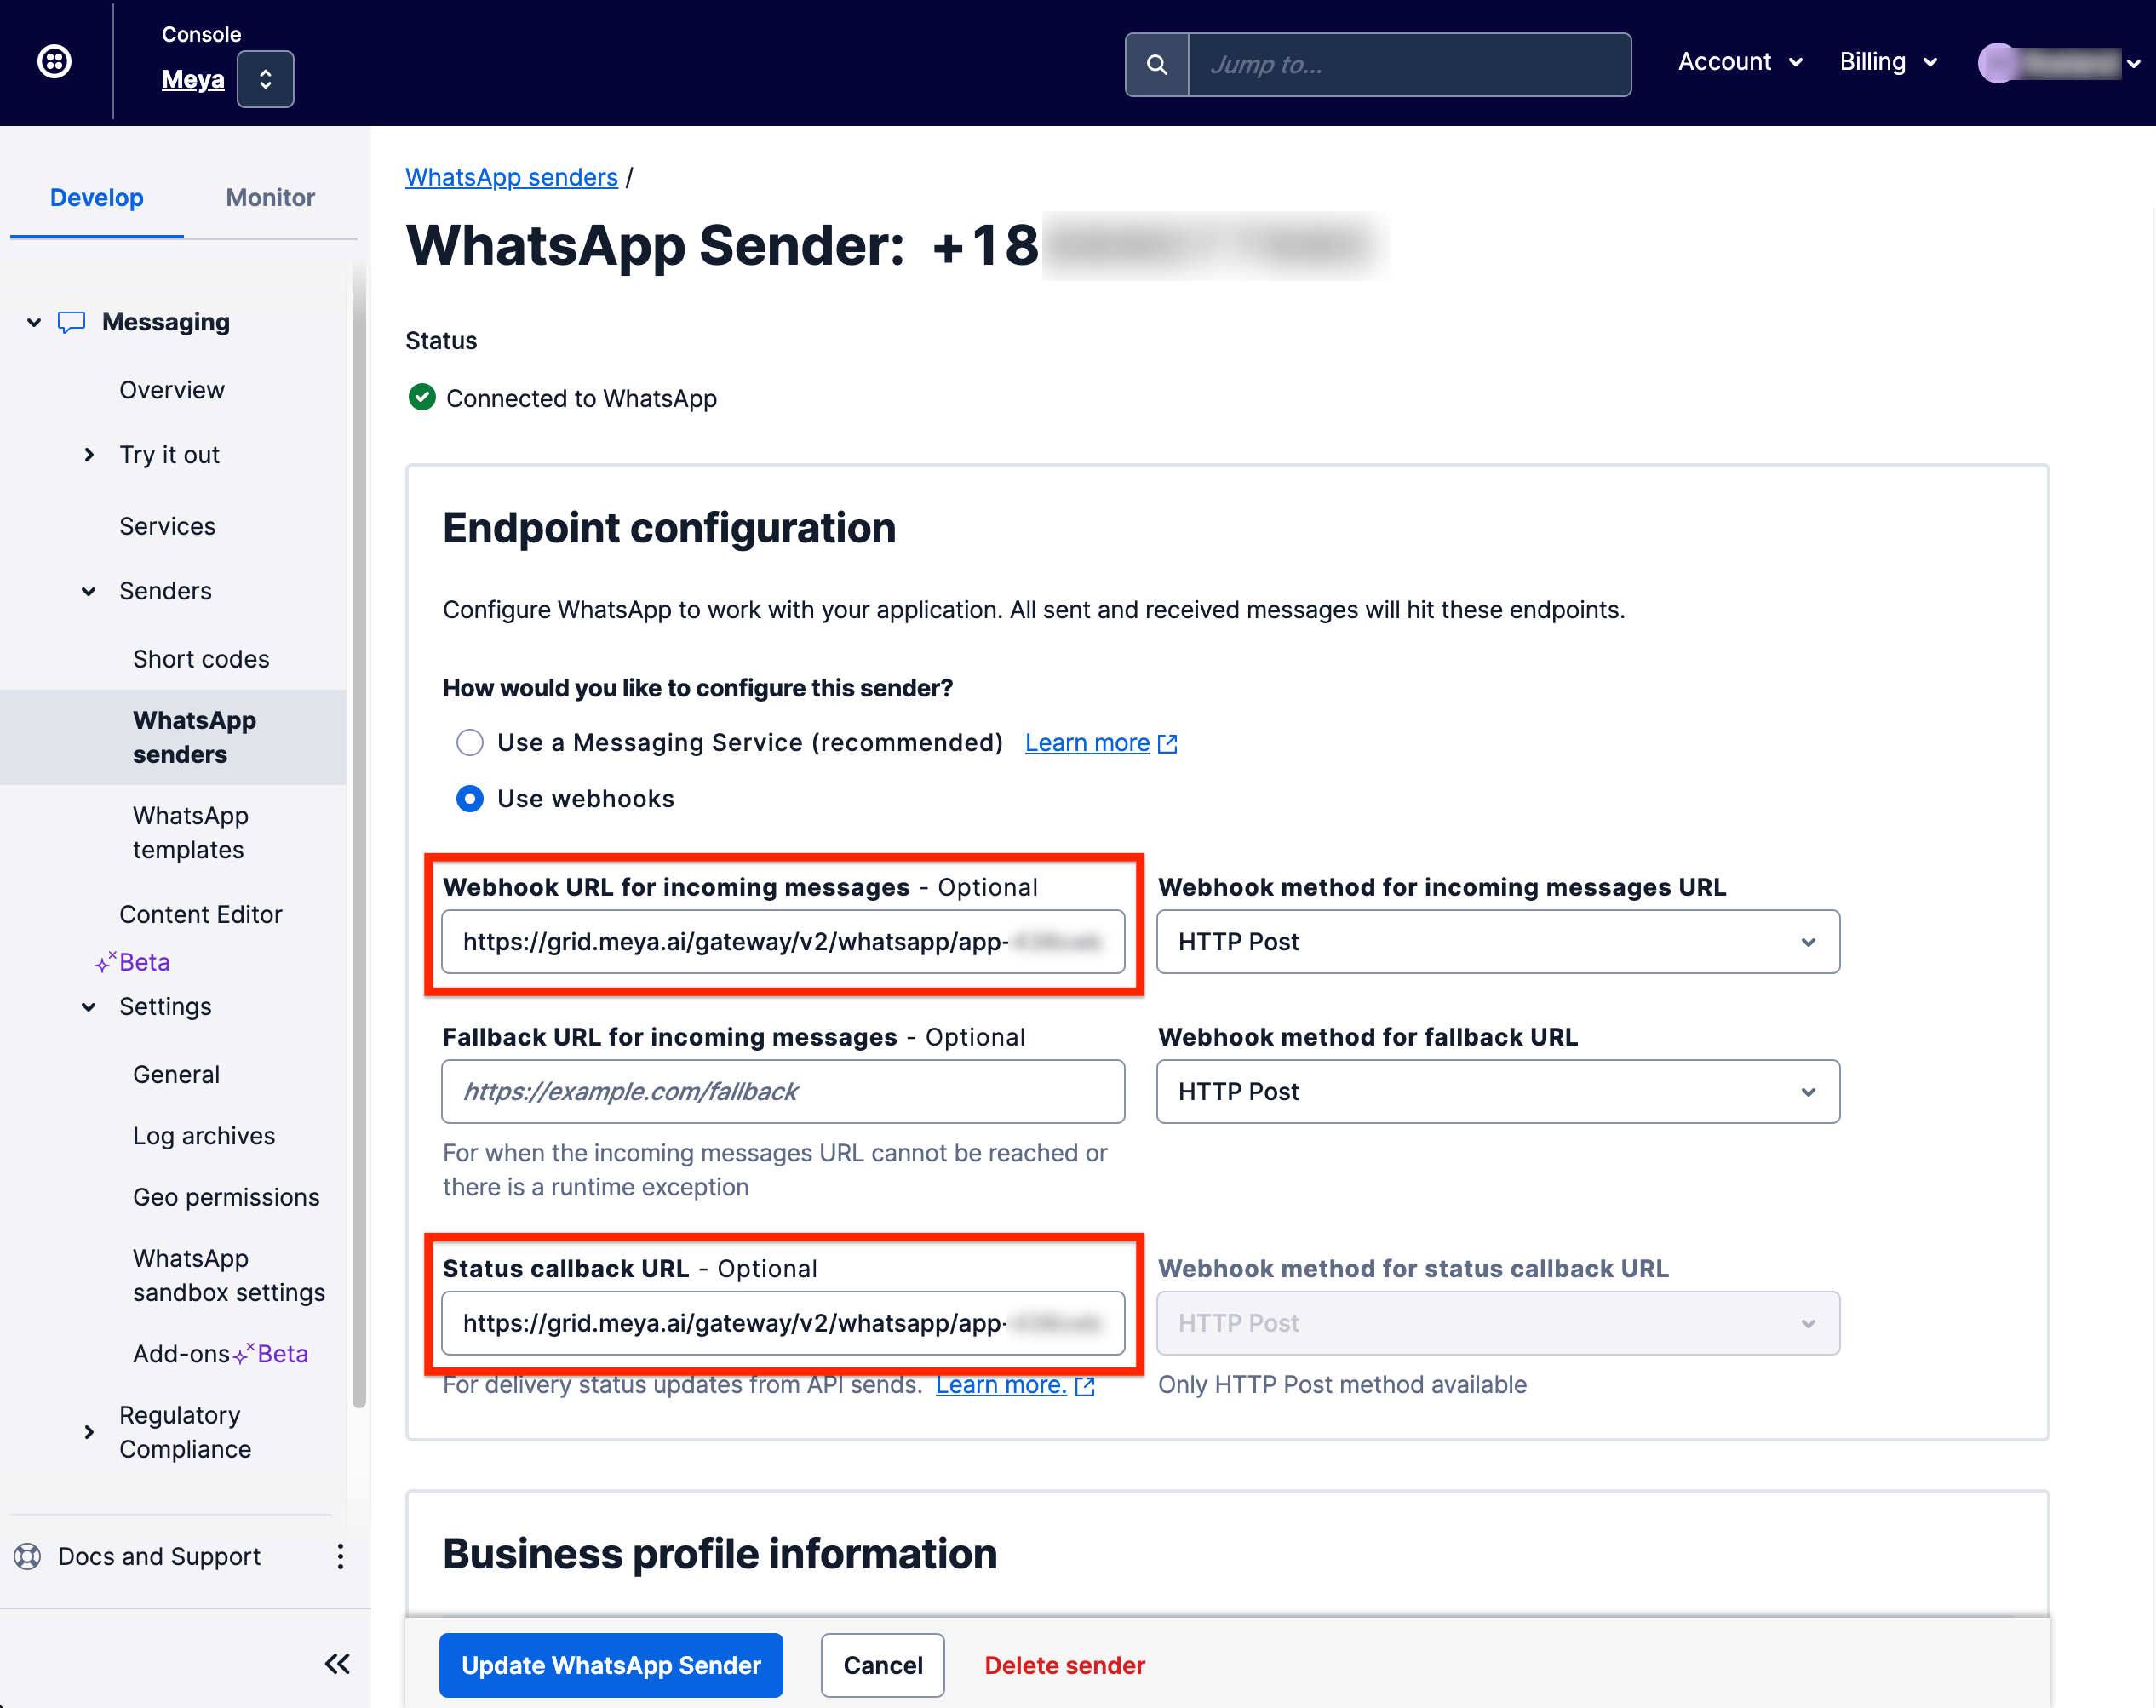
- In the Endpoint configuration, select the Use webhooks option.
- Paste the webhook from the previous section into the:
- Webhook URL for incoming messages, and
- Status callback URL
- Click Update WhatsApp Sender.
- Update the
whatsapp.phone_numbervalue in your vault using your WhatsApp sender's number. This should be in the form of'whatsapp:+PHONE_NUMBER', the phone number must not have any spaces.- Meya Console: save the vault.
- Meya CLI: upload the vault file, and do a
meya push.
Use a Twilio Messaging Service
Instead of setting the webhook URLs directly on the WhatsApp sender, Twilio recommends using a separate Messaging Service to configure the endpoint URLs.
Create a Messaging Service
- In your Twilio console, click the project name in the top left bar.
- Choose Messaging → Services from the products section.
- Click the Create Messaging Service button.
- Step 1:
- Give the service a descriptive name.
- Select the Engage in a discussion in the Select what you want to use Messaging for drop down.
- Click Create Messaging Service.
- Step 2:
- Click Add Senders.
- Select WhatsApp Number from the Sender Type drop down.
- Click Continue.
- Select your WhatsApp sender from the list.
- Click Add WhatsApp Numbers.
- Click Step 3: Set up integration.
- Step 3:
- Select the Send a webhook option.
- Paste the webhook from the previous section into the Request URL input.
- Under the Delivery Status Callback section.
- Also paste the webhook from the previous section into the Callback URL input.
- Click Step 4: Add compliance info
- Step 4:
- Click Complete Messaging Service Setup.
Update an existing Messaging Service
- In your Twilio console, click the project name in the top left bar.
- Choose Messaging → Services from the products section.
- Select the service from the list.
- Select the Integration section.
- Select the Send a webhook option.
- Paste the webhook from the previous section into the Request URL input.
- Under the Delivery Status Callback section.
- Also paste the webhook from the previous section into the Callback URL input.
- Click Save.
Update your vault
- In your Twilio console, click the project name in the top left bar.
- Choose Messaging → Services from the products section.
- Select the service from the list.
- Select the Properties section.
- Copy the Messaging Service SID.
- Update the
whatsapp.phone_numbervalue in your vault using Messaging Service SID. This should be in the form of'whatsapp:MG...'.- Meya Console: save the vault.
- Meya CLI: upload the vault file, and do a
meya push.
Use WhatsApp as a messaging channel
Create a flow
Let’s create a basic flow to see if we can send WhatsApp messages to and from our app.
In your app’s flow folder, create a new file called hi.yaml. Copy this code into the file:
triggers:
  - keyword: hi

steps:
  - say: Hello! Great to meet you.
Save the file and upload your work:
meya format
meya push
Try it out
Open WhatsApp. If you haven’t already done so, send the special joining phrase to your WhatsApp number. The phrase has the format join SOME-PHRASE. You’ll get a welcome message in response, which confirms your number has been added as a sandbox participant.
To trigger the flow, type hi.
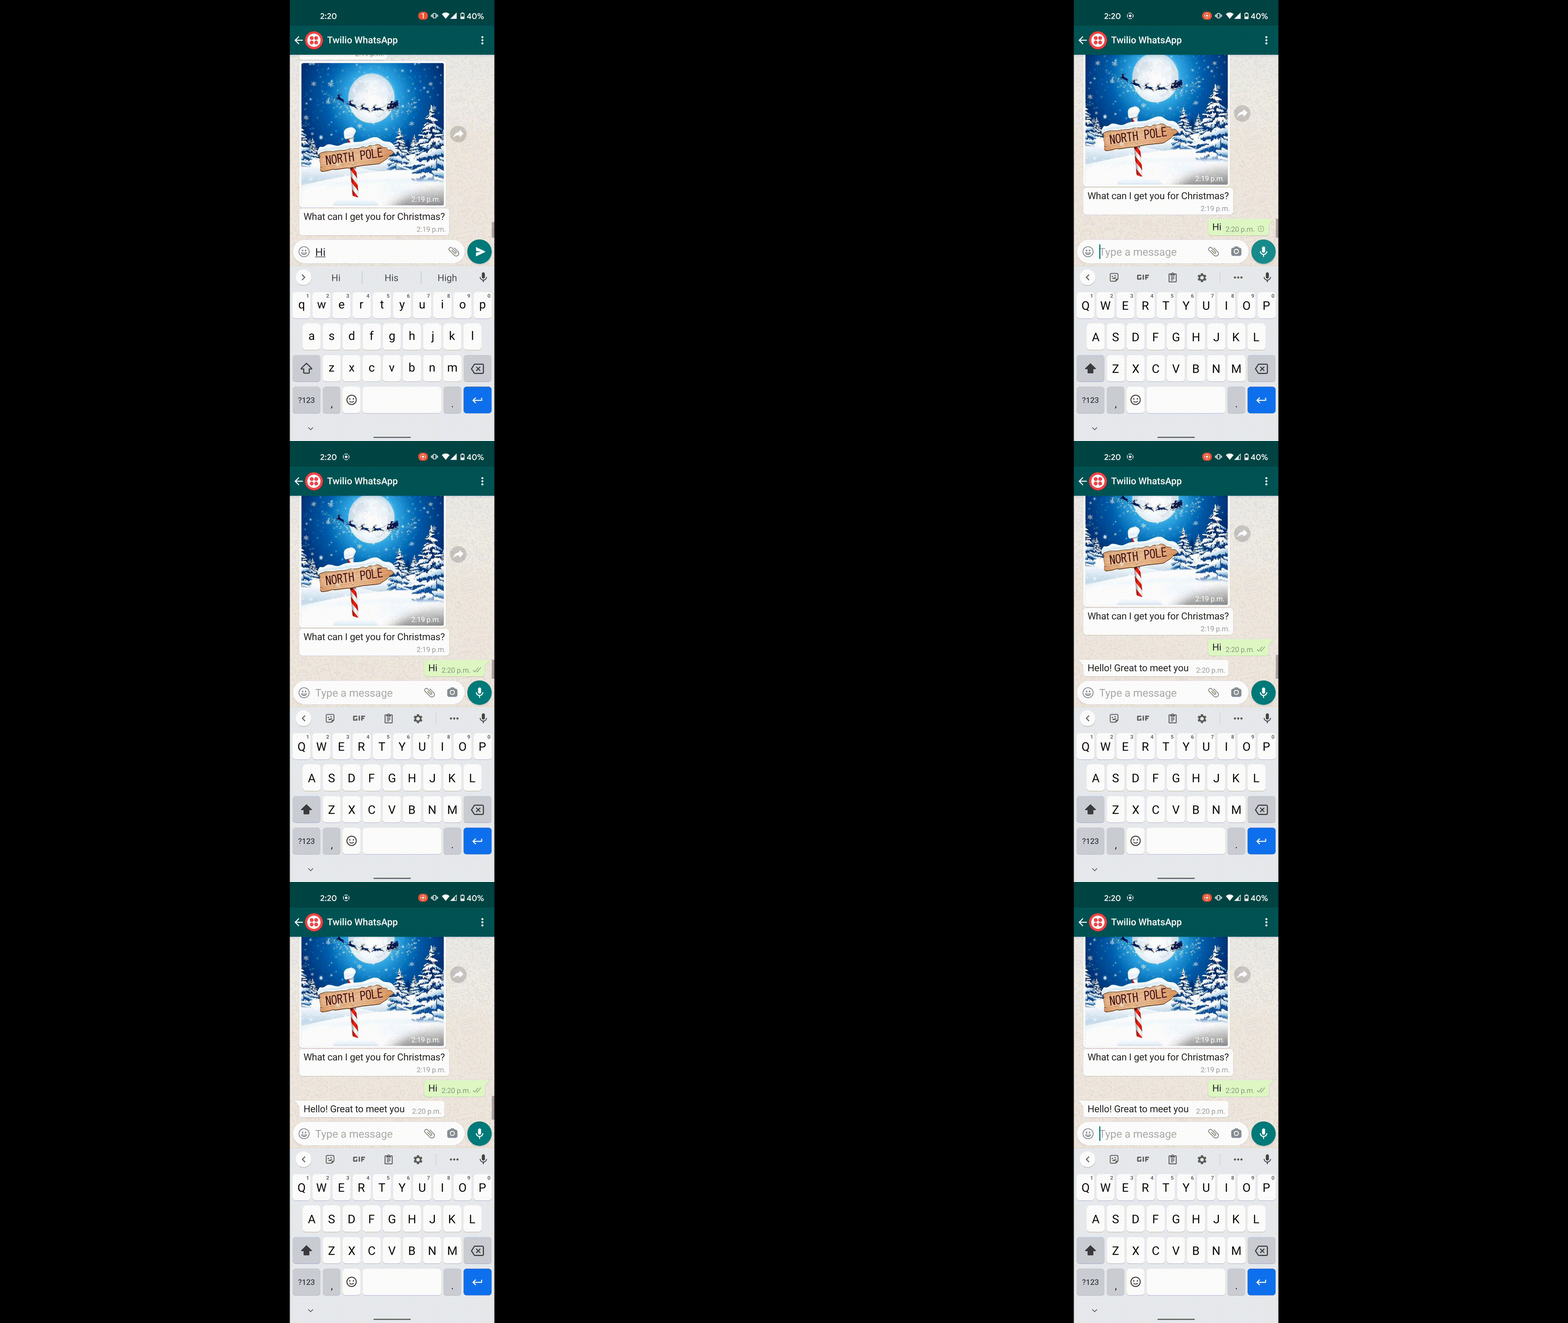
Great! You’ve set up the WhatsApp integration and confirmed that users can send and receive messages from your app.
Troubleshooting
If anything is misconfigured in your Twilio account, Twilio’s API will return an error message explaining what went wrong. You can find these responses in your app’s Log page using this GridQL query:
url:*twilio* type:meya.http.entry.responseFor detail on Twilio errors and how to fix them, check out their documentation.
Updated 9 months ago
