Twilio Voice
How to set up a Twilio Voice integration
Twilio lets you connect with customers everywhere they want to interact with you, including text messages, emails, phone calls, video, and more.
With Meya’s Twilio Voice integration you can do things like:
- Begin a chat on a messaging integration, then transfer it to a phone call instead of live chatting with an agent.
- Give VIP users the ability to jump the support queue and connect directly with an agent.
- Confirm a user’s phone number by calling and giving them a code to type into the chat.
This guide will show you how to add the Twilio Voice integration, use Twilio Voice as a messaging channel and incorporate Twilio Voice components and triggers into your bot.
Components and triggers
Here is an overview of what you can do with the Twilio Voice components and triggers:
Name | Description | Documentation |
|---|---|---|
| Create an outbound phone call. | |
| Connect the current caller to another party. | |
| Collect digits or transcribe speech during a call. | |
| End a call. | |
| Transfers control of a call to the TwiML instructions hosted at a different URL. | |
| Rejects an incoming call to your Twilio number without billing you. | |
| Triggered by a Twilio Voice call event. You can specify whether it should match inbound or outbound call events. |
Adding the Twilio integration
To create the integration, you’ll need to find your Twilio credentials, add them to the vault, and create the integration file.
Retrieve Twilio credentials
First, you’ll need to gather your Twilio account SID and authentication token.
If you’re just testing the integration out and don’t want to send real messages yet, Twilio provides test credentials you can use. See the Test Credentials section below for details.
Live credentials
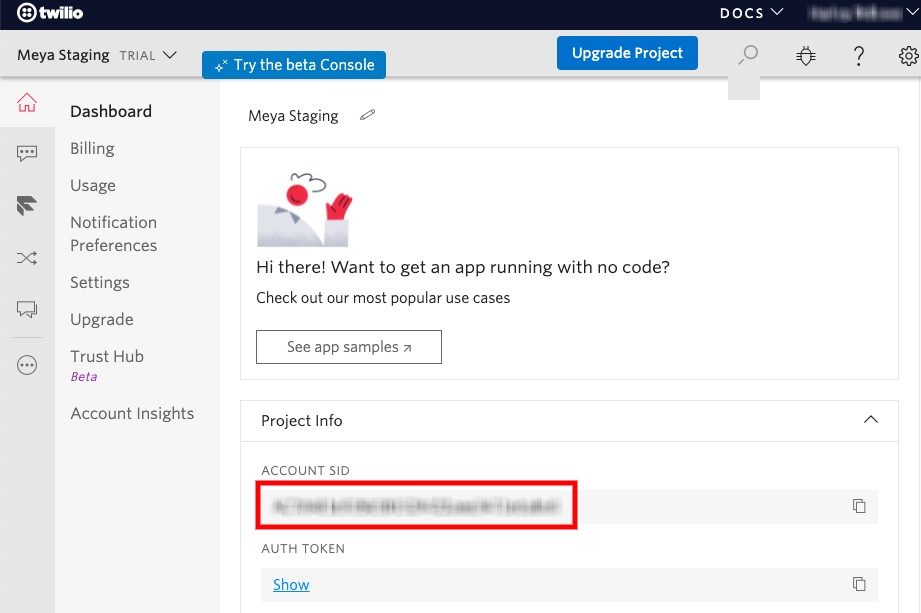
Login to your Twilio console. In the Project Info box you’ll see your Account SID. Make a note of it as you’ll use it in the following step.

You should also pick which Twilio phone number you’ll be sending the messages from.
Test credentials
If you’re not ready to use your live Twilio credentials, you can use test credentials instead. Here’s how.
If you’re using your Twilio live credentials, you can skip ahead to Add secrets to the vault.
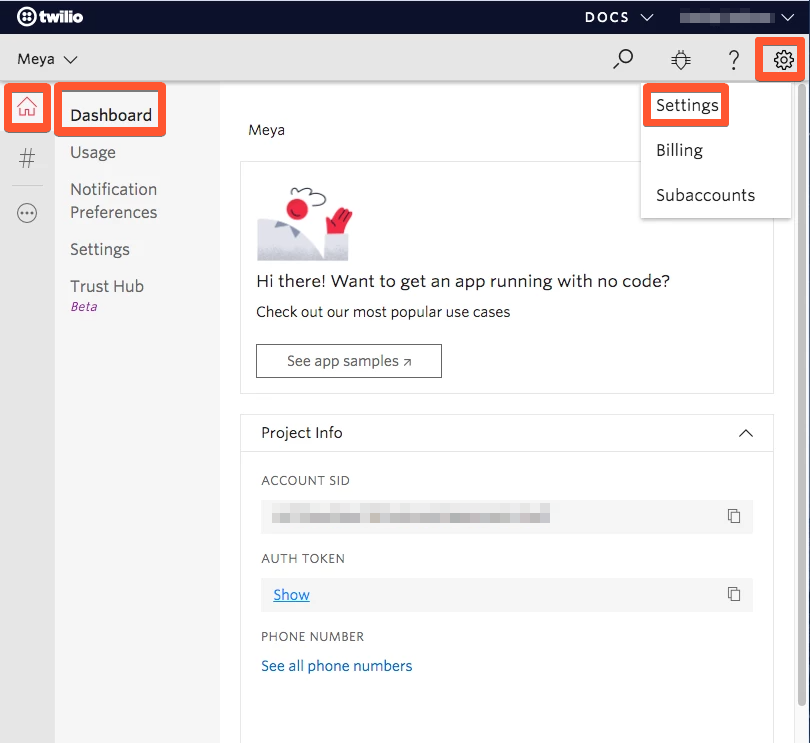
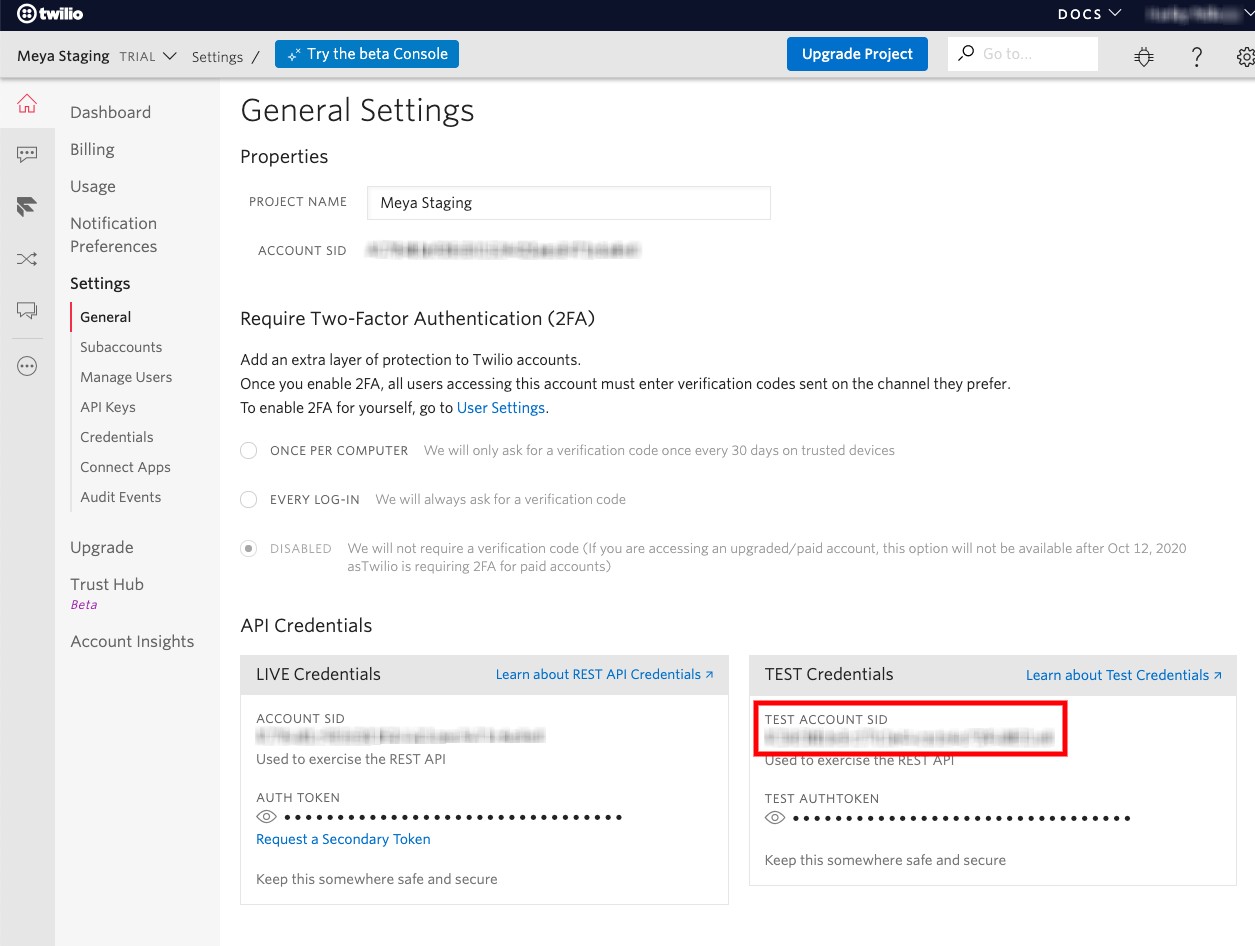
- Login to your Twilio console. In the upper right corner, click the gear icon, and choose Settings.

- In the Test Credentials box, make a note of the Test Account SID.

Create the API key
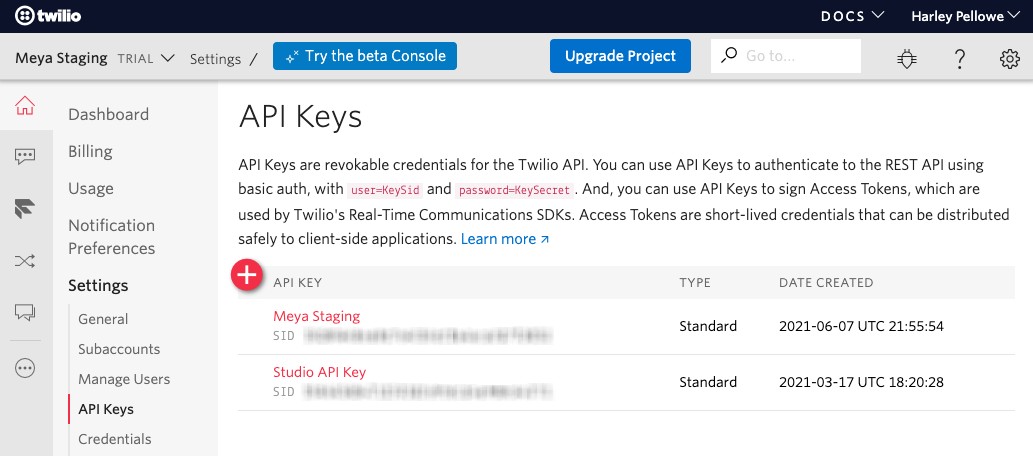
Navigate to the API key management page. Click the red + button to create a new key. Make sure the type is set to Standard.

Make a note of the API secret and SID values.
Add secrets to the vault
The vault is used to store secret information that shouldn’t be committed to version control. Let’s store the Twilio credentials there.
- In your app’s root folder, open
vault.yamland copy this code into it:
twilio.account_sid: xxx
twilio.api_key_secret: xxx
twilio.api_key_sid: xxx
twilio.phone_number: xxx
Remember not to store the actual values in yourvault.yamlfile. Just leave them set toxxx.
- Open
vault.secret.yamland copy this code into it:
twilio.account_sid: ACCOUNT_SID
twilio.api_key_secret: API_KEY_SECRET
twilio.api_key_sid: API_KEY_SID
twilio.phone_number: "PHONE_NUMBER"
Replace the values with your actual Twilio credentials.
If you’re using test credentials, set the phone number to”+15005550006”. This is a special phone number that will only work with your test credentials.
Depending on the format of the phone number, you may need to wrap it in quotes to ensure the app interprets it as a string, instead of an integer.
- Save these files and upload the new vault secrets using this command in your terminal:
meya vault upload --file vault.secret.yaml
meya push
Create the integration
Now that you’ve stored your credentials, you can create the integration using references to the vault.
In your app’s integration folder, create a new file called twilio_voice.yaml and copy this code into it:
type: meya.twilio.voice.integration
account_sid: (@ vault.twilio.account_sid )
api_key_sid: (@ vault.twilio.api_key_sid )
api_key_secret: (@ vault.twilio.api_key_secret )
phone_number: (@ vault.twilio.phone_number )
Save the file and upload it:
meya format
meya push
Create the flows
Let’s create a flow that will be triggered by an incoming call. We’ll use it to build a simple phone tree (i.e. an automated phone system through which callers are routed according to their responses to questions).
Inbound call
In your app’s flow folder, create a new file called incoming.yaml and copy this code into it:
triggers:
  - type: meya.twilio.voice.trigger.ringing
    direction: inbound

steps:
  - say: Hello and welcome to the Twilio Voice demo!
  - delay: 1

  - (question)
  - type: meya.twilio.voice.component.gather
    input: dtmf speech
    num_digits: 1
    hints: order status hang up
    ask: Press 1 or say "order status" or press 2 or say "create ticket" or press
      3 or say "hang up"
  - flow_set: choice

  - if: (@ flow.choice not in ["order status", "hang up", "create ticket", "1", "2",
      "3"])
    then:
      jump: invalid
    else: next

  # order status
  - if: (@ flow.choice | int == 1 or flow.choice == "order status")
    then:
      flow: flow.order_status
      transfer: true
    else: next

  - (create ticket)
  - if: (@ flow.choice | int == 2 or flow.choice == "create ticket")
    then:
      flow: flow.create_ticket
      transfer: true
    else:
      jump: hang up

  - (invalid)
  - say: Not a valid choice.

  - (hang up)
  - say: Goodbye
  - type: meya.twilio.voice.component.hangup
Breaking it down
Line 3: Specify that this flow should be triggered by inbound calls, not outbound.
Lines 10-15: Use the gather component to ask the user for input. On line 11, we specify that we’ll accept DTMF (i.e. phone keypad) or speech input.
Lines 18-22: Validate the input using a Jinja2 if statement.
Line 44: End the call if the user entered an invalid option using the hangup component.
Lines 27 & 34: Route the user to other flows depending on their input.
Order status
Let’s create the order_status flow referenced on line 27 of incoming.yaml.
Create a new file called order_status.yaml in the app’s flow folder. Copy this code into it:
steps:
  - say: I'll check the status of your order.
Since this is a demo, this flow stub is all we need in order to prove that the phone tree is working. In a real-world scenario this flow could be much more complex and route to other “branches” in the phone tree.
Create ticket
Now we’ll add the create_ticket flow referenced on line 34 of incoming.yaml.
Create another file called create_ticket.yaml in the app’s flow folder. Copy this code into it:
steps:
  - say: I'm creating a support ticket for you...
Upload your changes
Save your files, and run these commands in your terminal to push your changes to the Grid:
meya format
meya push
Test it out
Great! Our phone tree is complete. Let’s give it a test.
Dial your Twilio phone number. Your flow should launch and ask you for some input. Try pressing a button on your phone’s keypad, or saying order status, for example. It should route you to the order_status.yaml flow.
Awesome! You’ve set up the Twilio Voice integration and can now engage your customers using voice phone calls.
Updated 9 months ago
