Zendesk Support
Install instructions
On Zendesk
- Sign up for a Zendesk account. Note your account domain name.
- Create an admin user that will act as your bot under
⚙->Manage->People->add user. Give your bot an email address (the email address is not used except for identification) - Create an API token
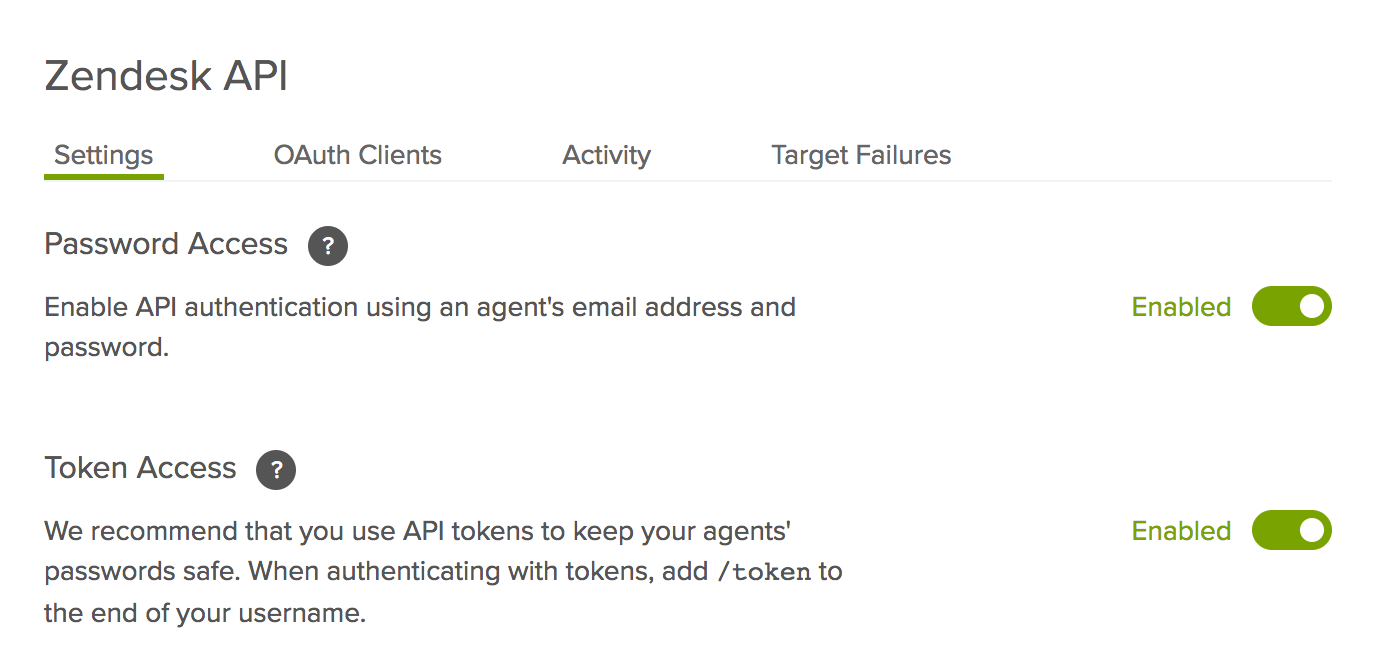
⚙->Channels->API->Settings. Make sure you have Password Access and Token Access enabled. Important: copy the API token somewhere accessible as Zendesk will not show it to you again.
Note you need to be on the Zendesk plan Team or higher for Zendesk to support this connection.

Enabling Password & Token access
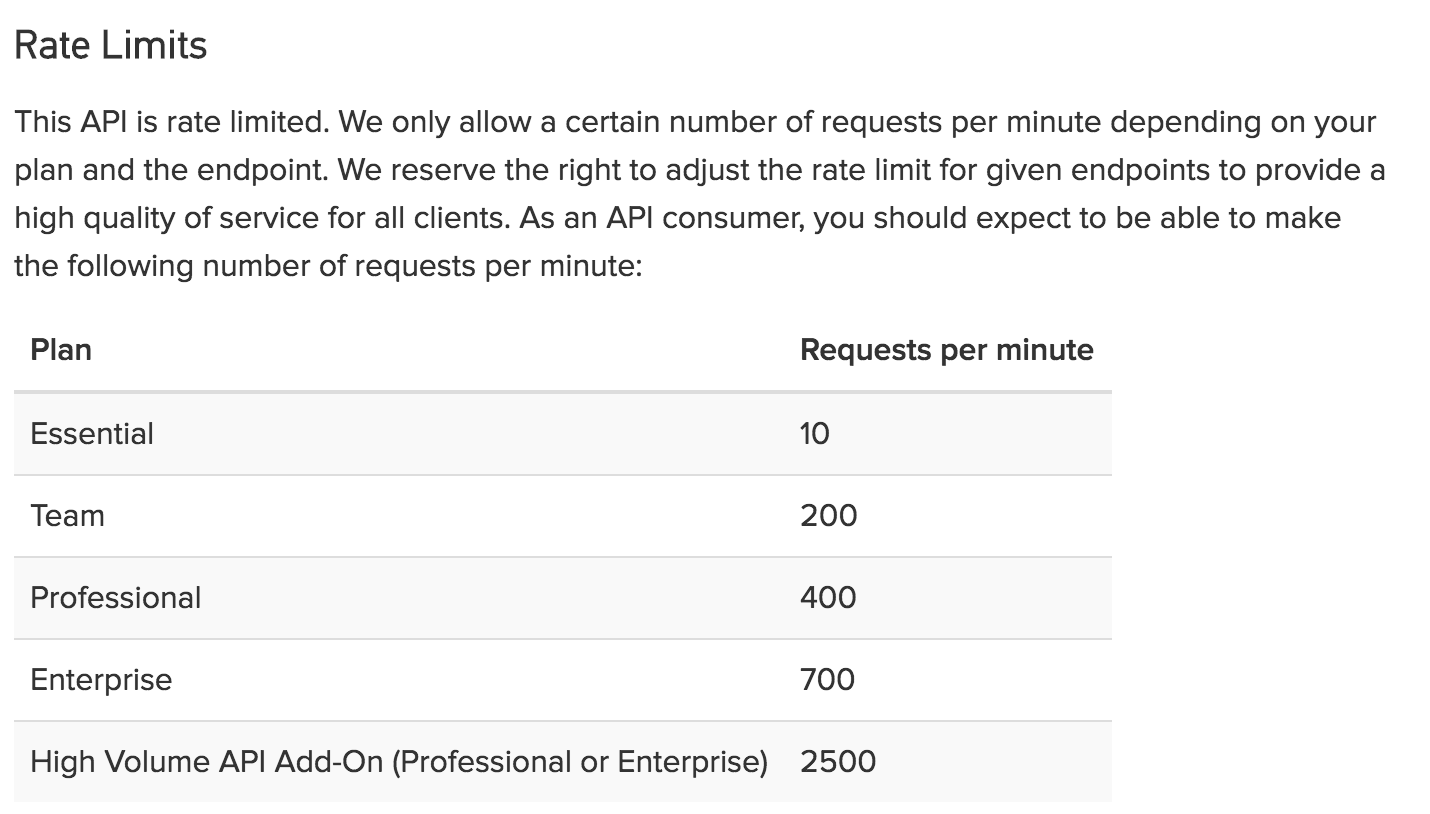
Zendesk rate limits are fairly limited. Please check your plan and be aware of your usage limits.

Zendesk rate limits
On Meya
- Enter the necessary information into the Zendesk integration page:
Zendesk name,API tokenandbot agent email address. Important: your bot agent email address must be verified. - Click SAVE and you're all set!
Assigning tickets to an agent
With the Zendesk Support integration you can
- Have a bot handle the initial conversation
- Create a Zendesk ticket
- Assign the ticket to an agent or group
- Pause the bot while the ticket is assigned to an agent
- Allow the agent to trigger bot flows using slash commands
- Unpause the bot when the agent closes the ticket
Below are more detail on these features.
Ticket subject and username
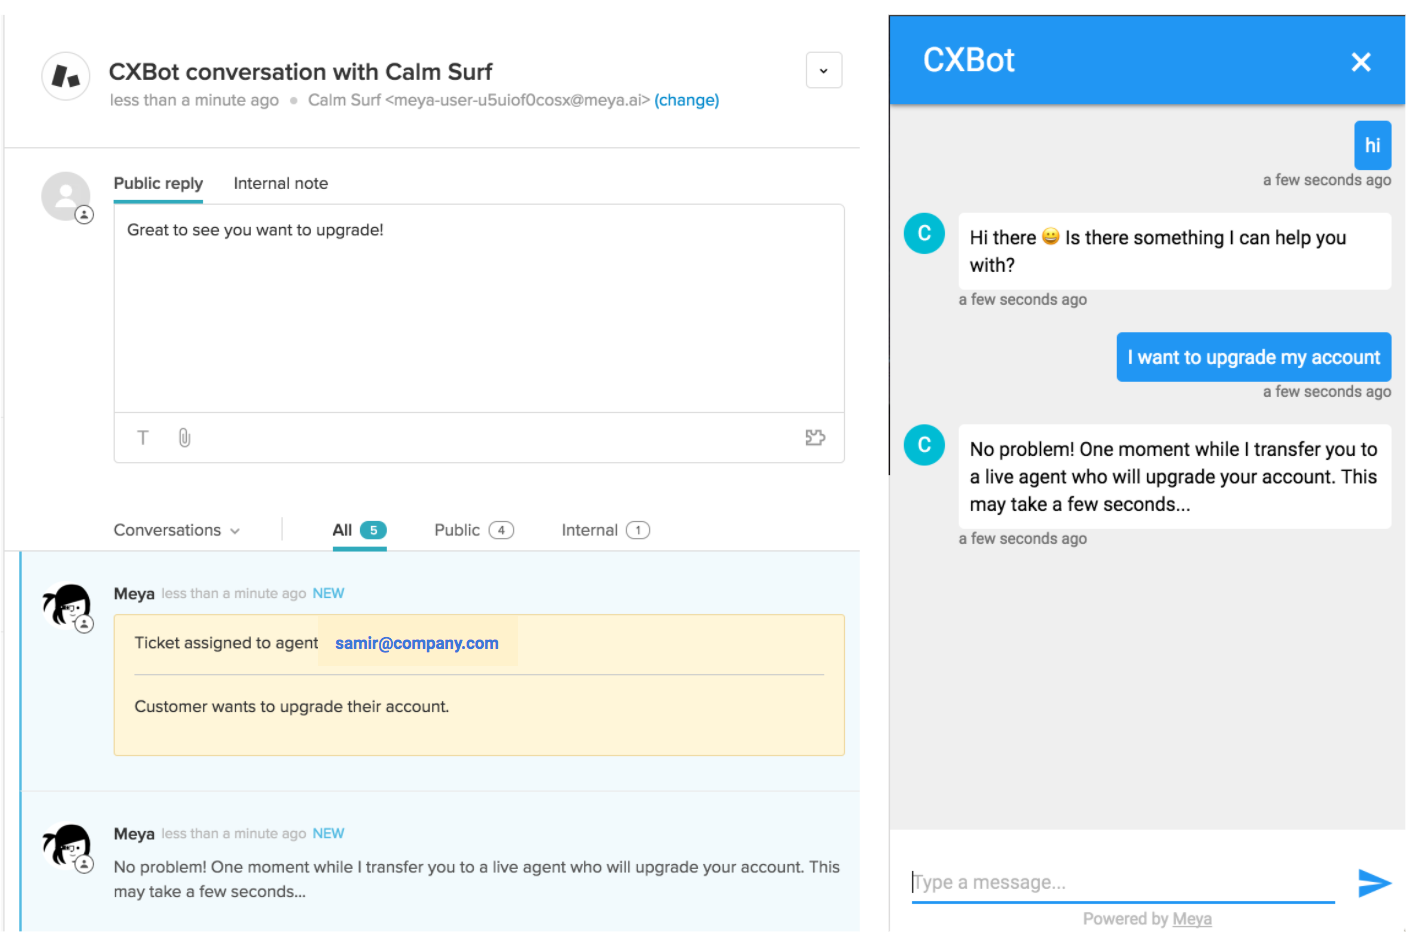
Subjects created by Meya will come in as BOT_NAME conversation with USERNAME. If the user is coming in from an anonymous chat, Meya will provide a friendly name to help you remember who you are talking to.

Example subject created by Meya
Responding as an agent
When an agent responds to a ticket from Zendesk, the following will occur:
- The bot will pause itself
- The bot will leave a note indicating its pause state
- An agent can unpause the bot by assigning the ticket to the bot agent.

Responding as agent (left)
User chat (right)
Transfer to an agent from a flow
Use human.transfer to assign the conversation to a human agent. You can assign using an agent's ID or email address, or assign to a team or group inbox using the group: prefix with the group's ID.
Click the three tabs in the code block below to see examples of the different ways you can assign tickets.
states:
    transfer:
        component: human.transfer
        properties:
            text: "I'm getting a live agent. This may take a few minutes."
            assignee: 145678
            note: "This ticket has been assigned to agent 145678!"
states:
transfer:
component: human.transfer
properties:
text: "I'm getting a live agent. This may take a few minutes."
assignee: "[email protected]"
note: "This ticket has been assigned to John Smith!"states:
transfer:
component: human.transfer
properties:
text: "I'm getting a live agent. This may take a few minutes."
assignee: "group:123456789"
note: "This ticket has been assigned the Success team!"
To find a group's ID, use this curl:
curl https://{subdomain}.zendesk.com/api/v2/groups.json \ -v -u {email_address}:{password}
Send a note to an agent
You can add private notes visible only to agents by using the human.note component.
states:
    send_note:
        component: human.note
        properties:
            text: "They are a great customer! Treat them right."
Starting flows from inside Zendesk
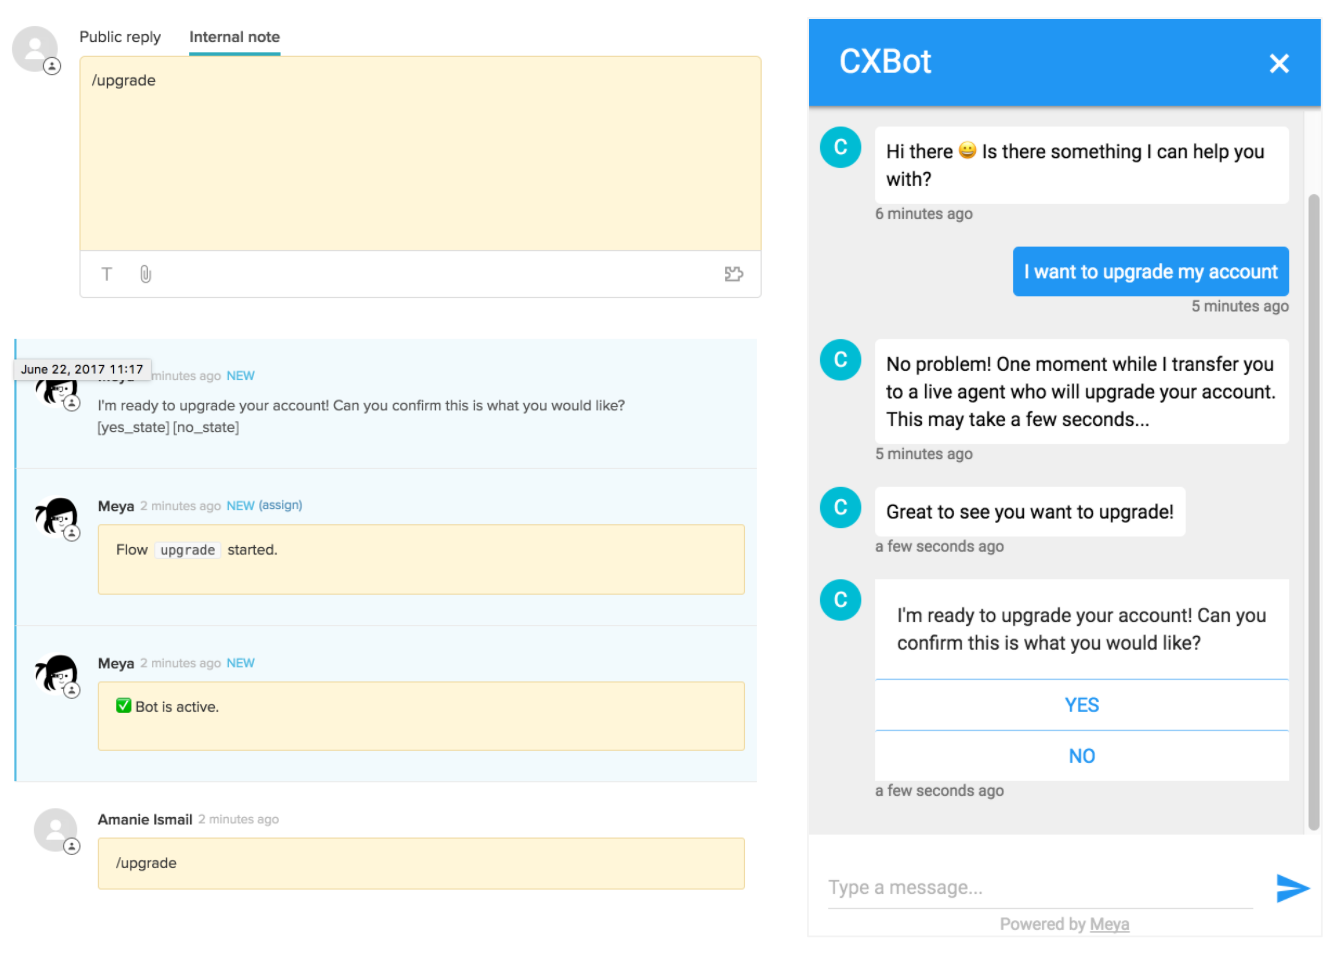
Agents can start bot flows by using "slash commands" from the internal note tab. For example, by entering /hello_world from the internal note tab, the bot will:
- unpause and assign the ticket to itself
- start the flow named
hello_world - leave a note confirming the flow has started

Agent start flow (left)
Chat result for user (right)
Missing flowsIf no Meya flow exists matching the Slash command the bot will leave a note "❌ Error: Flow not found."
Follow-up tickets vs new tickets

In Zendesk Support, a closed ticket cannot be re-opened. If a user responds to a closed ticket, Zendesk's default behaviour is to open a follow-up ticket.
Follow-up tickets contain a link to the previous ticket. Likewise, the previous ticket will contain a link to the follow-up ticket.
For some use-cases, though, it can be preferable to have responses to closed tickets create brand new tickets instead of follow-up tickets. New tickets are not connected to previous tickets.
In most cases, you should leave this setting checked in order to achieve the standard behaviour.
Updated 9 months ago
