Tutorial 1: Referencing Bot CMS content
Build a simple bot that uses Bot CMS to easily create and manage its content.
Hard-coding content into your flows and custom components might not seem like a bad idea when your bot only has a few, but as you develop your bot updating content can quickly become a headache! In this tutorial, you'll see how Bot CMS can make bot development and maintenance much faster by storing your content in one location.
Before you begin...
We recommend creating a bot from scratch by following along with the tutorial, but if you prefer, you can clone the finished bot: cms-basic.
1. Create a new bot
Start by creating a new bot in Meya. In your Meya account, click Create A Bot!.

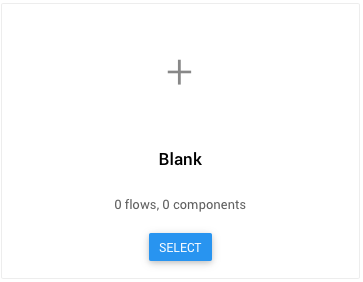
Select a blank bot.

Name your bot cms-basic.
2. Add a few flows
You can now view your bot’s dashboard. Click Add First Flow to enter the Bot Studio.
For the trigger, select open_chat. Leave the other settings with their default values and click OK to return to the code editor.

In the code editor window, enter the following code.
states:
	start:
		component: meya.text
		properties:
			text: Hi! I’m a basic bot. Here are some important instructions to get you started --> Current instructions. If you want to see these instructions again, type ‘help’.
Click Save. Start a new flow by clicking New Flow, found on the left side of the toolbar. Click Add An Trigger and set the type to keyword. Set the keyword to help. Enter the following code into the flow.
states:
    start:
        component: meya.text
        properties:
            text: Here are the important instructions --> Current instructions.
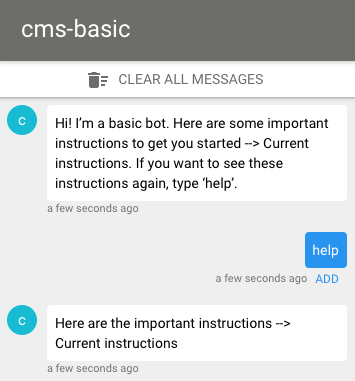
Save the flow. Press Clear All Messages in the test chat window. Your bot should display the text from the welcome flow.
3. Adding content to Bot CMS
Now imagine the important instructions change. You’d have to edit two different flows to update your bot! Let’s see how Bot CMS can save you time.
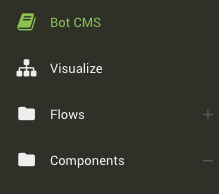
In the file explorer to the left of the code editor in Bot Studio, select Bot CMS.

Your bot’s content is organized into spaces, which can be thought of as folders containing related content, like FAQs, onboarding material, subscription commands, etc. Each space can contain one or more pieces of content.
Click Create Your First Space. Call it help. Click Edit Content. For your first piece of content, set Space to help, Key to instructions, IO Type to Output, Language to en - English, Value to Current instructions.
If you aren’t familiar with key/value pairs, you can think of this space as a dictionary where the key is a word and the value is the definition. We’ll be able to look up the right content from within a Meya flow or custom component by specifying the correct space, key, and language.
Click Save, then Close. Go back into Bot Studio.
4. Referencing content in Bot CMS
In the welcome flow (welcome.yaml in the file explorer on the left), replace the Current instructions text with {{ cms.help.instructions }}.
states:
    start:
        component: meya.text
        properties:
            text: >
                Hi! I’m a basic bot. Here are some important instructions to get
                you started --> {{ cms.help.instructions }}. If you want to see
                these instructions again, type ‘help’.
Do the same in the help.yaml flow.
states:
    start:
        component: meya.text
        properties:
            text: >
                Here are the important instructions -->
                {{ cms.help.instructions }}
In the chat test window, clear the messages and wait for the bot’s welcome message to appear. Type help to trigger the help flow.

5. Updating content in Bot CMS
Now, let’s suppose the important information has changed. Instead of going into every flow containing that important information, we can just open up Bot CMS and change the content once.
You can access Bot CMS without even leaving Bot Studio. Above the code window, toward the right, you should see a purple button that says Edit Content. Clicking on it will bring up the Bot CMS editor. It also appears in the file explorer to the left of the code editor.
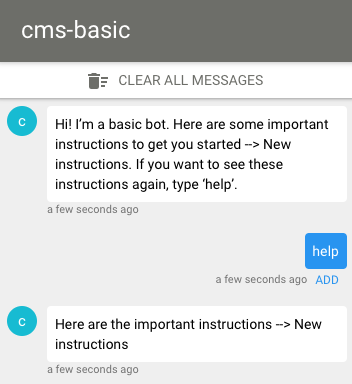
You only have one piece of content in the CMS, so it should already be selected. Change the Value field to say New instructions, click Save, then Close. Clear the messages in the chat test window and watch your bot display your updated content! Type help and verify that it appears different in the help flow as well.

Tip: If your bot doesn't work, clone the cms-basic bot and compare it with your own.
Congratulations!You now know how to access Bot CMS; create, edit, and delete entities; and reference those entities in your flows!
Updated 8 months ago
This has only scratched the surface of what you can do with Bot CMS. In the next tutorial you'll learn how to use Bot CMS to train a Natural Language Understanding (NLU) agent to trigger a flow.
