Account Dashboard
Learn how to navigate your account settings.
Once you've registered for an account you'll be able to login and access your Account Dashboard. The Account Dashboard is where you can view high-level statistics about your bots, change your billing details or your plan, add collaborators, and create new bots. Let's take a look at the user interface.
The Home tab
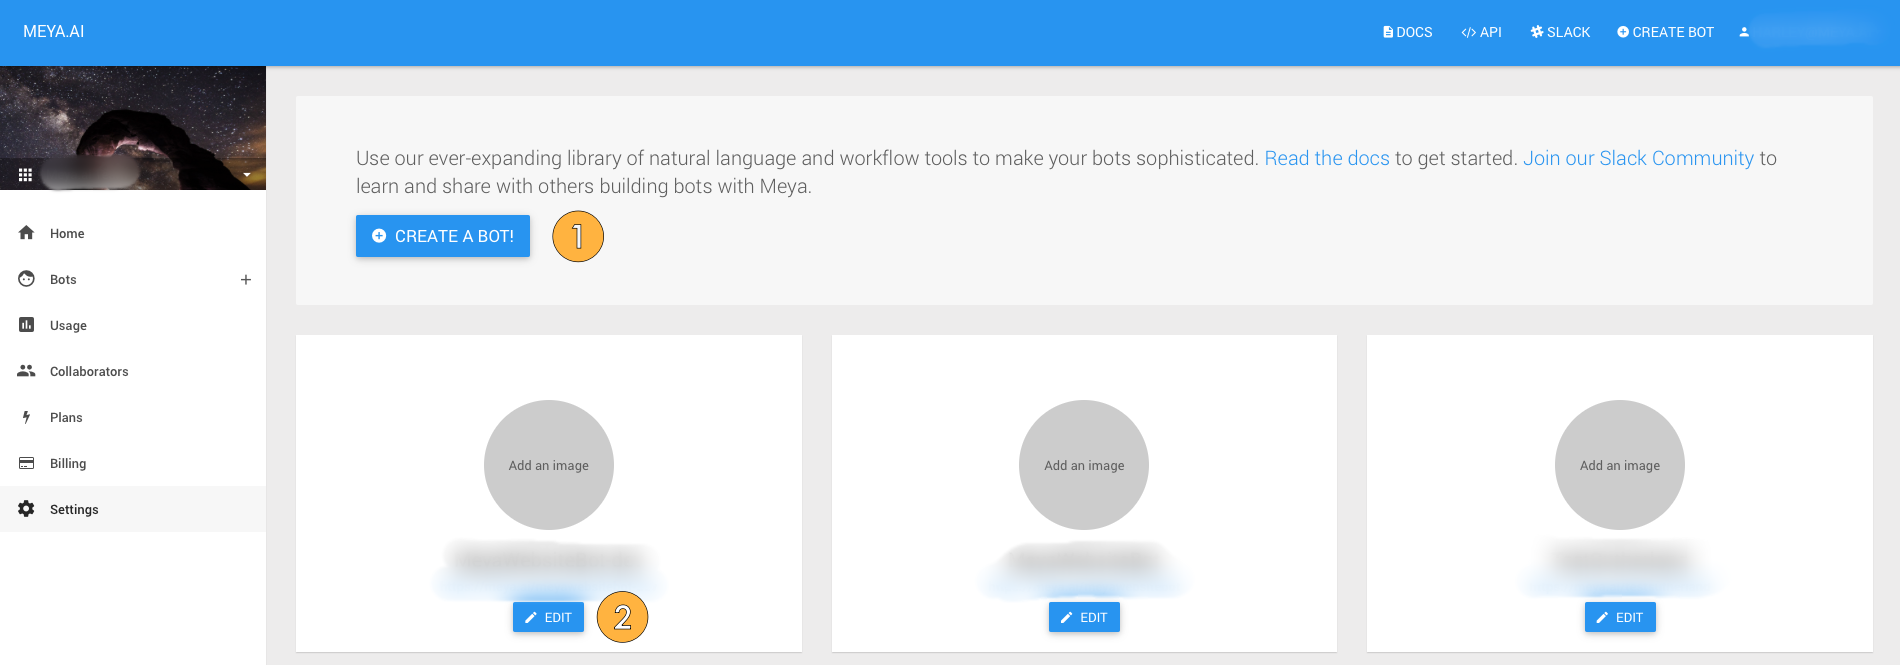
The Home tab is where you create new bots, or edit existing ones.
- Click here to create a new bot.
- If you have any existing bots, they'll appear here. Clicking the Edit button will take you to that bot's dashboard.

The Home tab on the Account Dashboard.
The Usage tab
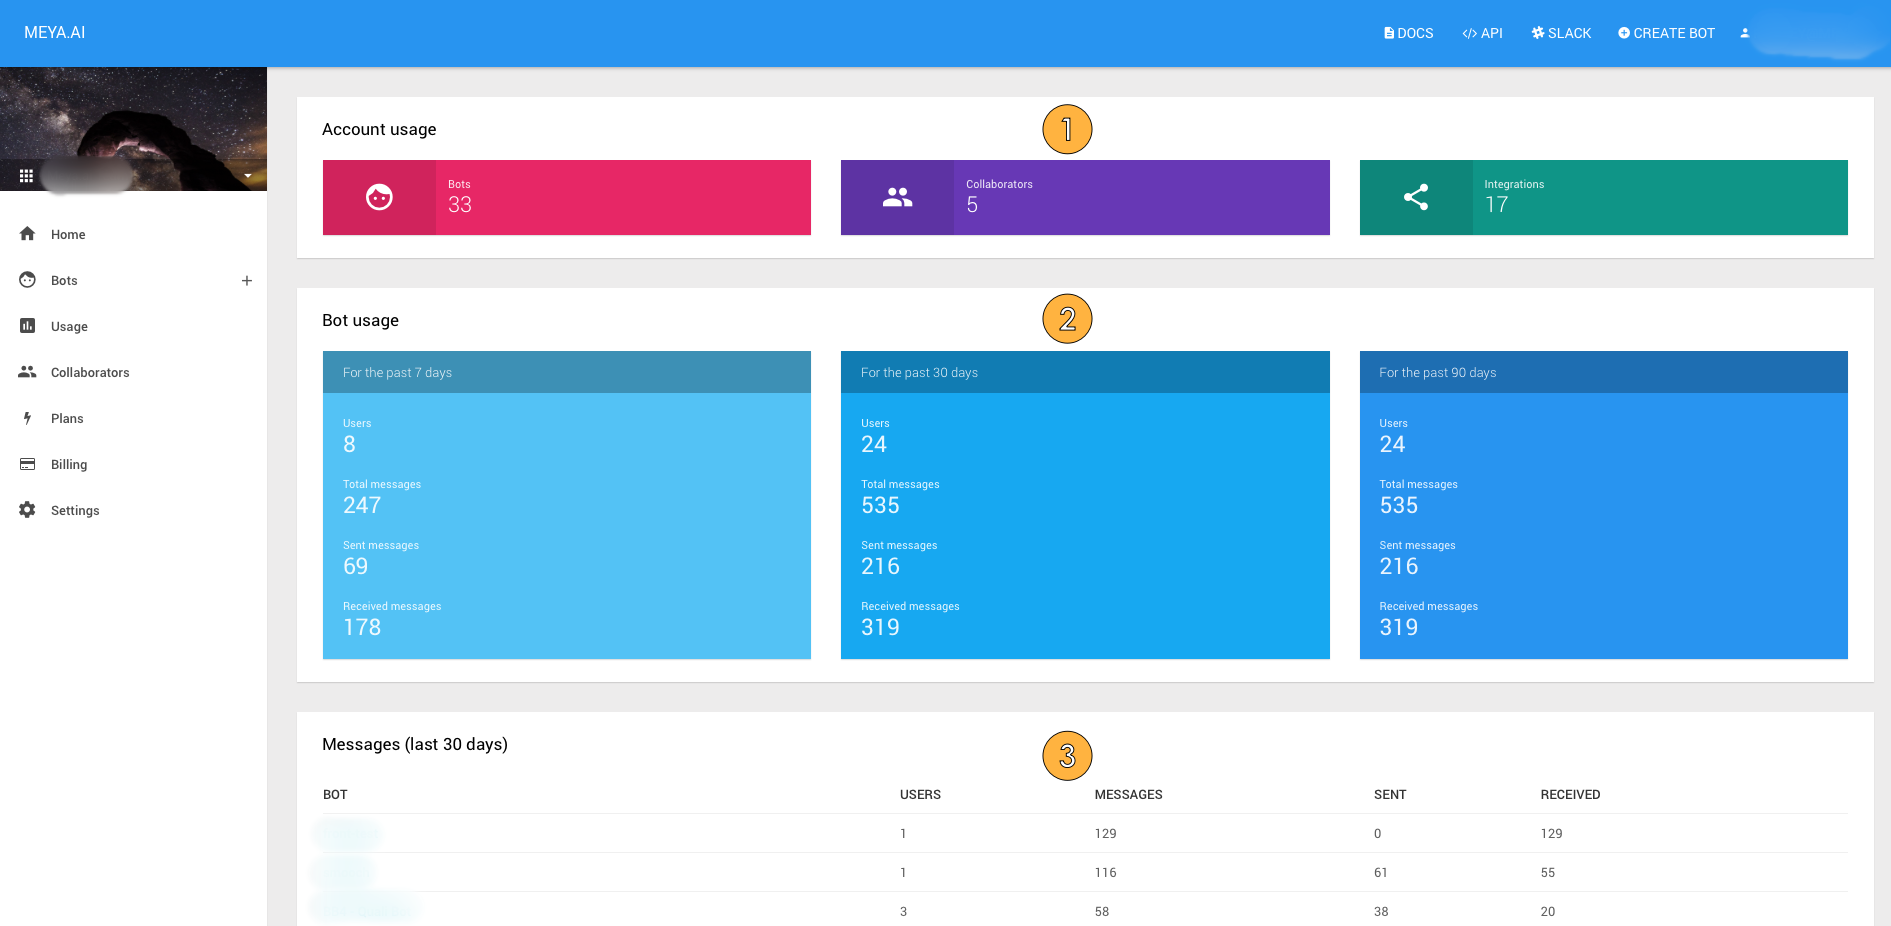
The Usage tab shows you a high-level summary of your bot and account activity.
- Here you can see how many bots, collaborators, and integrations you're using. Depending on your plan, you may be limited to a certain number of bots, collaborators, and/or integrations, so keeping an eye on these numbers is a good idea.
- This shows much your bots are being used. The Users field in the For the past 30 days section is especially important since each plan type is limited to a certain number of MAU (Monthly Active Users). Exceeding that limit will result in overage charges.
- Here you can see the same statistics grouped by bot.

The Usage tab on the Account Dashboard.
The Collaborators tab
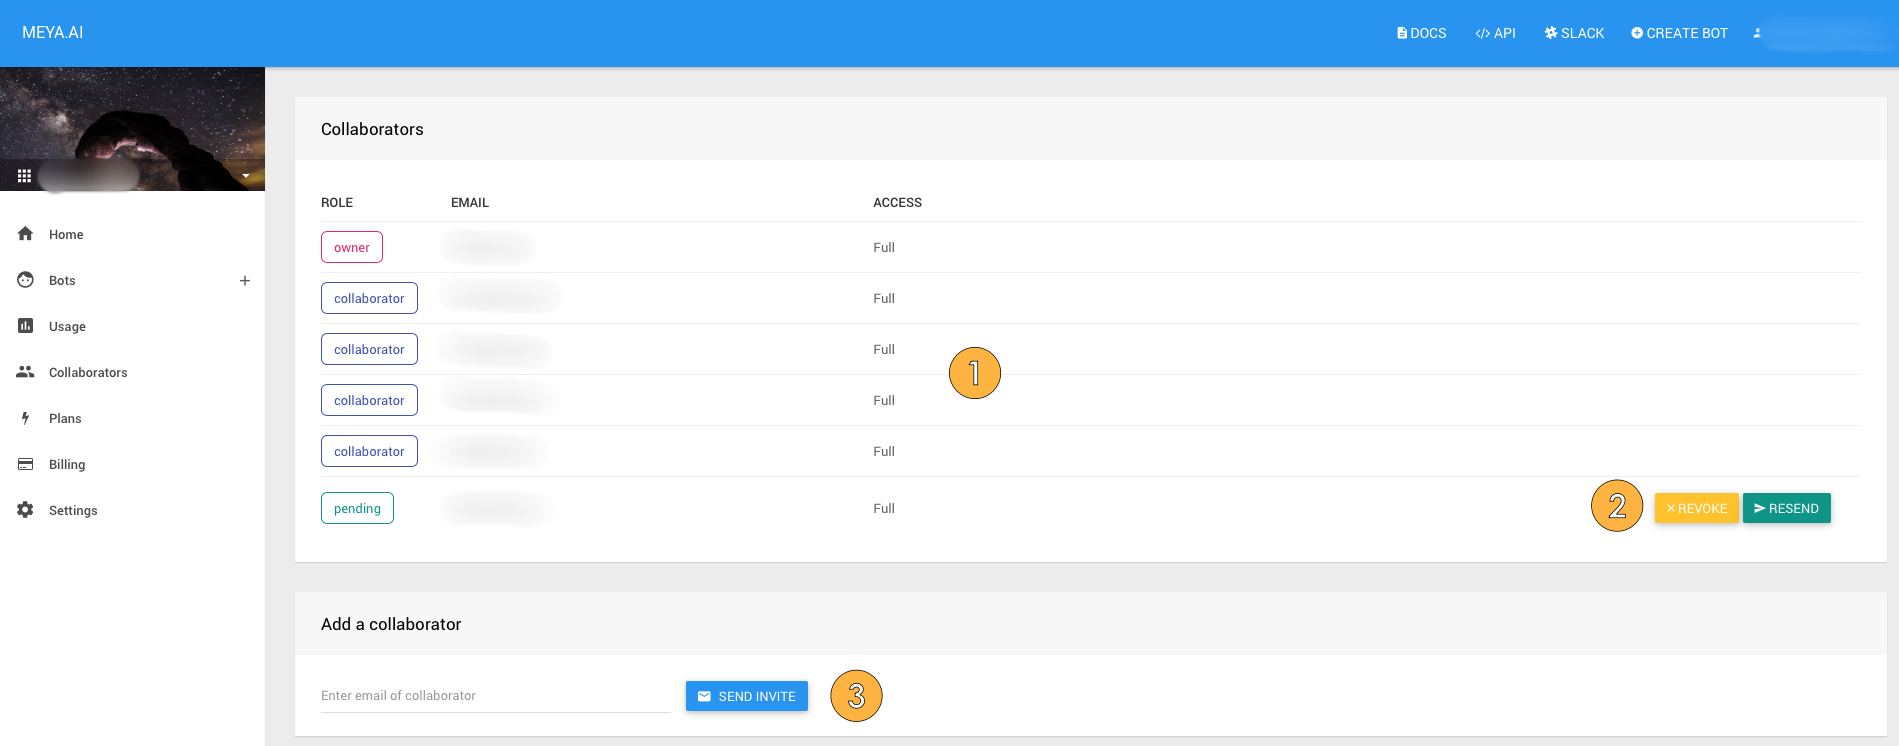
The Collaborators tab is where you can add other people to your account and set their permissions.
- Here you can see all the collaborators associated with this account, their role, and their access level. Only the owner can change a collaborator's access level.
- If a collaborator has not responded to their invite, send them another email with the Resend button. You can also withdraw the invitation by clicking Revoke.
- To invite a collaborator, enter their email address here and click Send Invite.

The Collaborators tab on the Account Dashboard.
The Billing tab
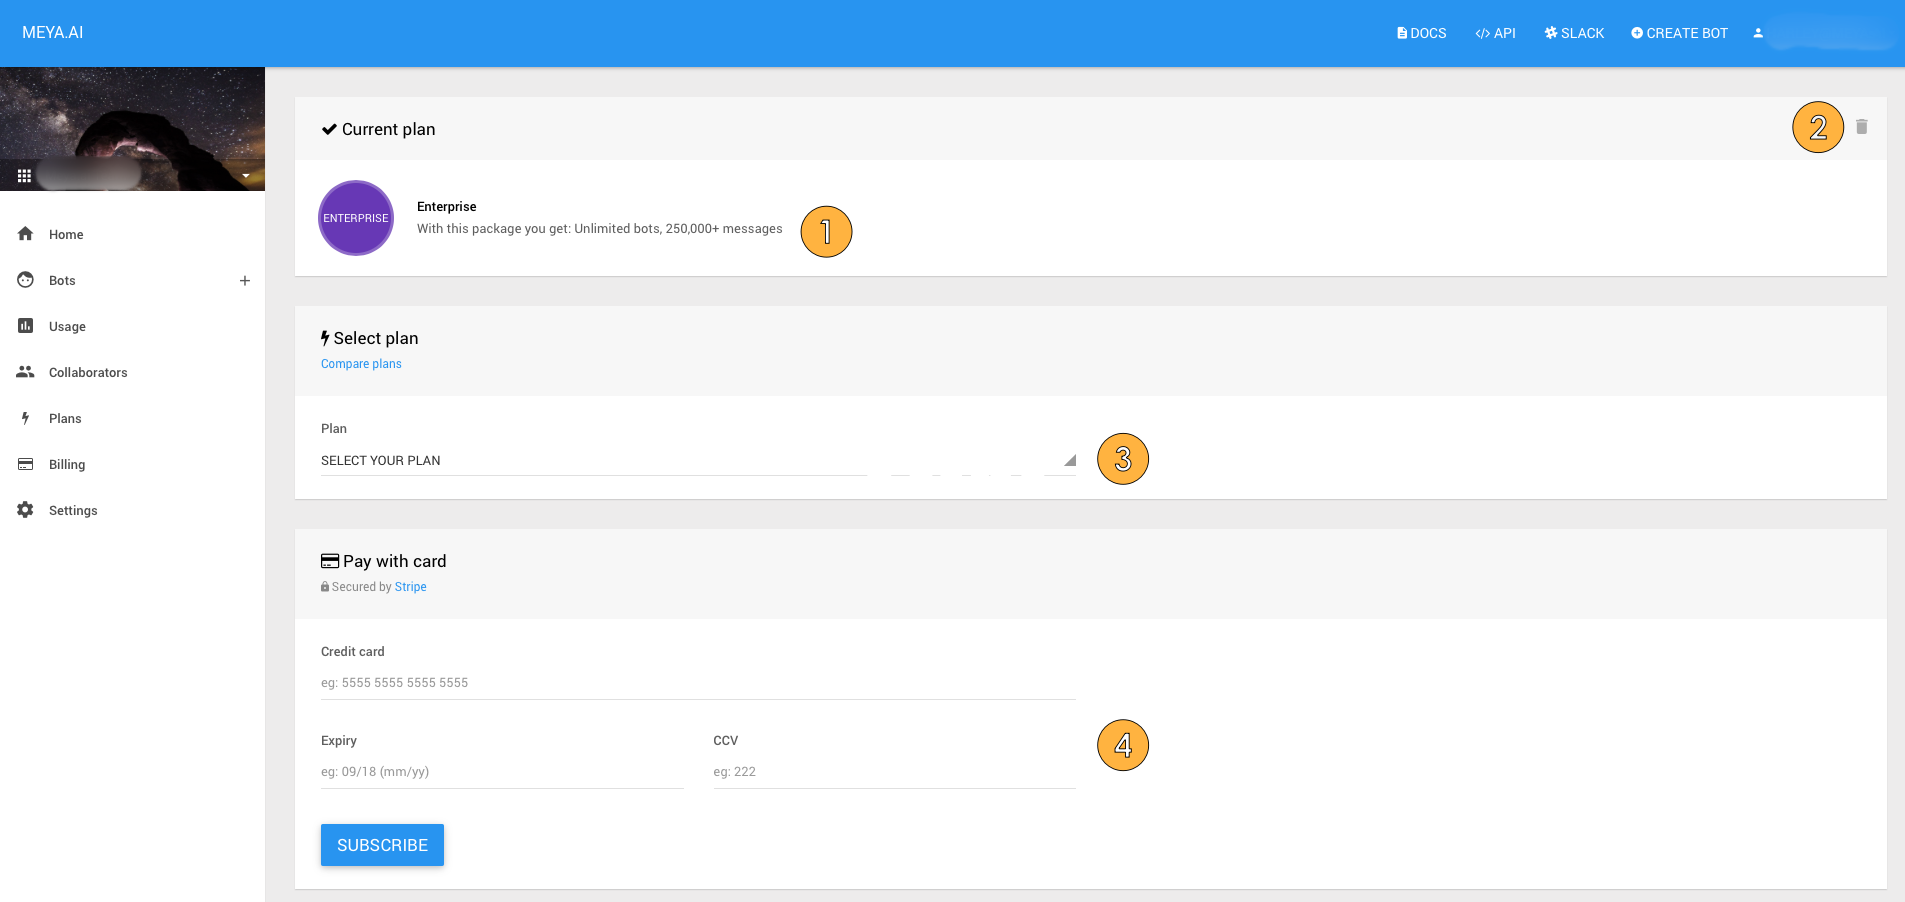
The Billing tab shows basic information about your current plan, let's you change the plan, and update your credit card info.
- Your current plan.
- Click the trashcan to remove your current plan. This will downgrade you to the Free plan. Note that if you have any features that aren't available in the Free plan, you may not be able to downgrade until you remove those features.
- Select a new plan here.
- Enter or update your payment details here.

The Billing tab on the Account Dashboard.
The Settings tab
The Account tab let's you edit your account name and specify an email address your Meya invoice will be sent to.

The Settings tab on the Account Dashboard.
Updated 8 months ago
Once you've created a bot, you'll be able to access the Bot Dashboard. Let's take a look...
