Facebook Messenger
How to connect your Meya bot to Messenger
- Create a Facebook App at https://developers.facebook.com/
- In the app, add the Messenger product.
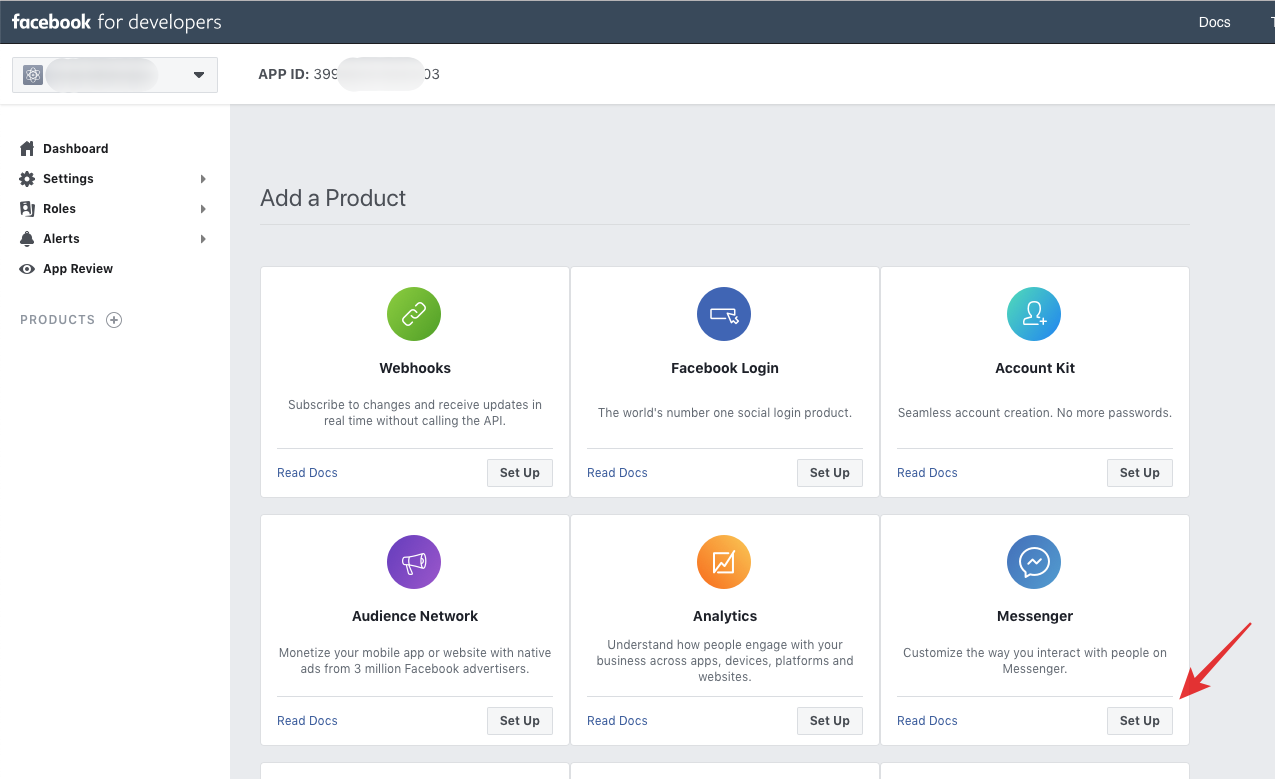
Select the Messenger product.
- Open the Messenger settings page and in the Token Generation section, either select an existing Facebook Page, or click the Create a new page button and follow the Page setup instructions.
- Copy the page access token and paste it in the Meya Messenger integration settings page in the Page access token field.

- In the Webhooks section of the app's Messenger settings, click Setup Webhooks.
- Check off
messages,messaging_postbacks,messaging_referrals, andmessaging_handovers.

- From the Meya Messenger integration page, copy the Webhook URL and Verify token into their respective fields in the app's Setup Webhooks pop-up. Click Verify and Save.

- From the Select a Page drop-down menu, choose your Page. Click Subscribe.
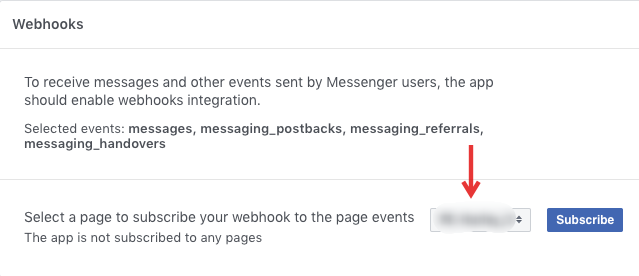
- Open the Facebook Page and choose About from the left-hand menu. Scroll to the bottom and copy the Page ID. Paste it in the Page ID field in the Meya Messenger integration page.

- Save the Meya Messenger integration page.
"The bot isn't responding to me (or another user)!"If the bot doesn't respond to a user, check if your Facebook app is in development mode. If it is, the bot will only respond to Facebook users who are listed in the Facebook app's Roles page as an Admin, Developer, or Tester.
Optional setup steps
- Add Get Started settings (optional)
- Add a Greeting (optional)
- Add a Persistent menu (optional)
Saving new Page CredentialsIn order for Meya to successfully complete the authentication flow with Facebook, your app must be in "Development" mode as pictured below. This will be the case when first connecting Meya to Facebook, and whenever the Page Access Token changes (which can happen when Facebook Page administrators change their personal account passwords). If the app is "Live" and Page Credentials have changed the authentication will fail.

User profile data
The Facebook User Profile API provides the following user profile fields without requiring any additional app permissions. By default, the bot will request this data.
Field Name | Description | App Permission Required |
|---|---|---|
| First name | N/A |
| Last name | N/A |
| Profile picture | N/A |
Accessing user profile data
User profile data is stored on the user scope and can be accessed within a flow using mustache syntax: {{ user.first_name }}, or from a Python component using self.db.user.get('profile_pic').
states:
    first:
        component: meya.text
        properties:
            text: "{{ user.first_name }}"
# -*- coding: utf-8 -*-
from meya import Component
class ProfileData(Component):
def start(self):
text = self.db.user.get('profile_pic')
message = self.create_message(text=text)
return self.respond(message=message, action="next")Adding additional profile fields
In addition to the above fields, other user profile fields can be accessed if your Facebook app has the required permissions.
Field Name | Description | App Permission Required |
|---|---|---|
| Locale of the user on Facebook |
|
| Timezone, number relative to GMT |
|
| Gender |
|
To add these permissions:
- Go to developers.facebook.com and open your app's dashboard.
- From the left-hand menu select Messenger, then Settings.
- Scroll to the bottom of the page and select additional permissions to add from the App Review for Messenger section.
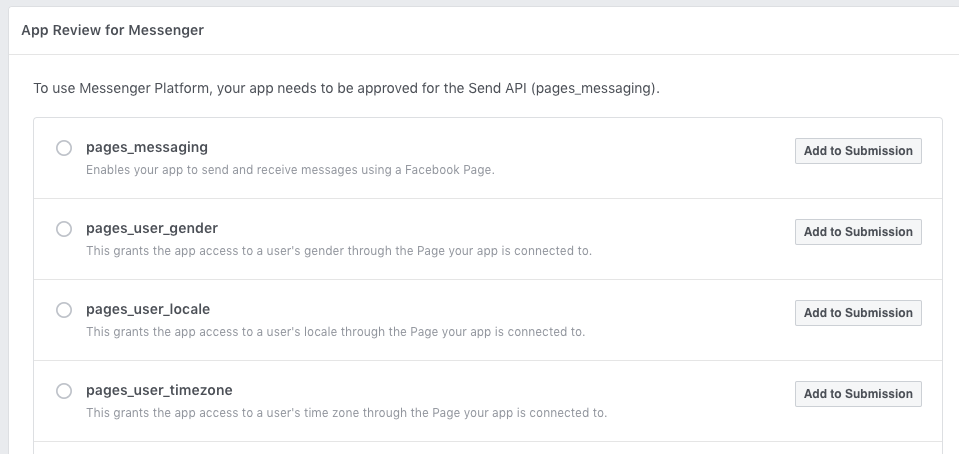
Selecting additional profile permissions from the Facebook app's Messenger settings.
- Go to your bot's Messenger integration settings and check off the additional permissions in the User profile permissions box. Click Save.
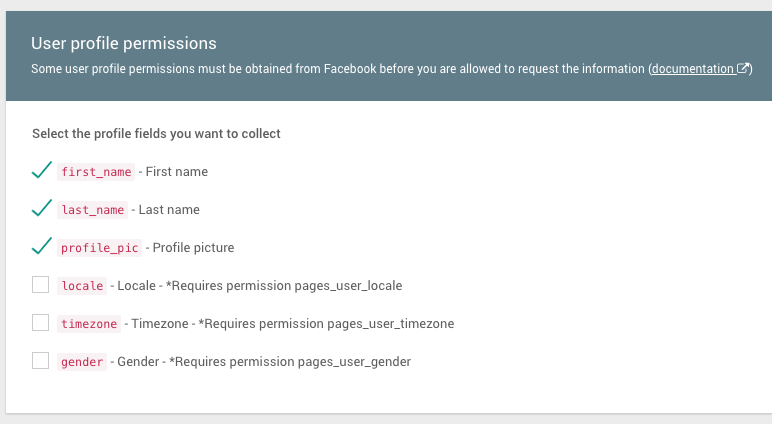
Select user profile permissions in the bot's Messenger integration settings.
Messenger messaging_type
All components that generate messages sent to Facebook Messenger must specify a messaging_type. By default, this will be set to RESPONSE, so no action is required on your part unless you wish to specify a more accurate messaging type.
TheRESPONSEmessaging type assumes that you are responding to a message from the user and are sending your response within the allowed 24-hour window or under the 24+1 policy .Misusing a message type is a violation of Facebook policy and may result in your app being rejected.
For details on the messaging_type options, visit the Facebook documentation.
Property | Description | |
|---|---|---|
| One of | Required |
| If the message is non-promotional and being sent more than 24 hours since the user last sent a message to the bot, set | Required if |
If either messaging_type or tag are set on a component, all messages generated by that component will have the same messaging_type and/or tag.
Example
states:
    first:
        component: meya.text
        properties:
            text: "This is a community alert!"
            integrations:
                messenger:
                    messaging_type: MESSAGE_TAG
                    tag: COMMUNITY_ALERT
Messenger Checkbox Plugin
Meya lets you trigger a flow from a Messenger Checkbox plugin. This is useful for initiating a conversation with a Facebook user as part of a form submission and/or checkout process
- Connect your bot to Messenger
- Make sure you have 'messaging_optins' checked from your subscription fields
- Whitelist the website domain on your Messenger integrations page.
- Add a snippet of HTML and javascript to your web form.
- Create a bot flow that is invoked from the form submission.
Accessing user profile dataUser data will only become available after the user has responded to the bot.
See the original Facebook docs for more detail.
Live Checkbox Demo
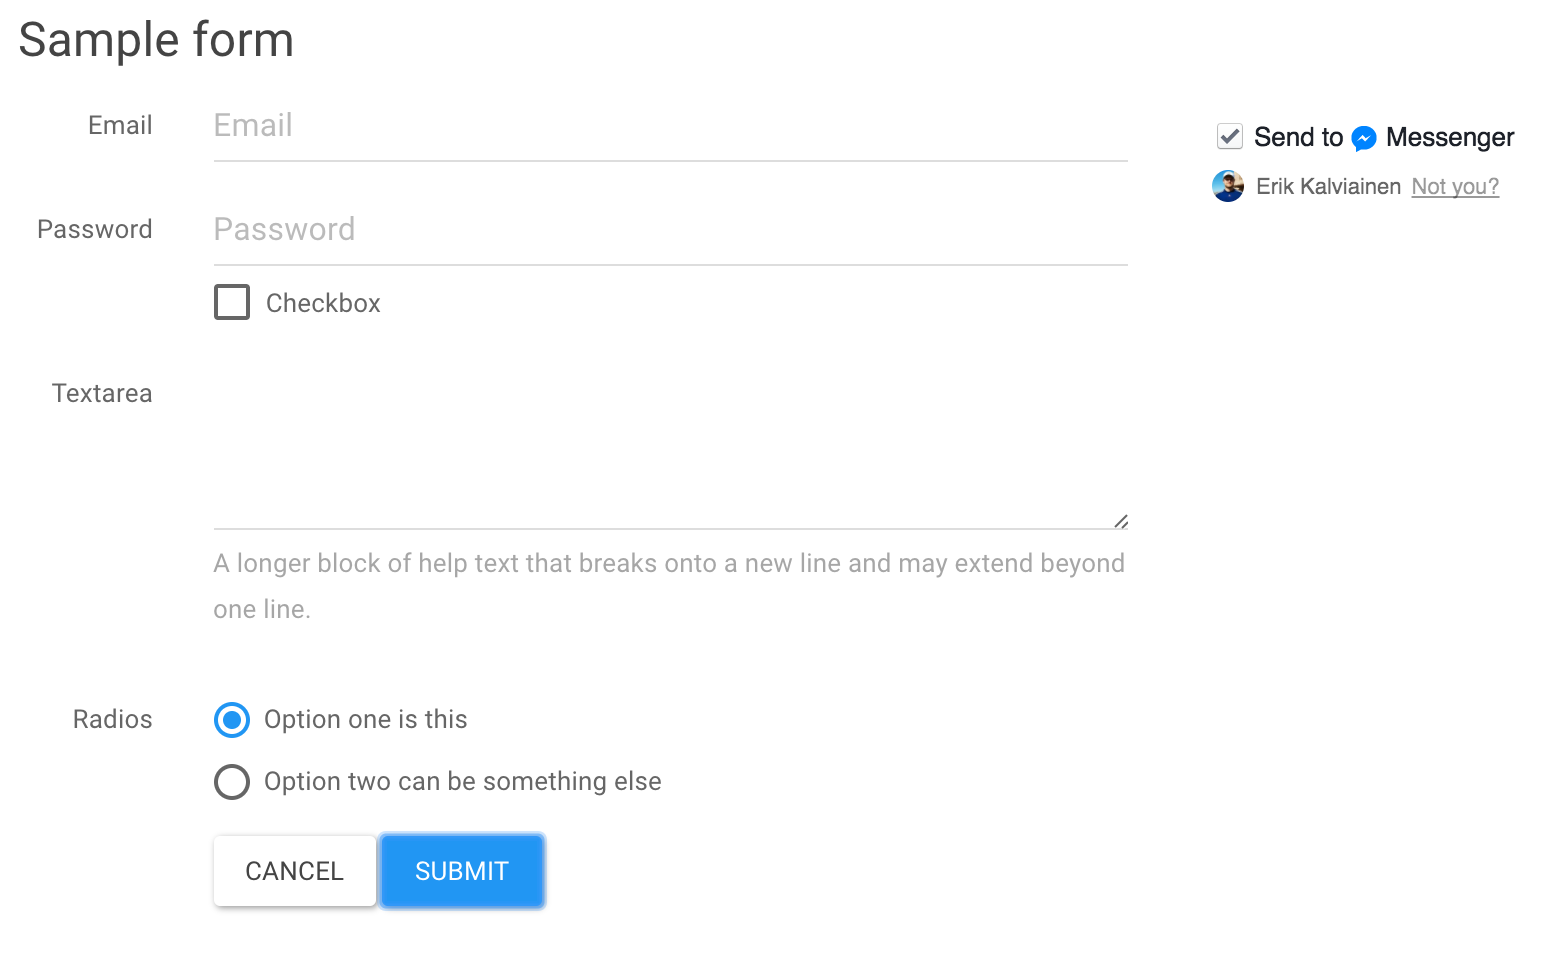
Notice the "Send to Messenger" checkbox in the top right
Try out the live demo here. Click Submit to get a message sent to your Messenger account.
<script>
  window.fbAsyncInit = function() {
    FB.init({
      appId      : '{{ app_id }}',
      xfbml      : true,
      version    : 'v2.6'
    });
  };
  (function(d, s, id){
    var js, fjs = d.getElementsByTagName(s)[0];
    if (d.getElementById(id)) {return;}
    js = d.createElement(s); js.id = id;
    js.src = "https://connect.facebook.net/en_US/sdk.js";
    fjs.parentNode.insertBefore(js, fjs);
  }(document, 'script', 'facebook-jssdk')
  );
</script>

....

<script>
  $("#target").submit(function(event) {
    FB.AppEvents.logEvent('MessengerCheckboxUserConfirmation', null, {
      'app_id': '{{ app_id }}',
      'page_id': '{{ page_id }}',
      'ref': '{{ ref }}',
      'user_ref': '{{ user_ref }}'
    });
  });
</script>

....

<div class="fb-messenger-checkbox"
 origin="{{ origin }}"
 page_id="{{ page_id }}"
 messenger_app_id="{{ app_id }}"
 user_ref="{{ user_ref }}"
 prechecked="true"
 allow_login="true"
 size="large"></div>
Field | Description | Example |
|---|---|---|
| the full URL of the page where the checkbox is rendered |
|
| the id of your Facebook page connected to the bot |
|
| The id of the Facebook app connected to your bot |
|
| A unique identifier referencing your user. This should behave like a nonce. If you reuse a
|
|
| Used to specify what Meya bot flow is invoked. See the full spec |
|
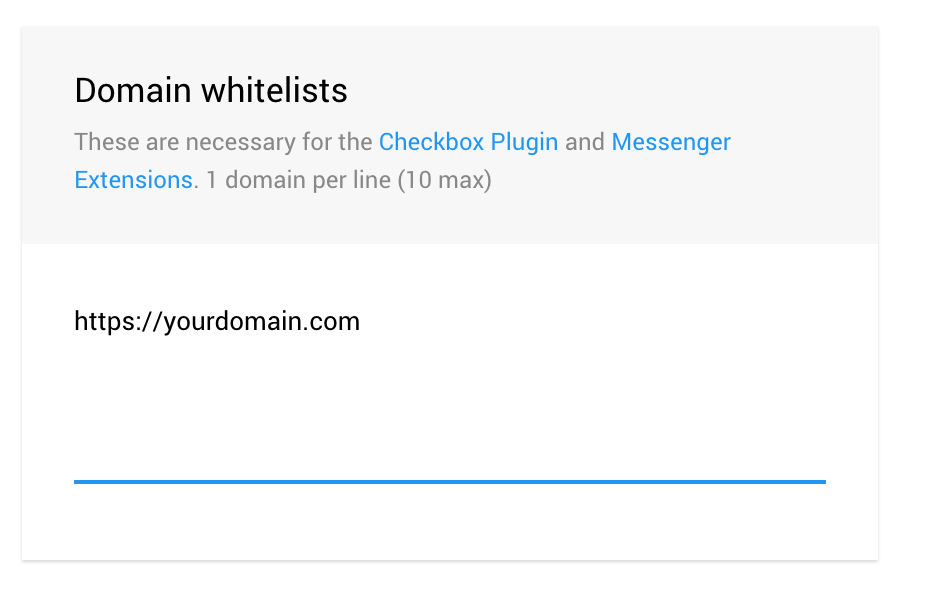
Whitelist your domain on the Messenger integration page on meya.ai
Troubleshooting checkbox rendering
- Did you specify the origin parameter?
- Did you whitelist your domain (https only)?
- Did you generate a new
user_reffor each page load?
Send to Messenger Plugin
Meya lets you trigger a flow from a "Send to Messenger" plugin.
- Connect your bot to Messenger
- Make sure you have 'messaging_optins' checked from your subscription fields
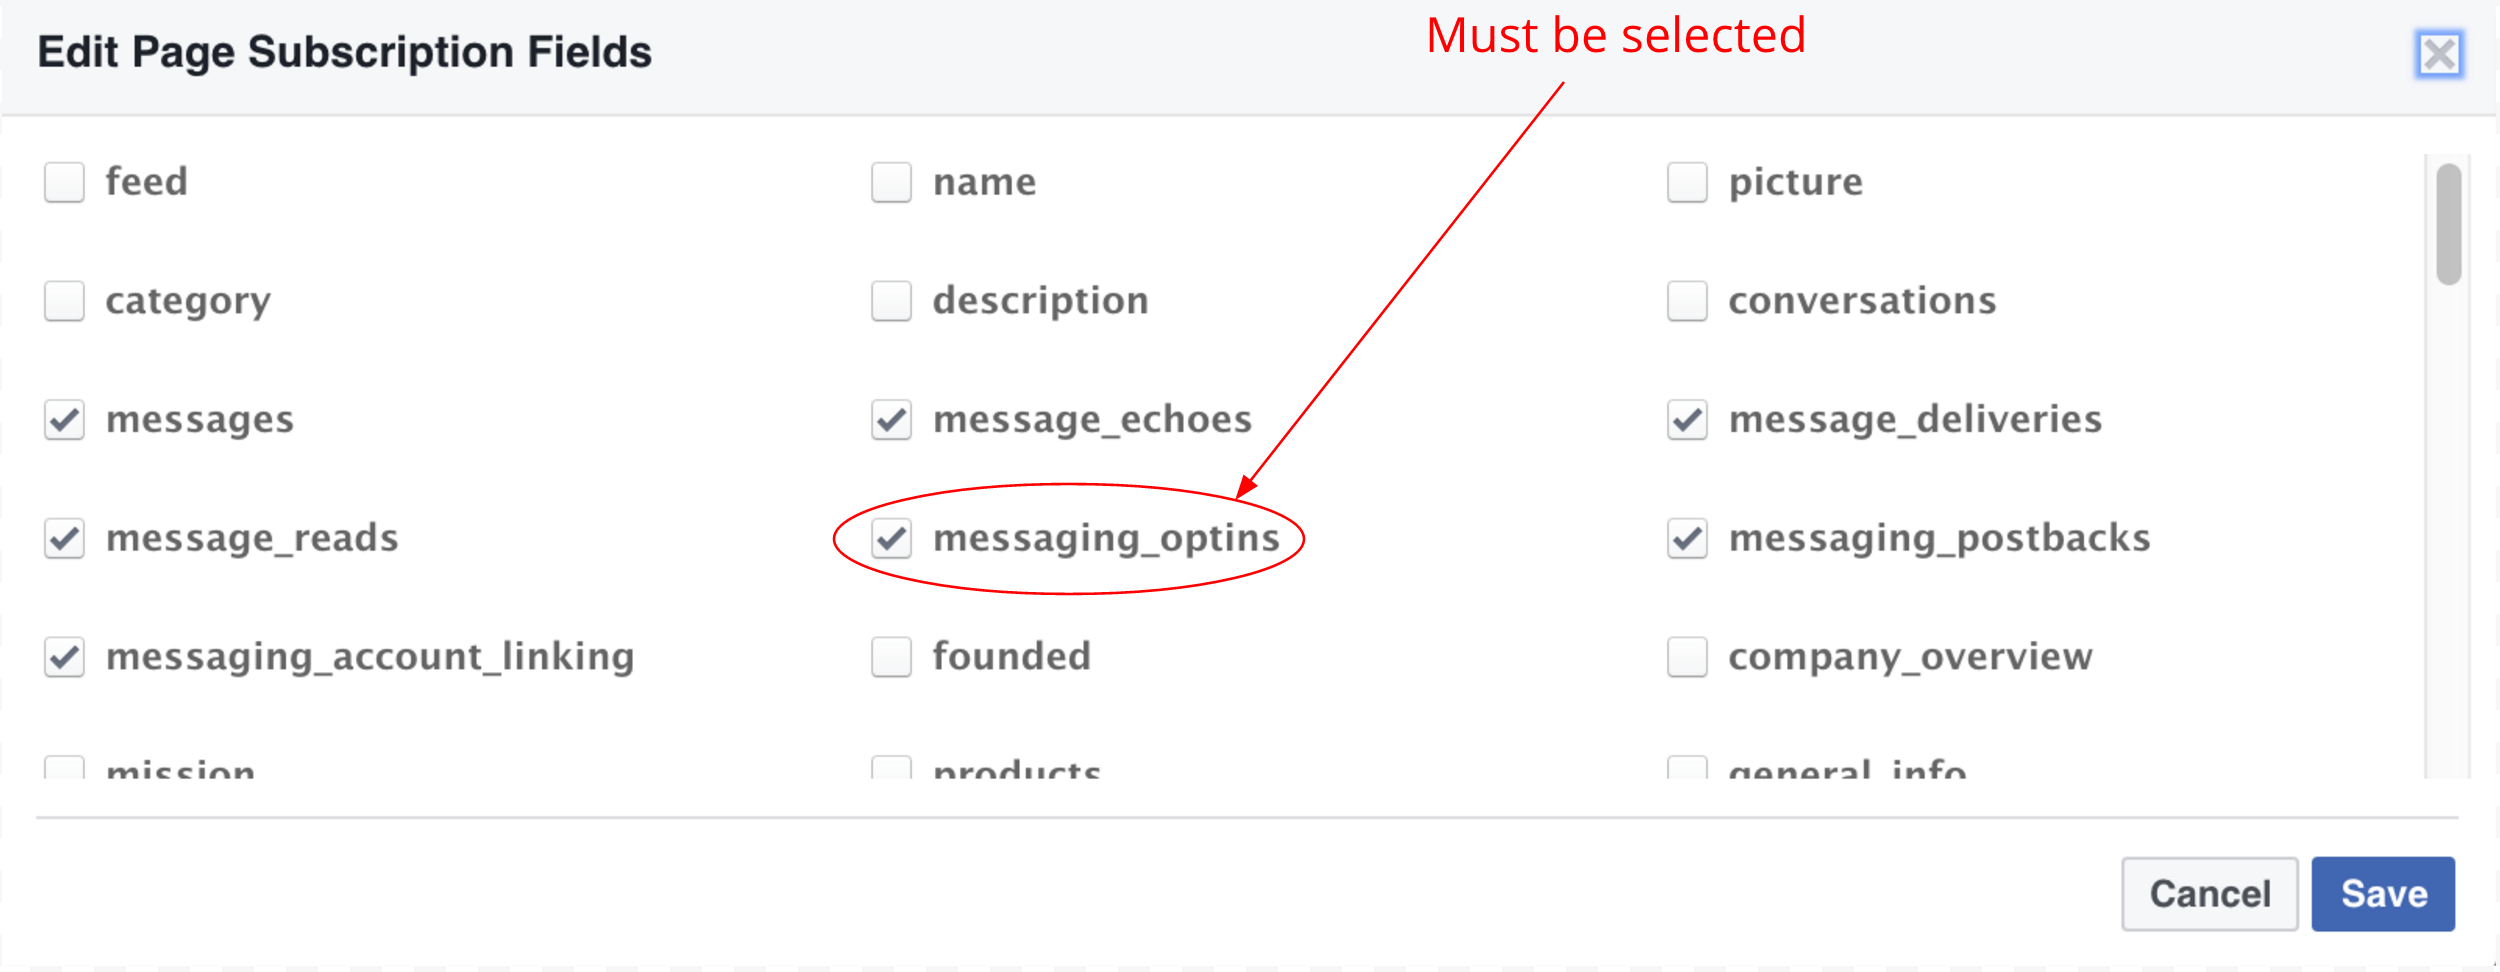
messaging_optins must be selected in order for this feature to work
- Copy/paste the button code to your webpage. Make sure you have the correct
APP_IDandPAGE_IDfor your bot. Specify a flow for thedata-ref. For more advanced use-cases, you can also include a start action and data (see table below for syntax).
<div class="fb-send-to-messenger"
  messenger_app_id="APP_ID"
  page_id="PAGE_ID"
  data-ref="YOUR_FLOW_PARAMETERS"
  color="blue"
  size="standard">
</div>
Ref format for Send to Messenger Plugins
data-ref | flow | action | data |
|---|---|---|---|
"hello_world" | hello_world | null | null |
"hello_world+foo=bar:x=1" | hello_world | null | |
"hello_world+action=skip:foo=bar:x=1" | hello_world | skip | |
A note about data-ref encodingFacebook only accepts a limited number of characters for data-ref, and Meya reserves the usage of "+", "=" and ":" characters to parse the flow parameters. To be safe, only include alphanumeric and underscore characters for flow, action and data.
Tip: Use data-ref to authenticate userIt's possible to pass authentication tokens in the data-ref and this could be useful to identify your signed in users with your Meya bot in one click. You could then store the auth token with the user datastore, and then use this to make authenticated requests to your API or backend.
- Make sure you have the Facebook script somewhere on your page. For full details see https://developers.facebook.com/docs/messenger-platform/plugin-reference/send-to-messenger
<body>
  <script>

    window.fbAsyncInit = function() {
      FB.init({
        appId: "APP_ID",
        xfbml: true,
        version: "v2.6"
      });

    };

    (function(d, s, id){
       var js, fjs = d.getElementsByTagName(s)[0];
       if (d.getElementById(id)) { return; }
       js = d.createElement(s); js.id = id;
       js.src = "//connect.facebook.net/en_US/sdk.js";
       fjs.parentNode.insertBefore(js, fjs);
    }(document, 'script', 'facebook-jssdk'));

  </script>

...
Note from FacebookWhen your app is in development mode, the plugin is only visible to admins, developers and testers of the app. In development mode, the plugin will not be visible if there isn't an active session.
Account linking and un-linking
Your bot can implement Facebook Messenger's account linking using the Messenger-specific account-linking button . Through account linking you can connect Messenger users with your users.
Once a user has logged in, the authorization_code which can be saved to your user, which you can use to connect your user with the Messenger user.
See Facebook details here: https://developers.facebook.com/docs/messenger-platform/account-linking
Auhorization code securityDo not display the authorization_code to the user, this is done purely for demo purposes.
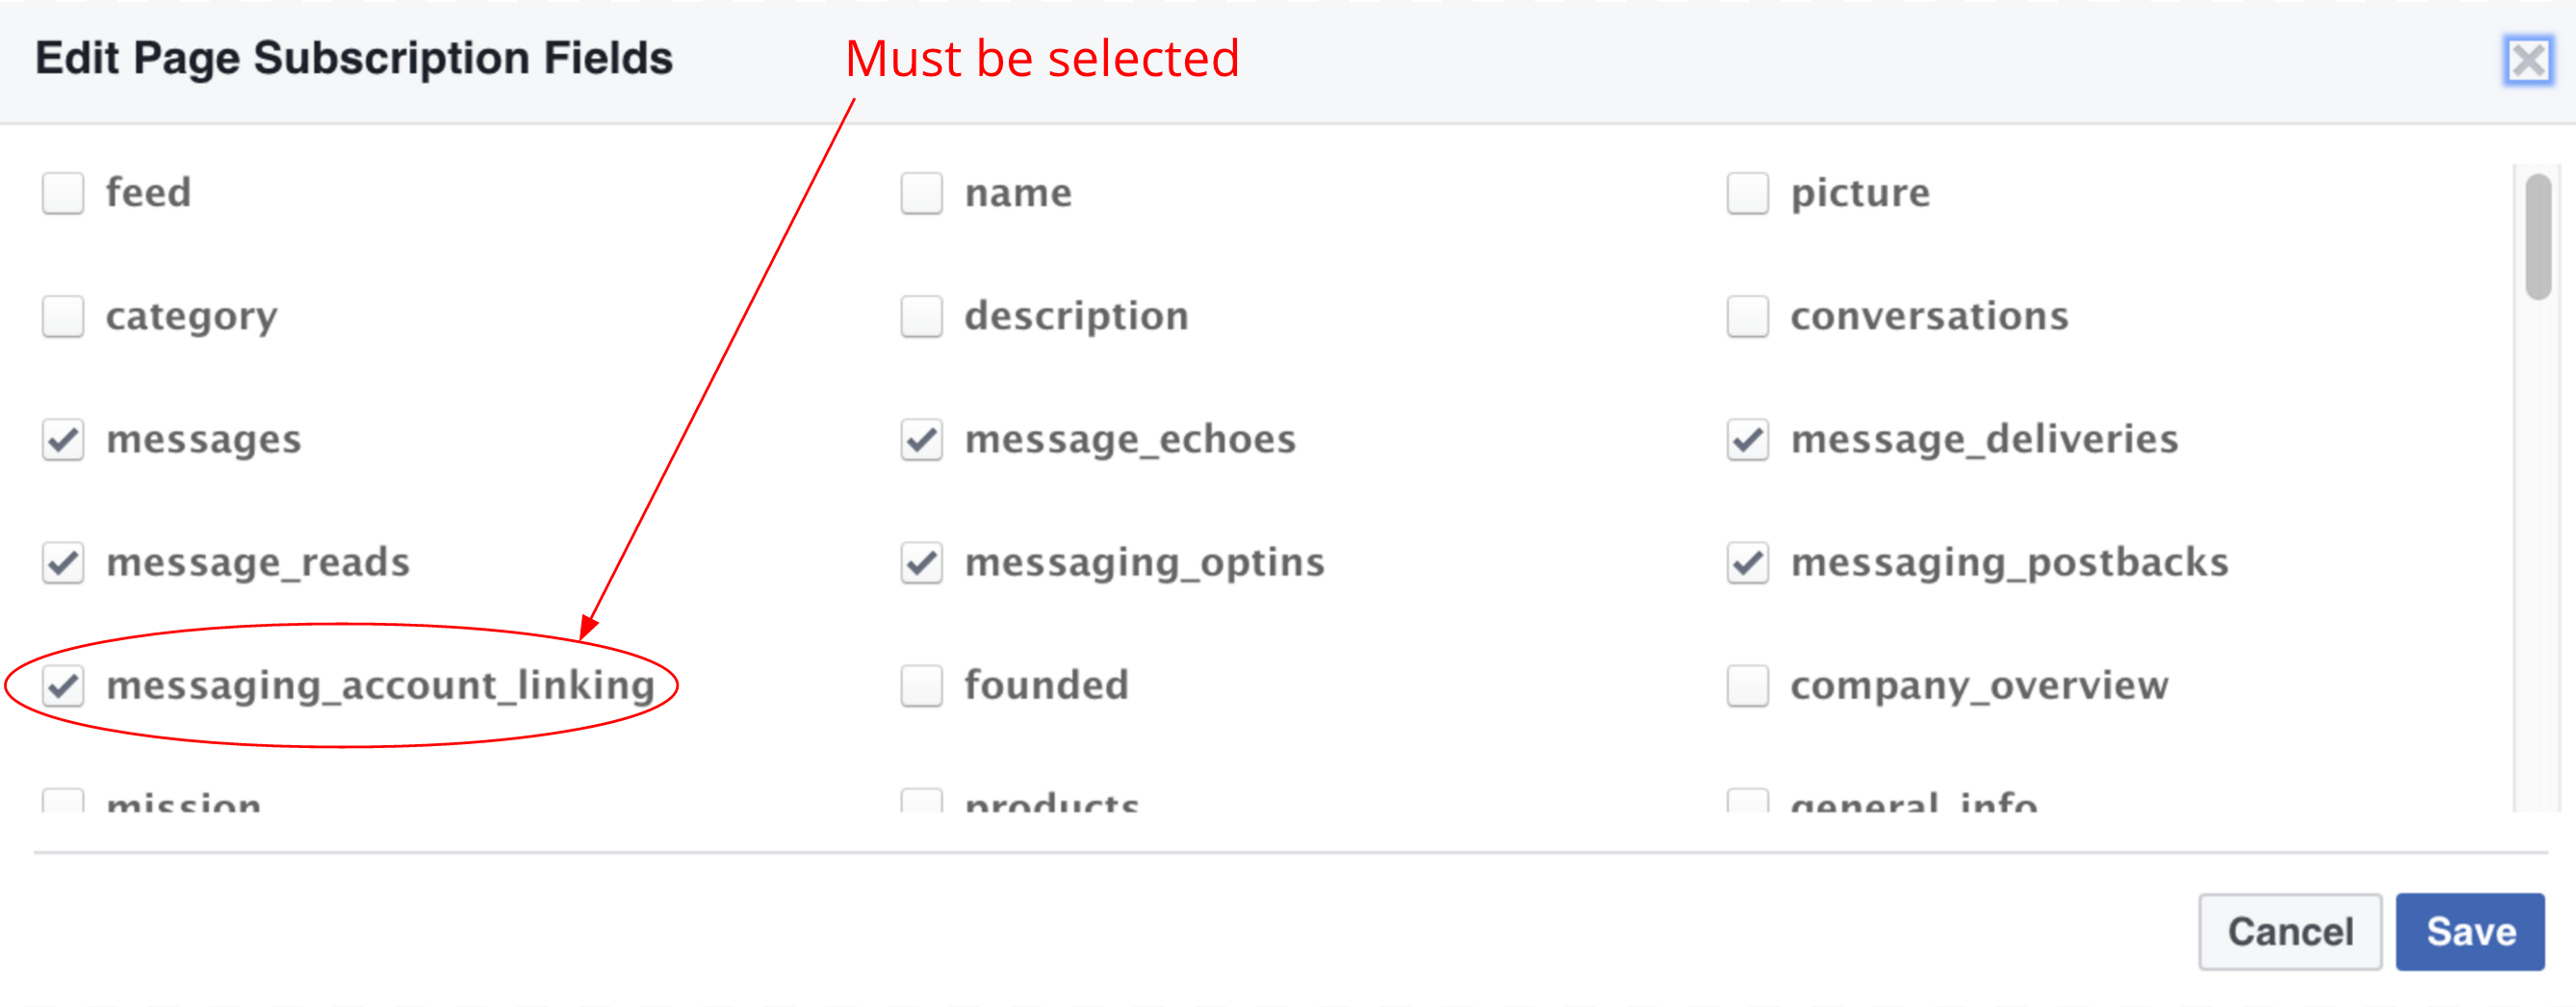
message_account_linking must be selected for this feature to work
states:
    text_buttons_state:
        component: meya.text_buttons
        properties:
            text: Login to continue
            scope: user
            buttons:
            -   action: login
                type: account_link
                url: "https://www.example.com/oauth/authorize"
            -   text: Cancel
                action: cancel
        transitions:
            login: login
            cancel: cancel
    login:
        component: meya.text
        properties:
            text: "Hi {{ user.first_name }}! This is your auth code: {{ user.authorization_code }}"
        return: true
    cancel:
        component: meya.text
        properties:
            text: "No problem, you can login later :)"
Test authorization URLIn testing, you can use https://meya.ai/c/messenger/test_account_link/ as the authentication url, which simulates a login and returns
authorization_code=1234567890
Account un-linking
Account unlinking disconnects the Messenger user and your user. You must use the account unlink to implement this feature.
states:
    text_buttons_state:
        component: meya.text_buttons
        properties:
            text: Welcome to MeStore
            buttons:
            -   action: logout
                type: account_unlink
            -   text: Cancel
                action: cancel
        transitions:
            logout: logout
            cancel: cancel
    logout:
        component: meya.text
        properties:
            text: "You've logged out, see you next time!"
        return: true
    cancel:
        component: meya.text
        properties:
            text: "No problem, you can logout later :)"
        return: true
Updated 8 months ago
