Using Dialogflow v2 with Bot CMS
Make sure Dialogflow supports the language you are trying to connect in Bot CMS. See a full list of languages supported by Dialogflow here
1. Add multi-lingual input content to Bot CMS
If haven't added multi-lingual content to Bot CMS yet, do that now. Make sure you select the correct language code from the Language drop-down menu.

French content added to Bot CMS.
2. Make the Dialogflow agent multilingual
Now that you’ve added a second language to Bot CMS, you’ll need to go back to Dialogflow and add the new language to your agent.
-
In your Dialogflow console, click the gear icon next to your agent's name.
-
Click the Languages tab and select the appropriate language from the Select Additional Language drop-down.
-
Click Save.
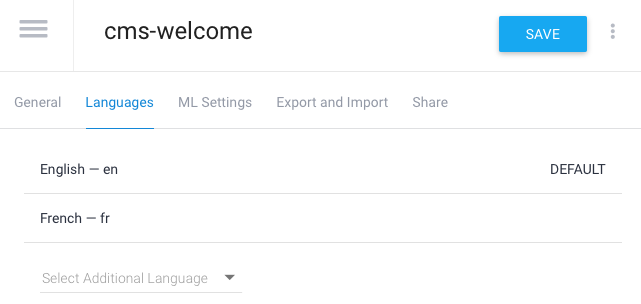
Add an additional language to the list of languages your agent should understand.
3. Add the Dialogflow integration
-
From your bot's dashboard, click the Integrations tab.
-
Scroll to the bottom and click Dialogflow from the NLU Integrations section.
-
Click the Connect Dialogflow button and follow the prompts.
4. Connect the NLU agent to your Bot CMS content
-
Return to your bot’s dashboard and click the Bot CMS tab near the top of the screen.
-
Click the space you want to connect to Dialogflow.
-
Under the Natural Language Understanding section, click the Connect Provider button.
-
Click Yes. From the drop-down menu, choose Dialogflow.
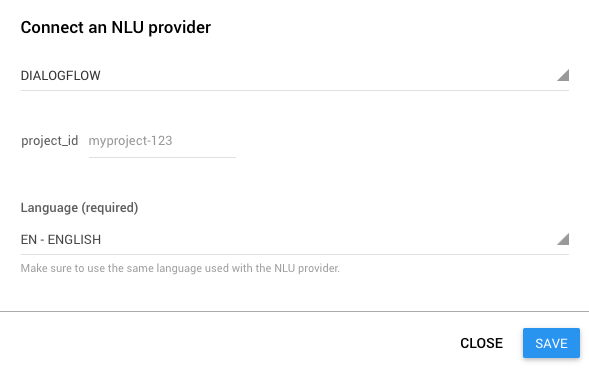
- Enter your agent's Google Project ID, which can be found on your agent's General settings tab.
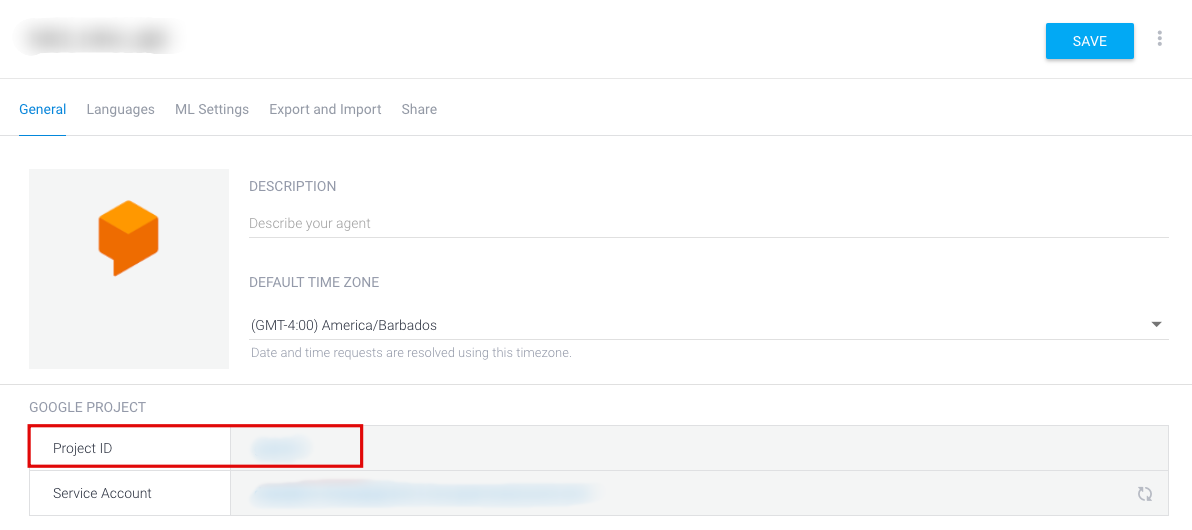
The agent's Google Project ID.
You will now be able to use the cms_nlu trigger and the meya.cms_text component to detect the user's language and respond in that language (assuming you've added content in that language to Bot CMS, of course).
One CMS space per agentEach agent can only have a single CMS space connected to it. Connecting mulitple spaces to the same bot will result in the agent being trained without the most recently updated space.
The solution is to create multiple Dialogflow agents, one per space. Continue to the next section for instructions on how to set this up.
Connecting multiple spaces to Dialogflow
Each CMS space must be connected to its own agent. Since you can only upload one Dialogflow service account credential file in the Dialogflow integration settings page, the setup process for these additional agents is slightly different. Basically, you will add the "master" service account (whose credentials you uploaded to Meya) as a user in each additional agent's Google Project.
First, you'll need one agent that will be your "master" agent. This would be the agent you set up using the instructions here.
- Go to the agent's settings page and click the service account link to go to the associated Google Project's Service Accounts page on Google Cloud Platform.
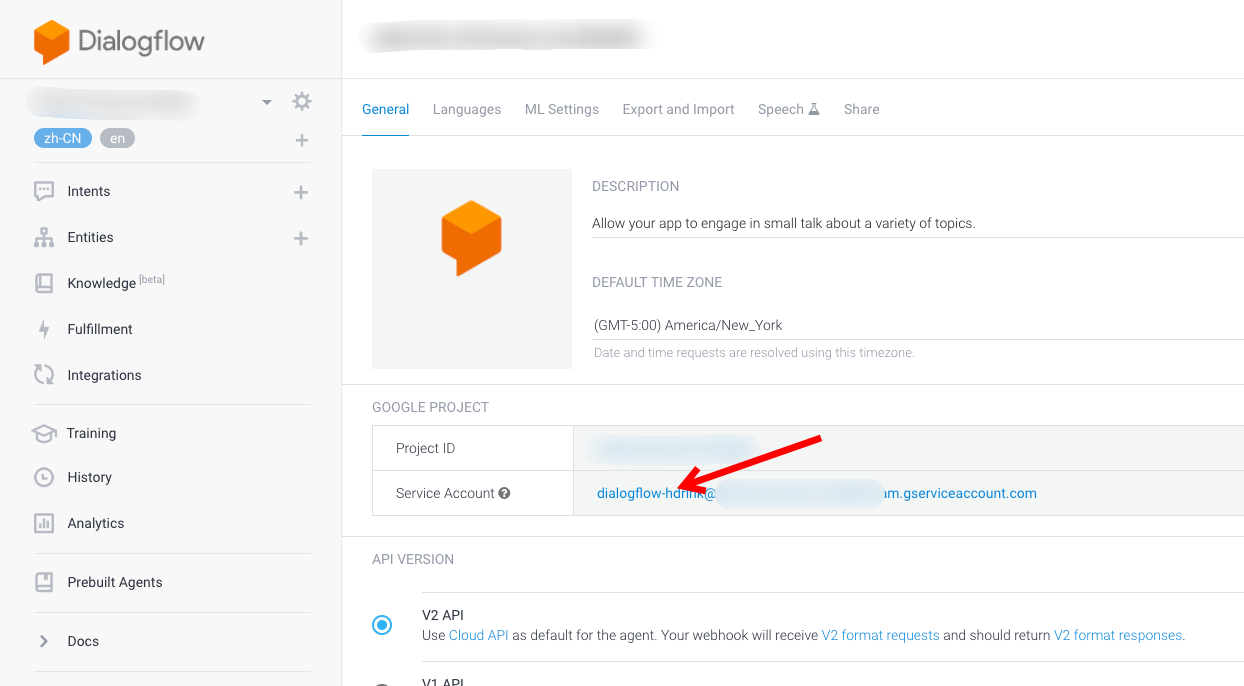
Go to the main agent's service account page.
- When setting up the Dialogflow integration you would have created a service account with the Dialogflow API Admin role. It should appear in the list of service accounts on this page. Copy the service account's email address. You will need this when setting up other agents.
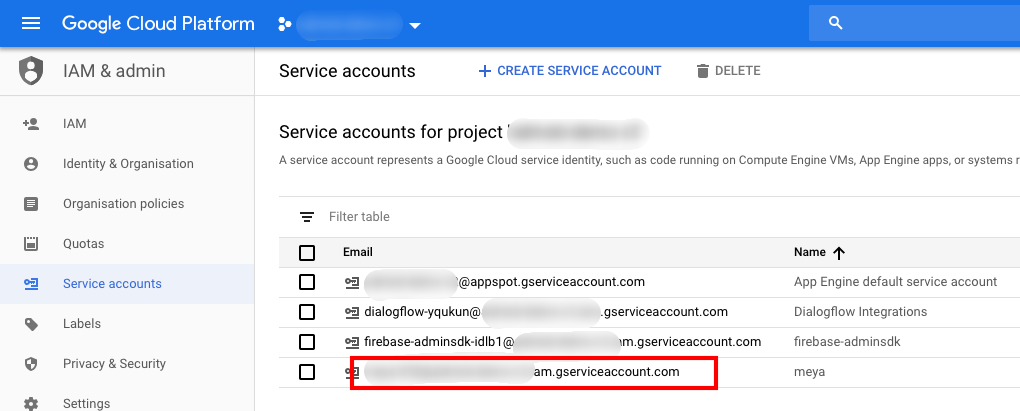
Copy the service account's email address.
Now, for each additional agent, do the following:
3. In Dialogflow, create a new agent.
4. Go to the agent's settings page and click the Project ID to go to the Google Cloud Platform dashboard for the new project.
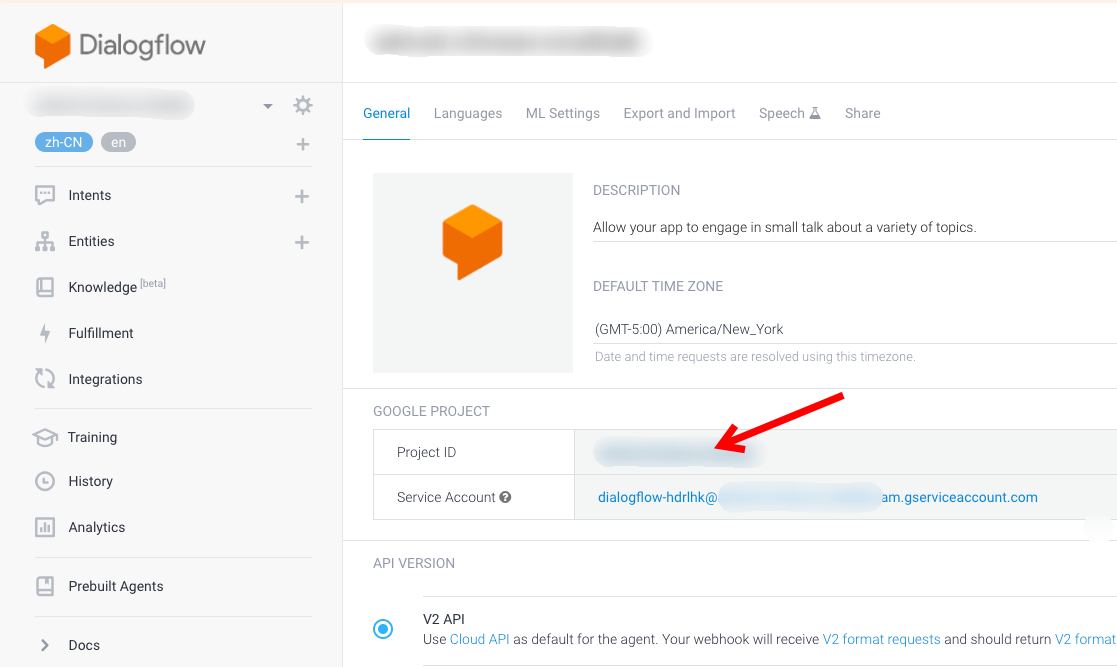
Go to the agent's project page on Google Cloud Platform.
- Navigate to the project's IAM page. From the left-hand menu, choose IAM & admin, then IAM.
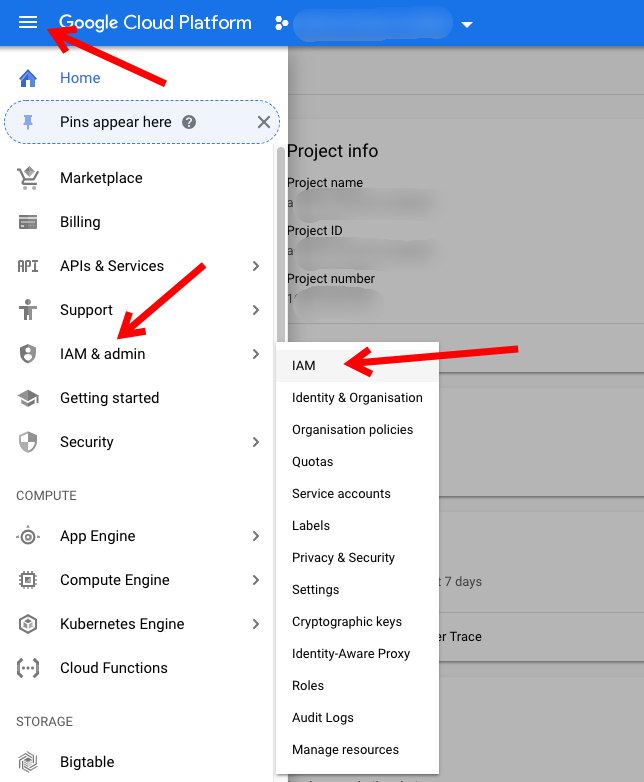
Go to the project's IAM page.
- Click Add at the top of the page to add a new user.
- In the New Members field, enter the email address associated with your main Dialogflow agent that you copied in step 2.
- Select the Dialogflow API Admin role. Click Save.
Repeat steps 3-8 for each additional agent you need.
- On the Meya platform, use each agent's project ID where appropriate. In other words, although each agent's service account is connect to a single master Google Project, you will still refer to each agent's project ID in your bot's trigger settings and/or Bot CMS NLU provider settings.
Updated 8 months ago
